5. Connect your computer and all attached devices to electrical outlets, and turn them on.
Removing the Hard-Drive Fan Assembly
1. Follow the instructions in Before You Begin.
2. Remove the left side-panel (see Removing the Left Side-Panel).
3. Open the PCI shroud (see Opening the PCI Shroud).
4. Remove the drive-bay shroud (see Removing the Drive-Bay Shroud).
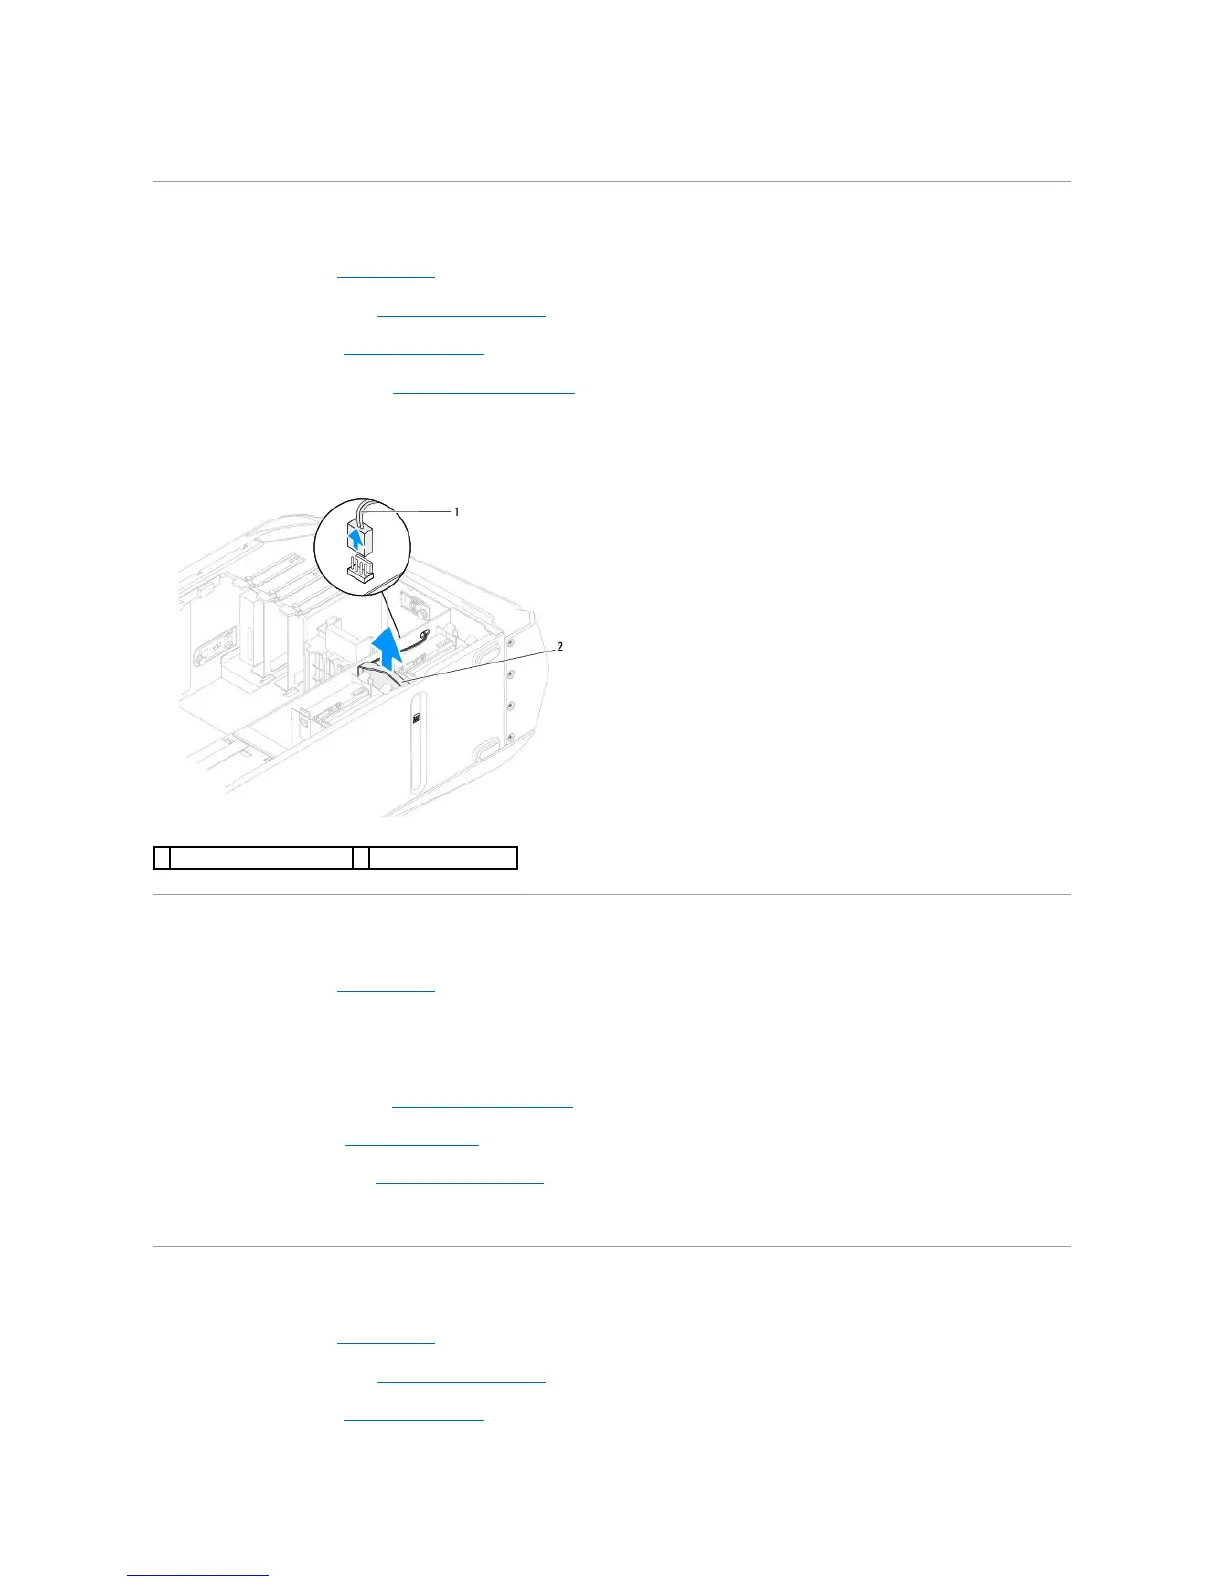
5. Make note of the hard-drive fan cable routing and then disconnect the hard-drive fan assembly cable from the connector on the master I/O board.
6. Lift the hard-drive fan assembly out of the chassis.
Replacing the Hard-Drive Fan Assembly
1. Follow the instructions in Before You Begin.
2. Push the hard-drive fan assembly into the hard-drive fan assembly bay.
3. Route the cable through the slot in the hard-drive bay and then connect the hard-drive fan assembly cable to the connector on the master I/O board.
4. Replace the drive-bay shroud (see Replacing the Drive-Bay Shroud).
5. Close the PCI shroud (see Closing the PCI Shroud).
6. Replace the left side-panel (see Replacing the Left Side-Panel).
7. Connect your computer and all attached devices to electrical outlets, and turn them on.
Removing the PCI-Fan Assembly
1. Follow the instructions in Before You Begin.
2. Remove the left side-panel (see Removing the Left Side-Panel).
3. Open the PCI shroud (see Opening the PCI Shroud).
 Loading...