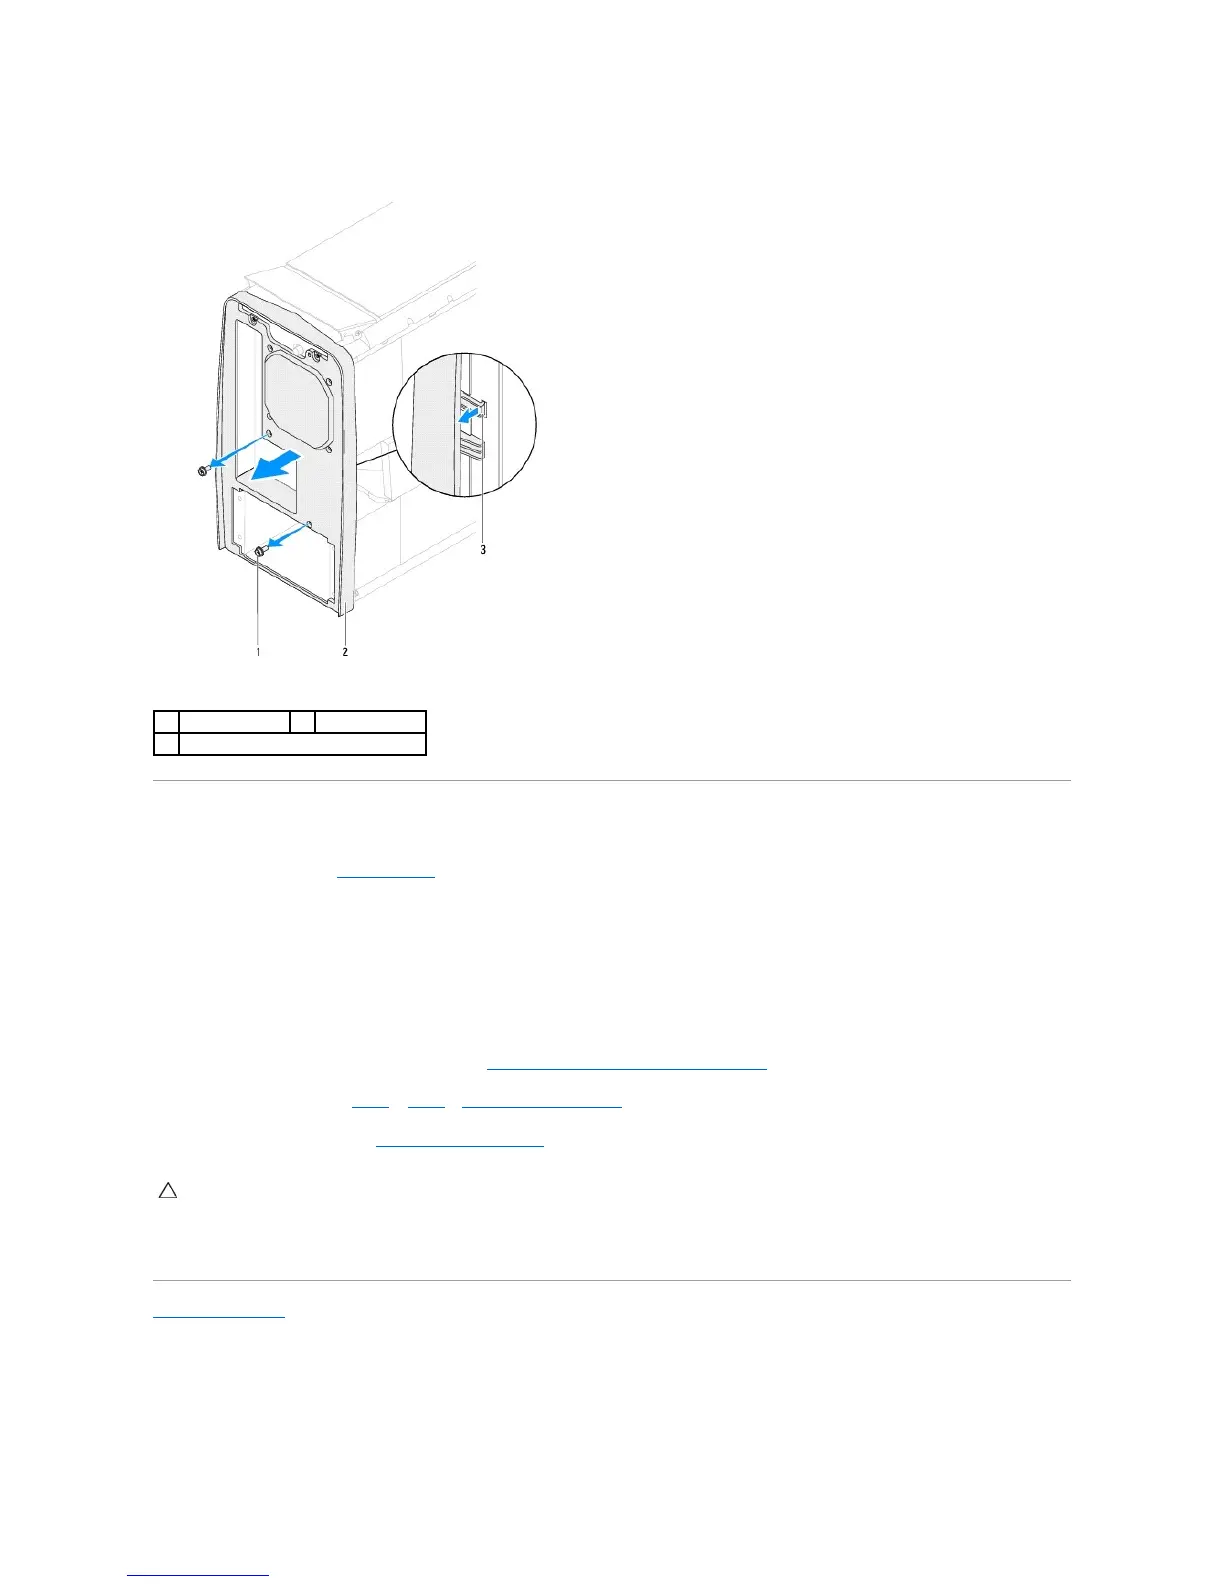
Replacing the Back Bezel
1. Follow the instructions in Before You Begin.
2. Align the tabs on the back bezel with the slots on the chassis.
3. Push the back bezel into place.
4. Replace the two screws that secure the back bezel to the chassis.
5. Replace the two screws that secure the security lock panel to the chassis.
6. Replace the processor liquid-cooling assembly (see Replacing the Processor Liquid-Cooling Assembly).
7. Follow the instructions from step 4 to step 8 in Replacing the Power Supply.
8. Replace the left side-panel (see Replacing the Left Side-Panel).
9. Connect your computer and all attached devices to electrical outlets, and turn them on.
Back to Contents Page
CAUTION: Before turning on the computer, replace all screws and ensure that no stray screws remain inside the computer. Failure to do so may
result in damage to the computer.
 Loading...