EasyManuals Logo

Dell Alienware Aurora R3 Service Manual

Dell Alienware Aurora R3
64 pages
To Next Page IconTo Next Page
To Previous Page IconTo Previous Page
Page #17 background imageLoading...
Page #17 background image
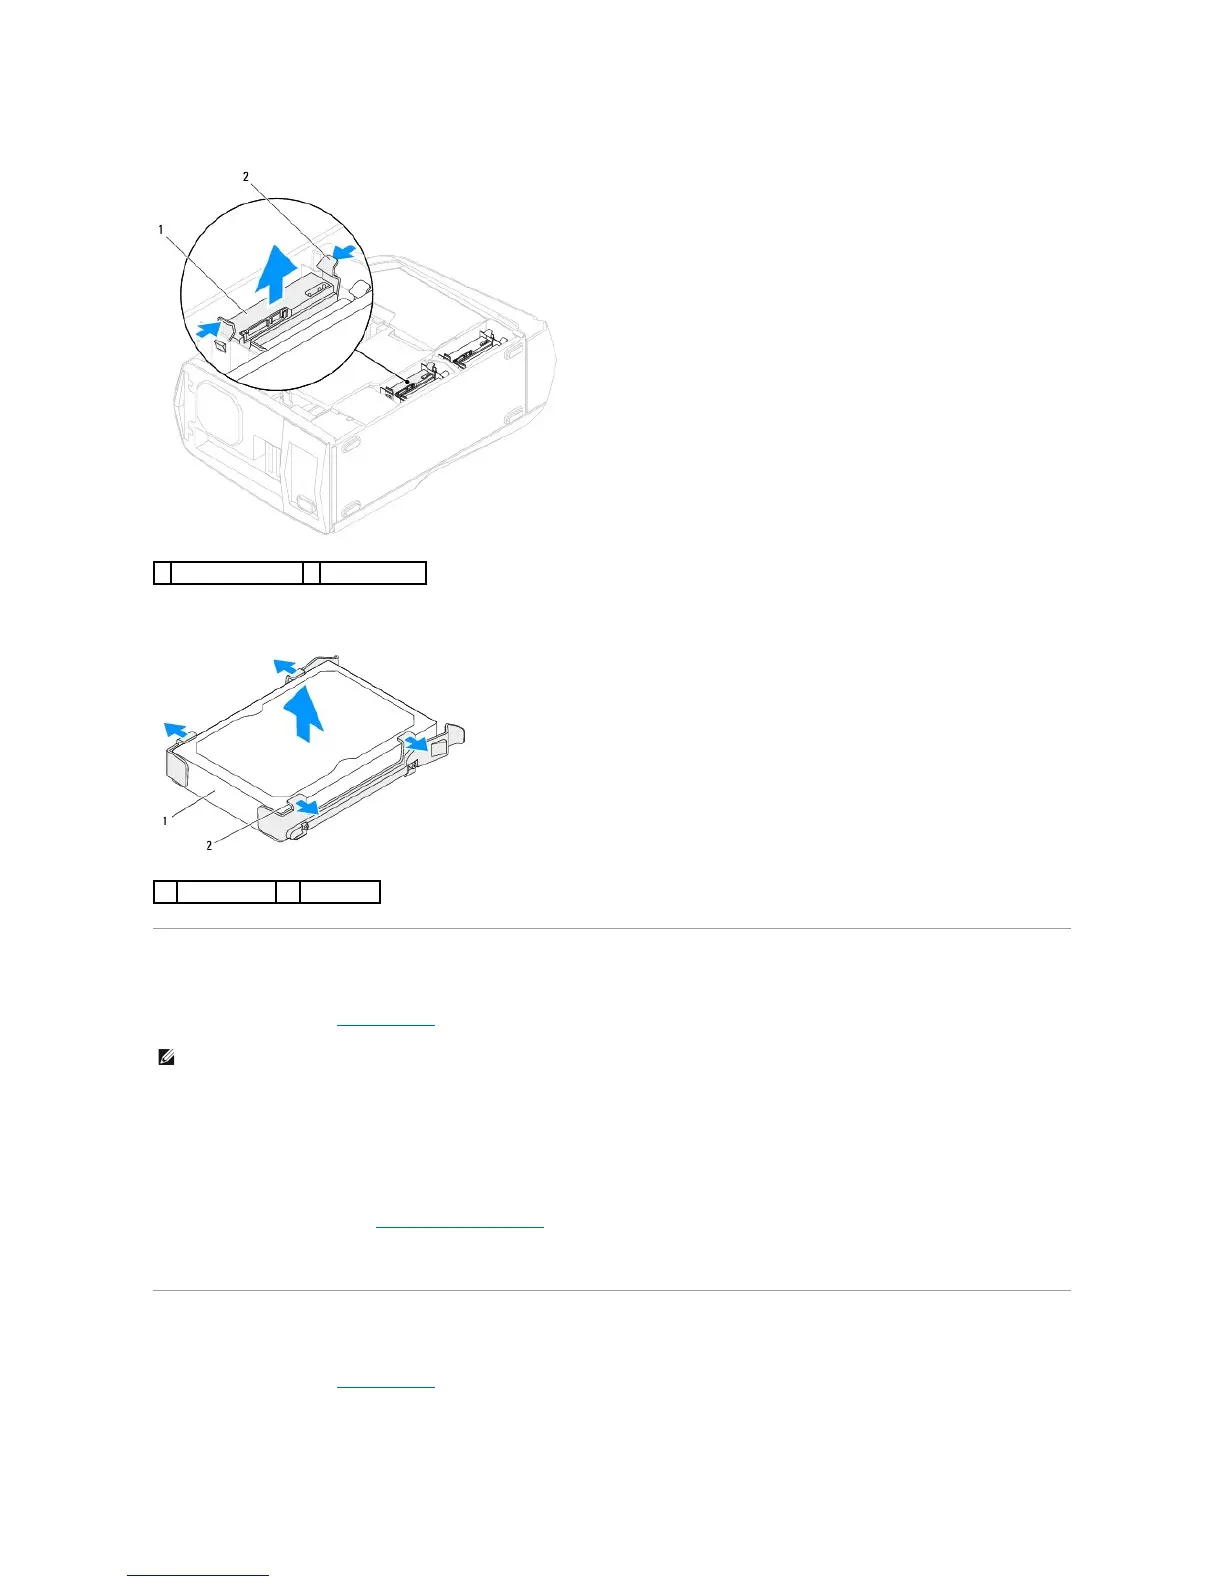
5. Release the tabs on the hard-drive bracket and lift the hard drive out of the bracket (if applicable).
Replacing the Hard Drive(s)
1. Follow the instructions in Before You Begin.
2. Snap the hard-drive bracket on to the new hard drive (if applicable).
3. Slide the hard-drive assembly into the hard-drive cage until the release tabs snap into place.
4. Connect the power and data cables to the hard-drive assembly (if applicable).
5. Replace the left side-panel (see Replacing the Left Side-Panel).
6. Connect your computer and all attached devices to electrical outlets, and turn them on.
Removing the Optical Drive(s)
1. Follow the instructions in Before You Begin.
2. Press the AlienHead on the front of your computer to lower the drive panel.
1
hard-drive assembly
2
release tabs (2)
1
hard drive
2
tabs (4)
NOTE: See the documentation that shipped with your new hard drive and ensure that the jumper positioning is correct.

Table of Contents

Other manuals for Dell Alienware Aurora R3

Questions and Answers:

Question and Answer IconNeed help?

Do you have a question about the Dell Alienware Aurora R3 and is the answer not in the manual?

Dell Alienware Aurora R3 Specifications

General IconGeneral
BrandDell
ModelAlienware Aurora R3
CategoryDesktop
LanguageEnglish

Related product manuals