Steps
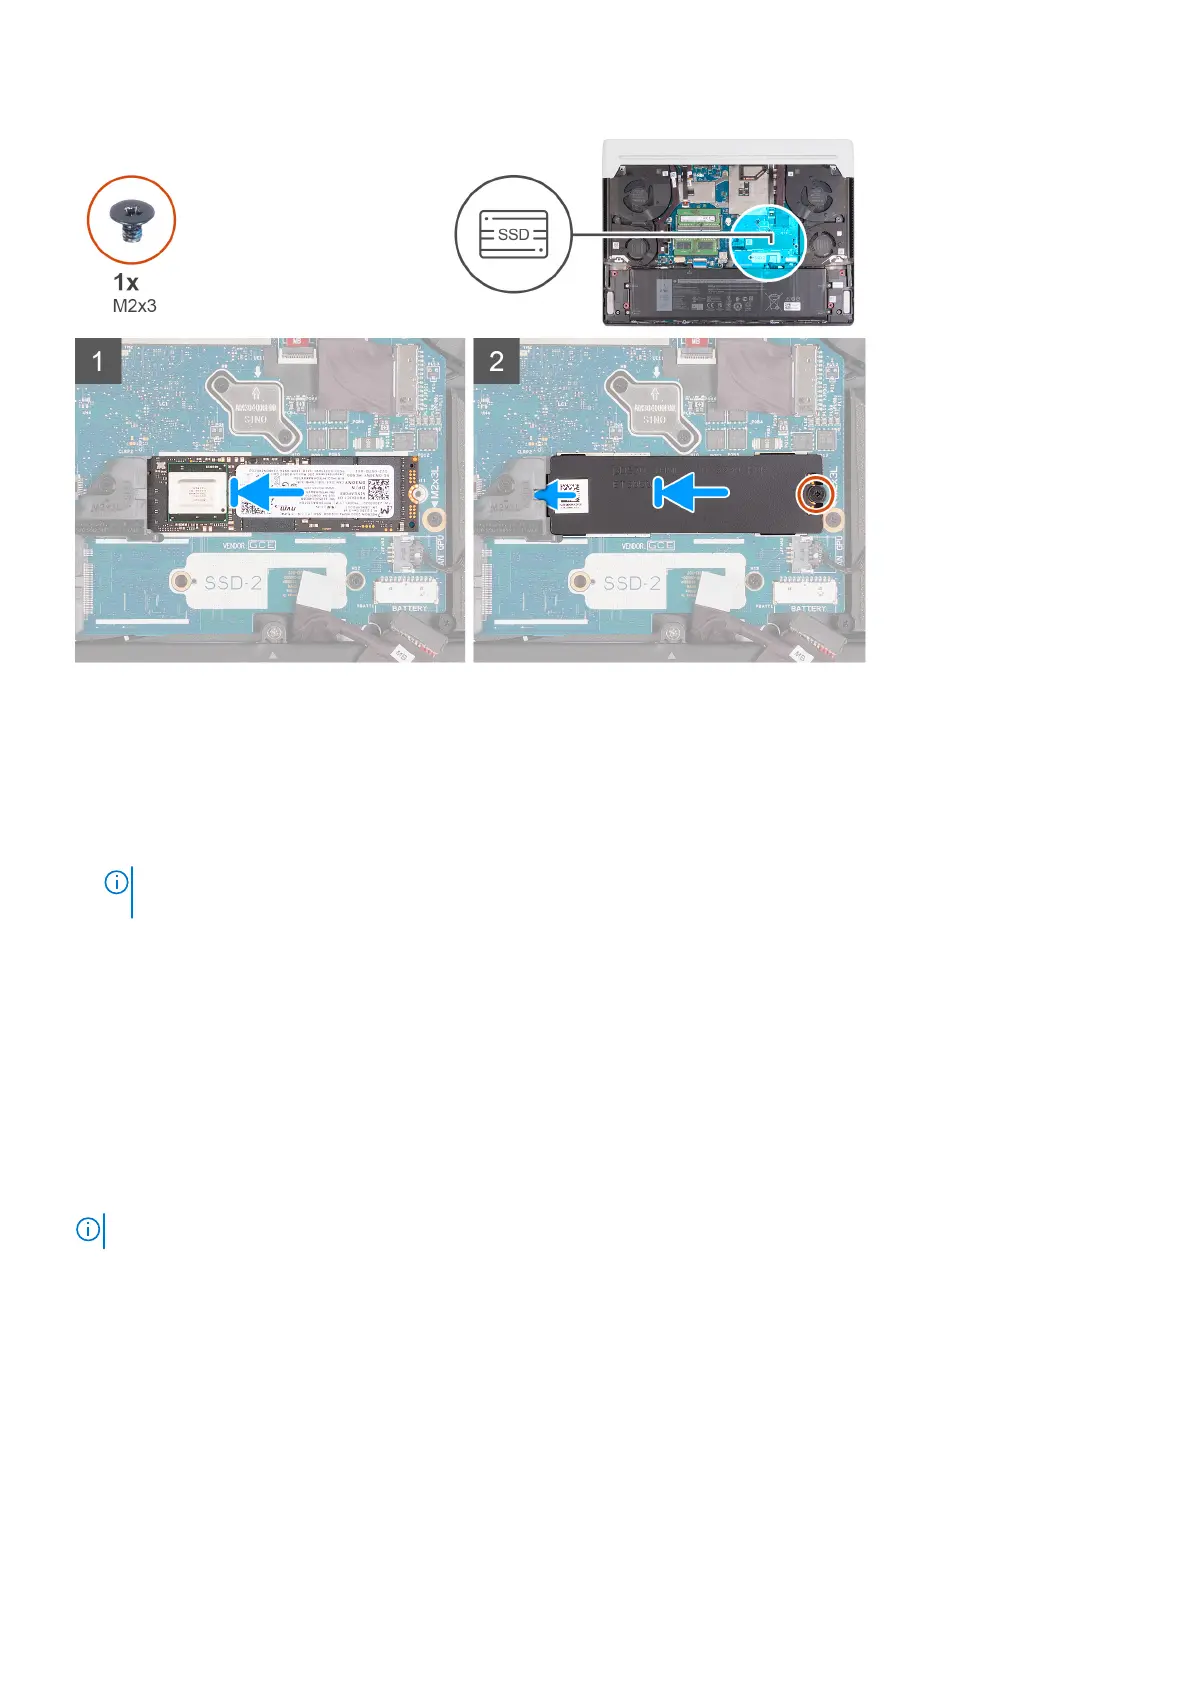
1. Align the notch on the M.2 2280 solid-state drive with the tab on the M.2 card slot on the system board.
2. Slide the M.2 2280 solid-state drive into the M.2 card slot on the system board.
3. Slide the tab on the M.2 thermal shield into the M.2 card slot and align the screw hole on the thermal shield to the screw
hole on the system board.
4. Replace the screw (M2x3) that secures the M.2 2280 solid-state drive to the system board.
NOTE:
Your computer can have up to two M.2 2280 solid-state drives installed. Repeat steps 1 to 4 to install the
second M.2 2280 solid-state drive.
Next steps
1. Install the base cover.
2. Follow the procedure in After working inside your computer.
Removing and installing the M.2 2230 solid-state drive mounting bracket
About this task
The following image provides a visual representation of the procedure to remove and install the M.2 2230 solid-state drive
mounting bracket.
NOTE: This procedure is applicable for both M.2 slot one (SSD-1) and M.2 slot two (SSD-2).
Removing and installing components 23
 Loading...