14 Installing the Hardware
NOTE: Please take precautions against over-tightening the screws or nuts on this
device.
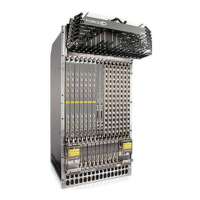
Installing a DC PEM
Step Task
1 Turn the remote power source (the circuit breaker panel) to the OFF
position.
2 Turn the over current protector (located on the PEM front panel) to the
OFF position.
3 Loosen the PEM safety cover retaining screw and remove the cover.
4 Slide the PEM into power slot 0 or 1.
CAUTION: Fill all power supply slots with power supplies or
filler blanks before tightening the power supply screws. Doing
this ensures that each power supply is aligned correctly.
Attempting to tighten screws without all power supply slots
filled will cause misalignment with screw holes, which might
damage the chassis permanently. If you are only installing one
PEM, replace the empty slot with two blank panels. (CC-
E300-BLNK-PWR.)
5 Tighten the two locking screws on each module with a #2 Phillips
screwdriver to secure the PEM in place. As a best practise, insert all
screws before tightening each one.
6 Remove the outer nut and washer from each of the remaining studs.
7 Connect the -48 VDC and Return cables from each PEM to the remote
power sources.
a
Verify that the remote power source is in the OFF position.
b
Locate the appropriate studs on the PEM front panel. The two top
studs are the return (+) connection. The cable attached to these studs
is typically red. The two bottom studs on the PEM are the -48 VDC (-
) connection. The cable attached to these studs is typically black.
Power cables must be terminated only with a UL-listed 2-hole lug to
accommodate 1/4-inch studs with 3/4-inch spacing.
c
Apply a coat of anti-oxidant paste to the connector studs.
d
Replace the washers and nuts on the studs.
e
Route the terminated cables out toward the rack rail.
f
Secure the nuts with a nut driver or torque wrench (not to exceed 4
ft/lbs).