Palm-rest and keyboard assembly
Removing the palm-rest and keyboard assembly
CAUTION: The information in this section is intended for authorized service technicians only.
Prerequisites
1. Follow the procedure in Before working inside your computer.
NOTE: Ensure that your computer is in Service Mode. For more information, see step 6 in Before working inside your
computer.
2. Remove the base cover.
3. Remove the battery.
4. Remove the M.2 2230 solid-state drive or the M.2 2280 solid-state drive, whichever is applicable.
5. Remove the display assembly.
6. Remove the fan.
7. Remove the wireless card.
8. Remove the speaker and antenna assembly.
9. Remove the power-adapter port.
10. Remove the system board.
NOTE: The system board can be removed with the heat sink attached.
11. Remove the I/O board.
12. Remove the USB board.
13. Remove the I/O-board and USB-board cable.
14. Remove the power button.
15. Remove the touchpad.
About this task
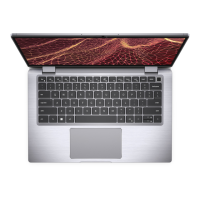
The following image(s) indicate the location of the palm-rest and keyboard assembly and provides a visual representation of the
removal procedure.
Removing and installing Field Replaceable Units (FRUs)
85
 Loading...