Management ports
Besides the 10 GbE and 40 GbE switch ports, the S4048–ON system provides several ports for management and storage.
Topics:
• RS-232 console port access
• Micro USB-B console port access
• Before you install an OS
RS-232 console port access
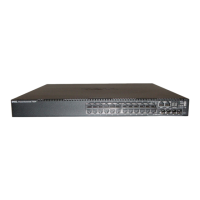
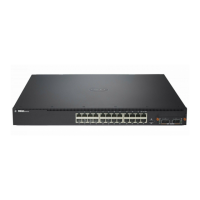
The RS-232 console port is on the PSU-side of the S4048-ON chassis, as shown.
Figure 21. S4048–ON RS–232 console ports
1 Ethernet management port
2 RS-232 console port
NOTE
: Before starting this procedure, be sure that your PC has a 9-pin serial port and that you have a terminal emulation
program already installed and running on the PC.
NOTE: If your PC’s serial port cannot accept a female DB-9 connector, acquire a DB-9 male-to-male adaptor.
1 Install the provided RJ-45 connector side of the provided cable into the S4048-ON console port.
2 Install the DB-9 female side of the provided copper cable into your PC’s serial port or into other data terminal equipment (DTE) server
hardware that you intend to use.
3 Keep the default terminal settings on the console as follows:
• 115200 baud rate—set the MicroUSB console port to 9600 baud rate
• No parity
• 8 data bits
• 1 stop bit
• No ow control
Micro USB-B console port access
The MicroUSB-B console port is on the I/O side of the S4048-ON.
The terminal settings are the same for the MicroUSB-B console port and the RS-232/RJ-45 console port:
8
Management ports 33