About this task
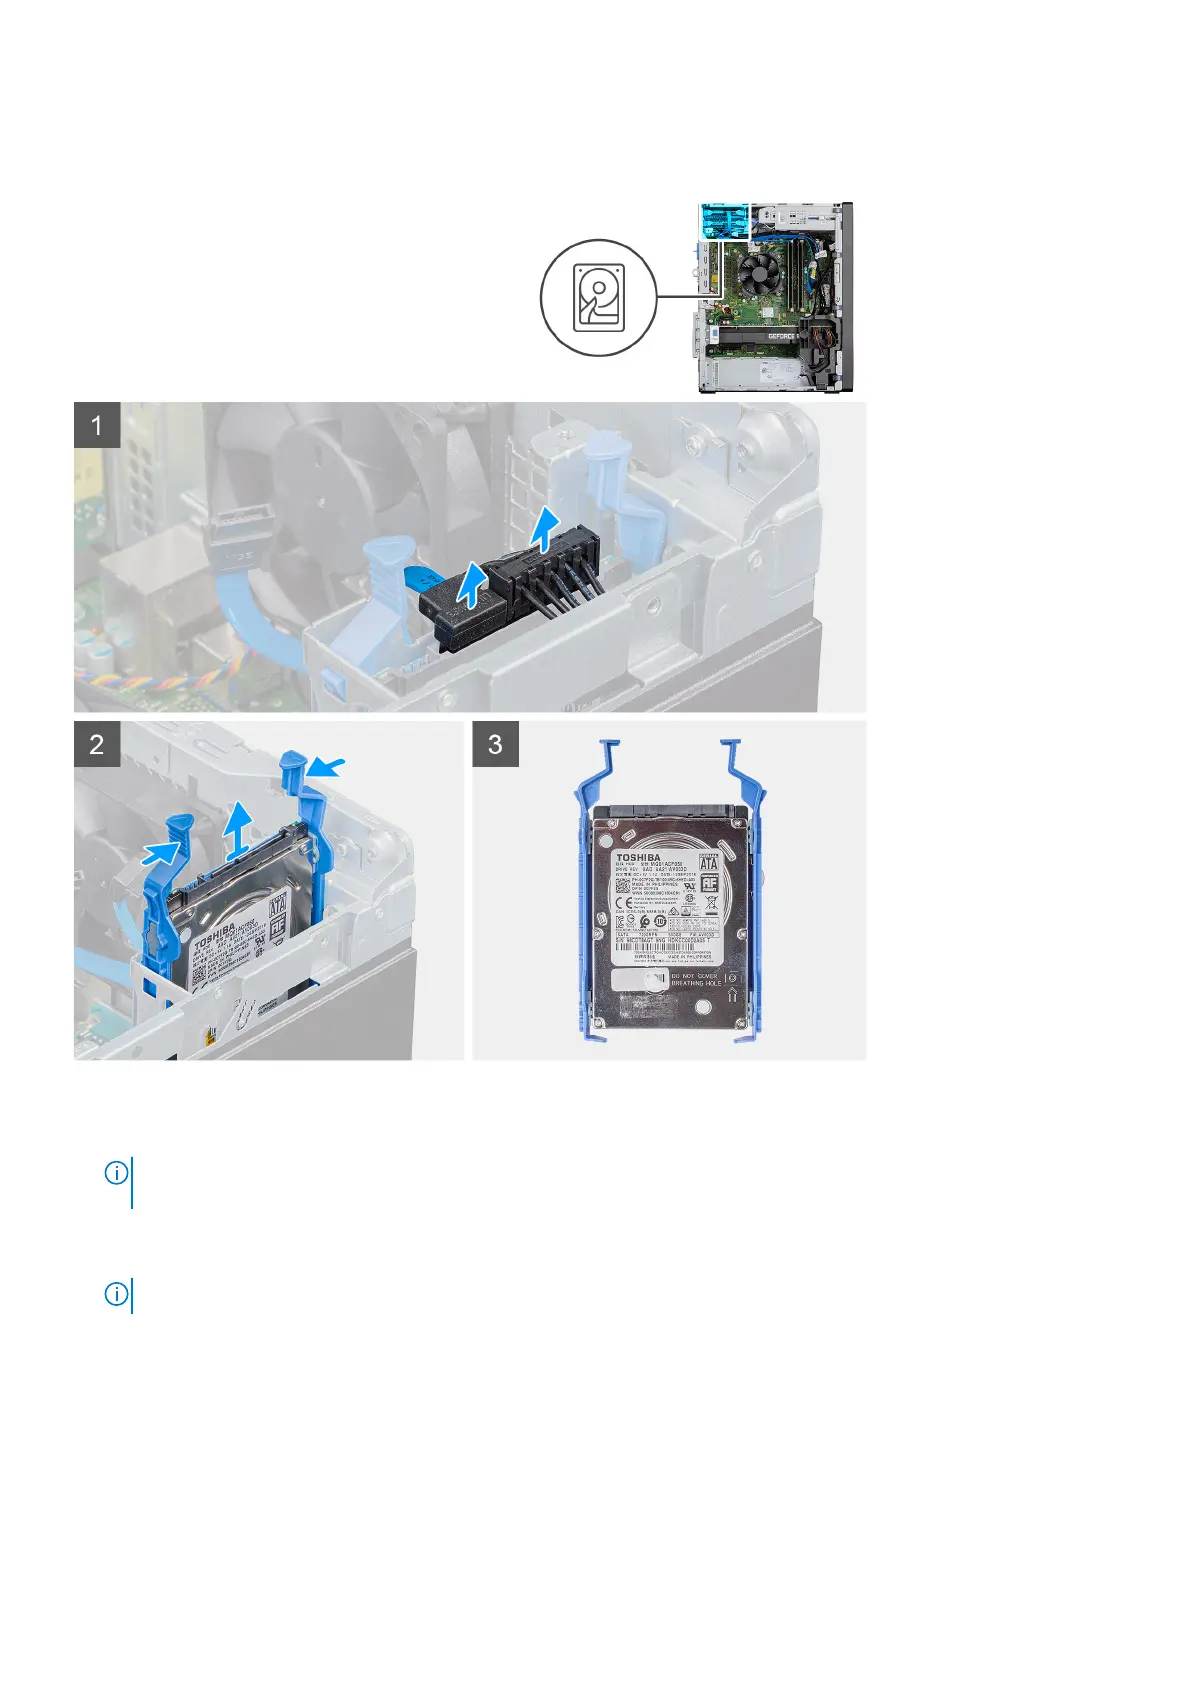
The following images indicate the location of the 2.5-inch hard-disk drive and provide a visual representation of the removal procedure.
Steps
1. Disconnect the power cable and the black hard drive data cable from the connectors on the 2.5-inch hard-disk drive.
NOTE:
For secondary 2.5-inch hard-disk drive, the other end of the black hard-drive data cable is connected to the
SATA1 and SATA2 connectors on the system board.
2. Press the release tabs on the hard-disk drive bracket and slide the hard-disk drive assembly out of the hard-disk drive bracket.
3. Lift the hard-disk drive assembly from the computer.
NOTE: Note the orientation of the hard-disk drive so that you can replace it correctly.
Removing the 2.5-inch hard-disk drive bracket
Prerequisites
1. Follow the procedure in before working inside your computer.
2. Remove the side cover.
24
Disassembly and reassembly