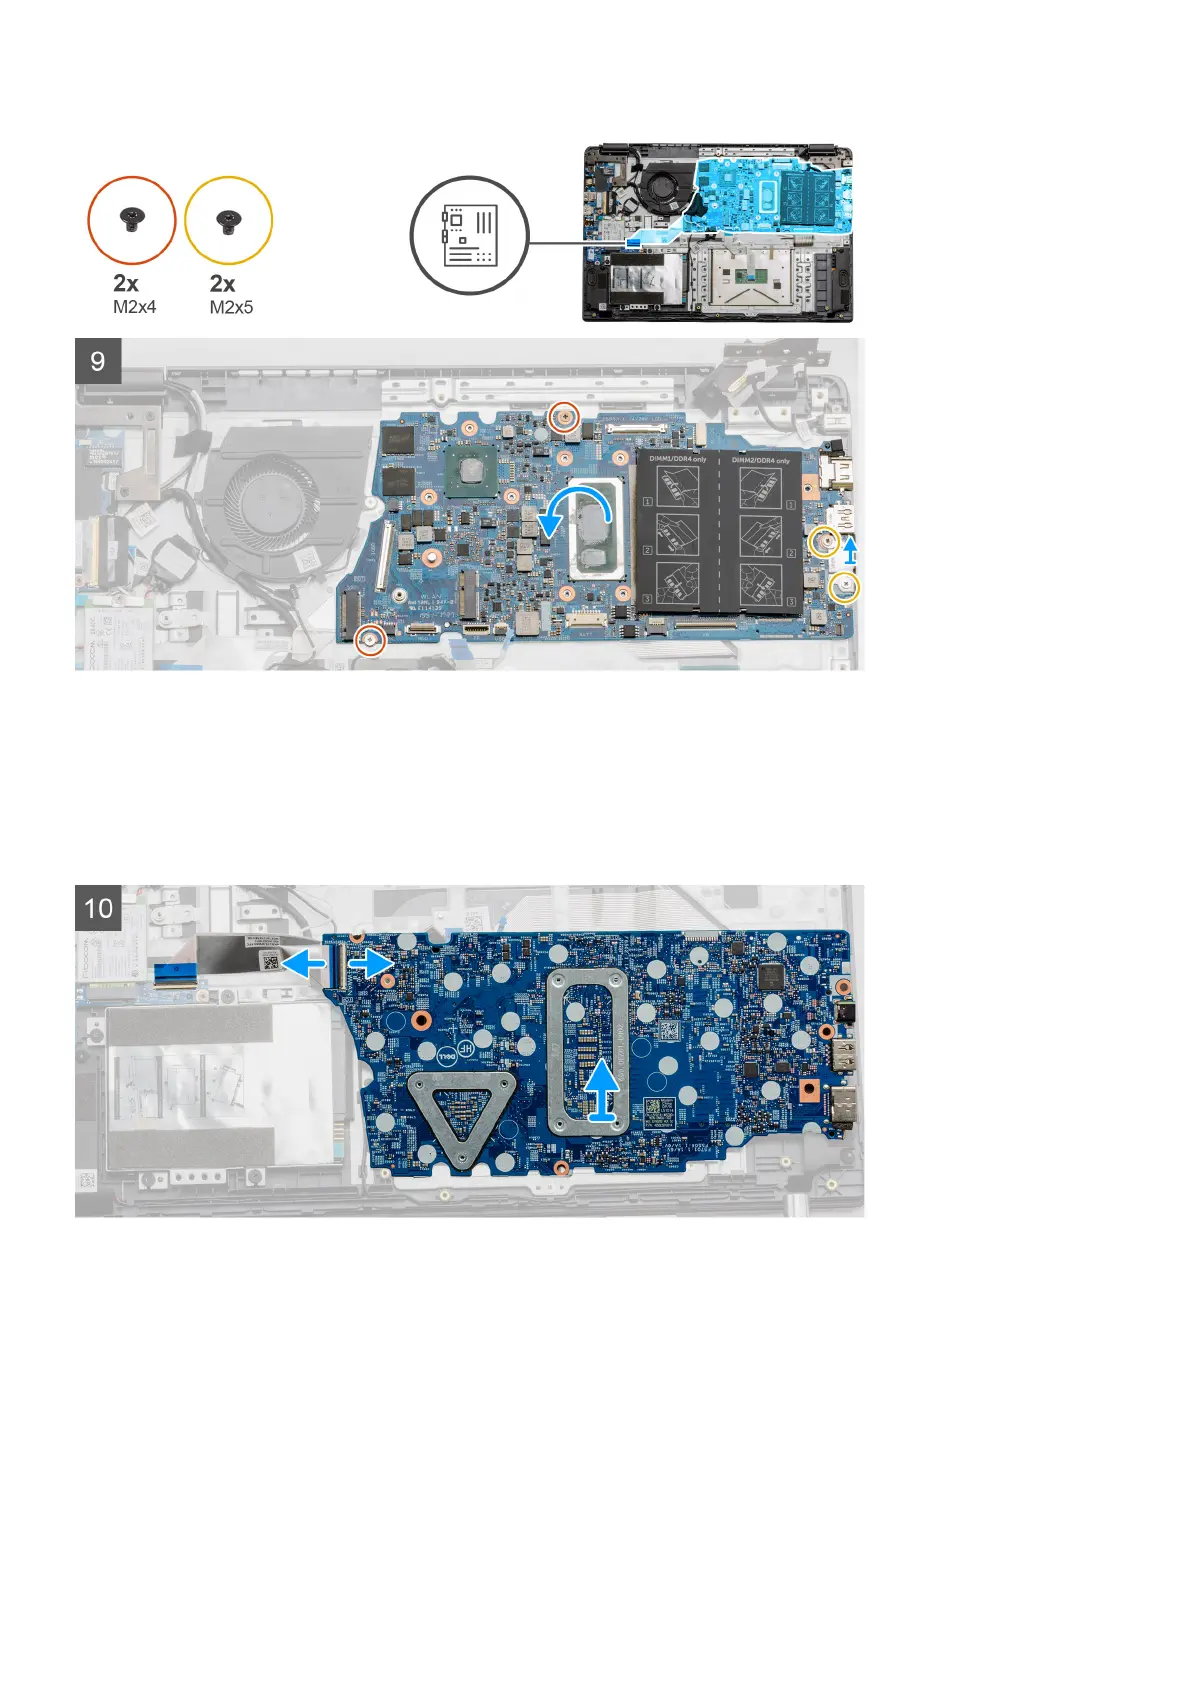
Steps
1. Remove the two (M2.5x5) and the single (M2.5x4) screws from the right hinge.
2. Disconnect the DC-in connector cable from the system board.
3. Disconnect the Fan assembly cable from the system board.
4. Peel back the adhesive tape covering the LCD cable.
5. Lift the latch that locks down the LCD cable onto the system board.
6. Disconnect the LCD cable from the system board.
7. Peel back the adhesive tape from over the IO board connector cable and disconnect the IO boards connector cable.
8. Disconnect the connector cables from the system board in the following order (left - right): Speaker, Touchpad, USB,
Battery, Keyboard.
Disassembly and reassembly
51