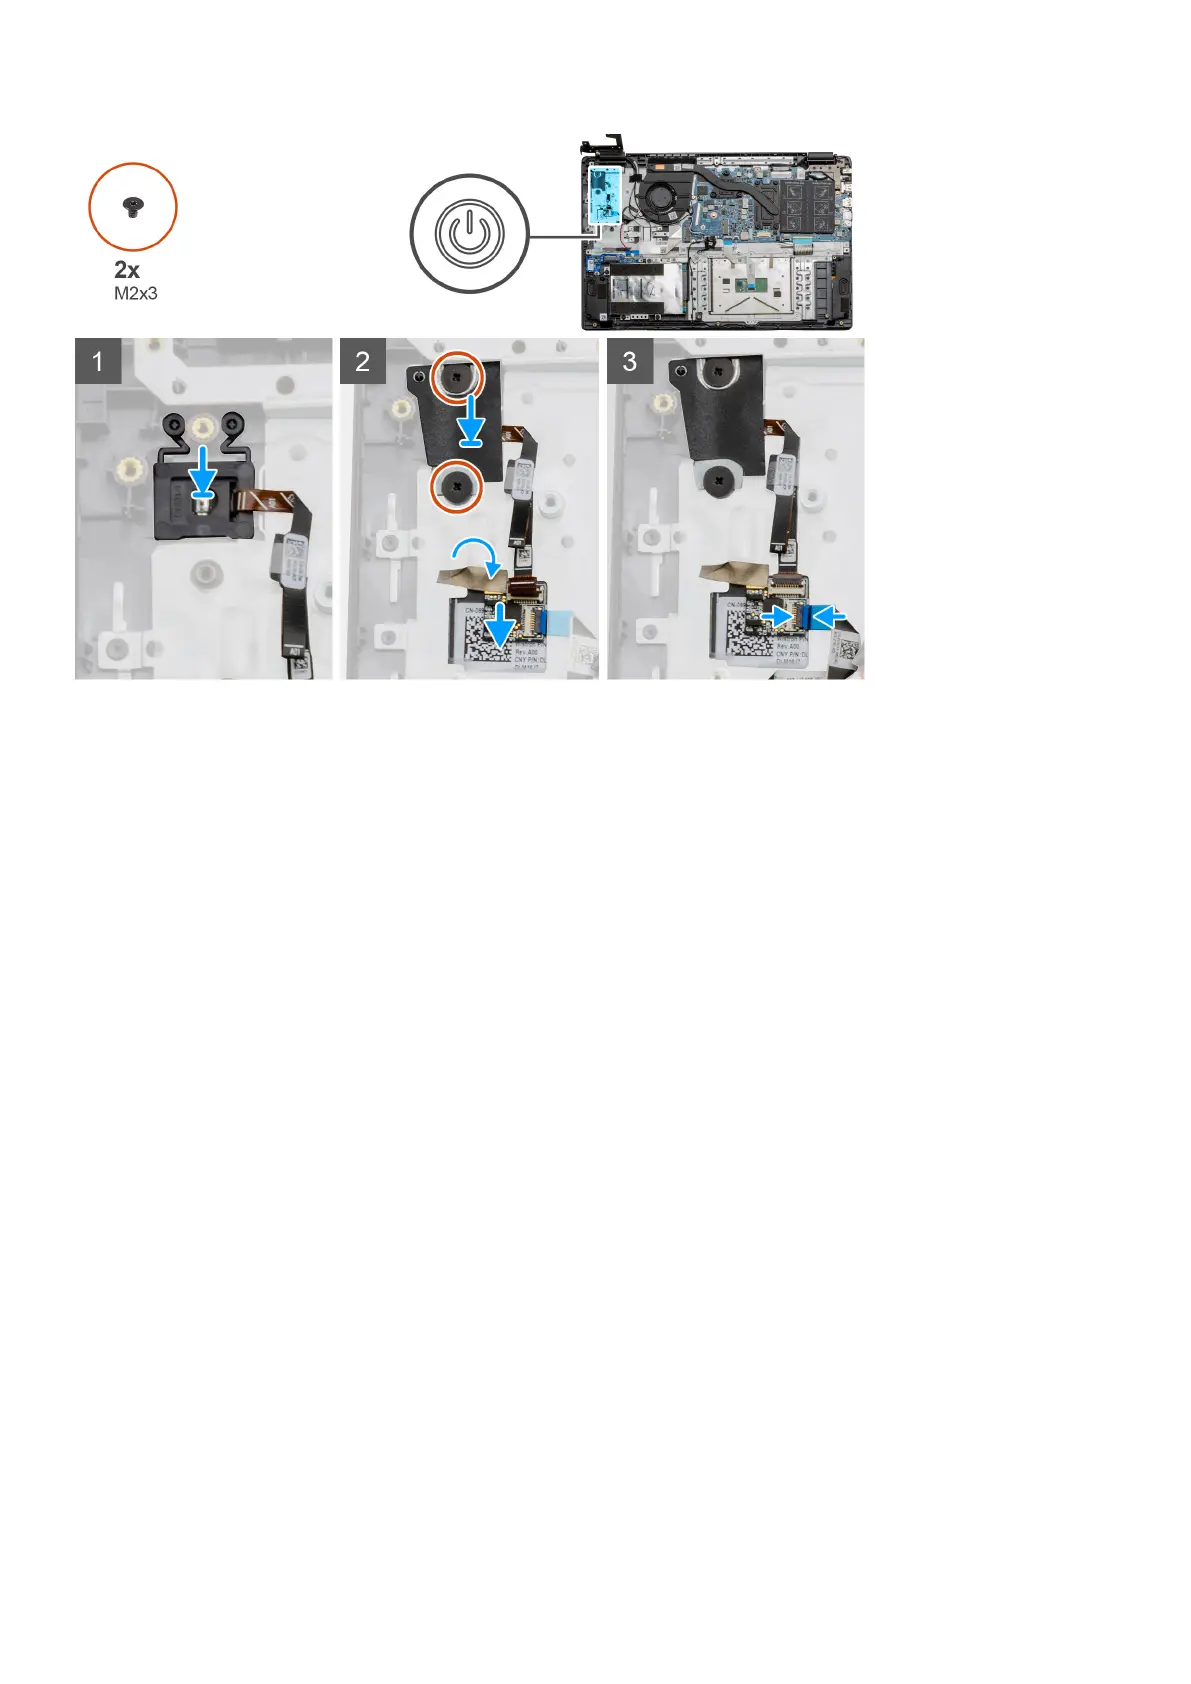
Steps
1. Place the Power Button module onto the mounting points on the palmrest.
2. Place the shield on top of the power button module and install the two (M2x3) screws to secure the shield onto the power
button. Place the power button daughterboard on the palmrest..
3. Connect the cable connector from the system board to the connector on the power button daughterboard.
Next steps
1. Install the WWAN card.
2. Install the Solid state drive.
3. Install the IO board.
4. Install the battery.
5. Install the base cover.
6. Install the SD Card.
7. Follow the procedure in After working inside your computer.
Display assembly
Removing the Display Assembly
Prerequisites
1. Follow the procedure in before working inside your computer.
2. Remove the SD Card.
3. Remove the base cover.
4. Disconnect the battery.
About this task
The figure indicates the location of the LCD Assembly and provides a visual representation of the removal procedure.
64
Disassembly and reassembly