Steps
1. Align the pins on the caddy with the slot on the hard-disk drive and insert the hard-disk drive into the caddy.
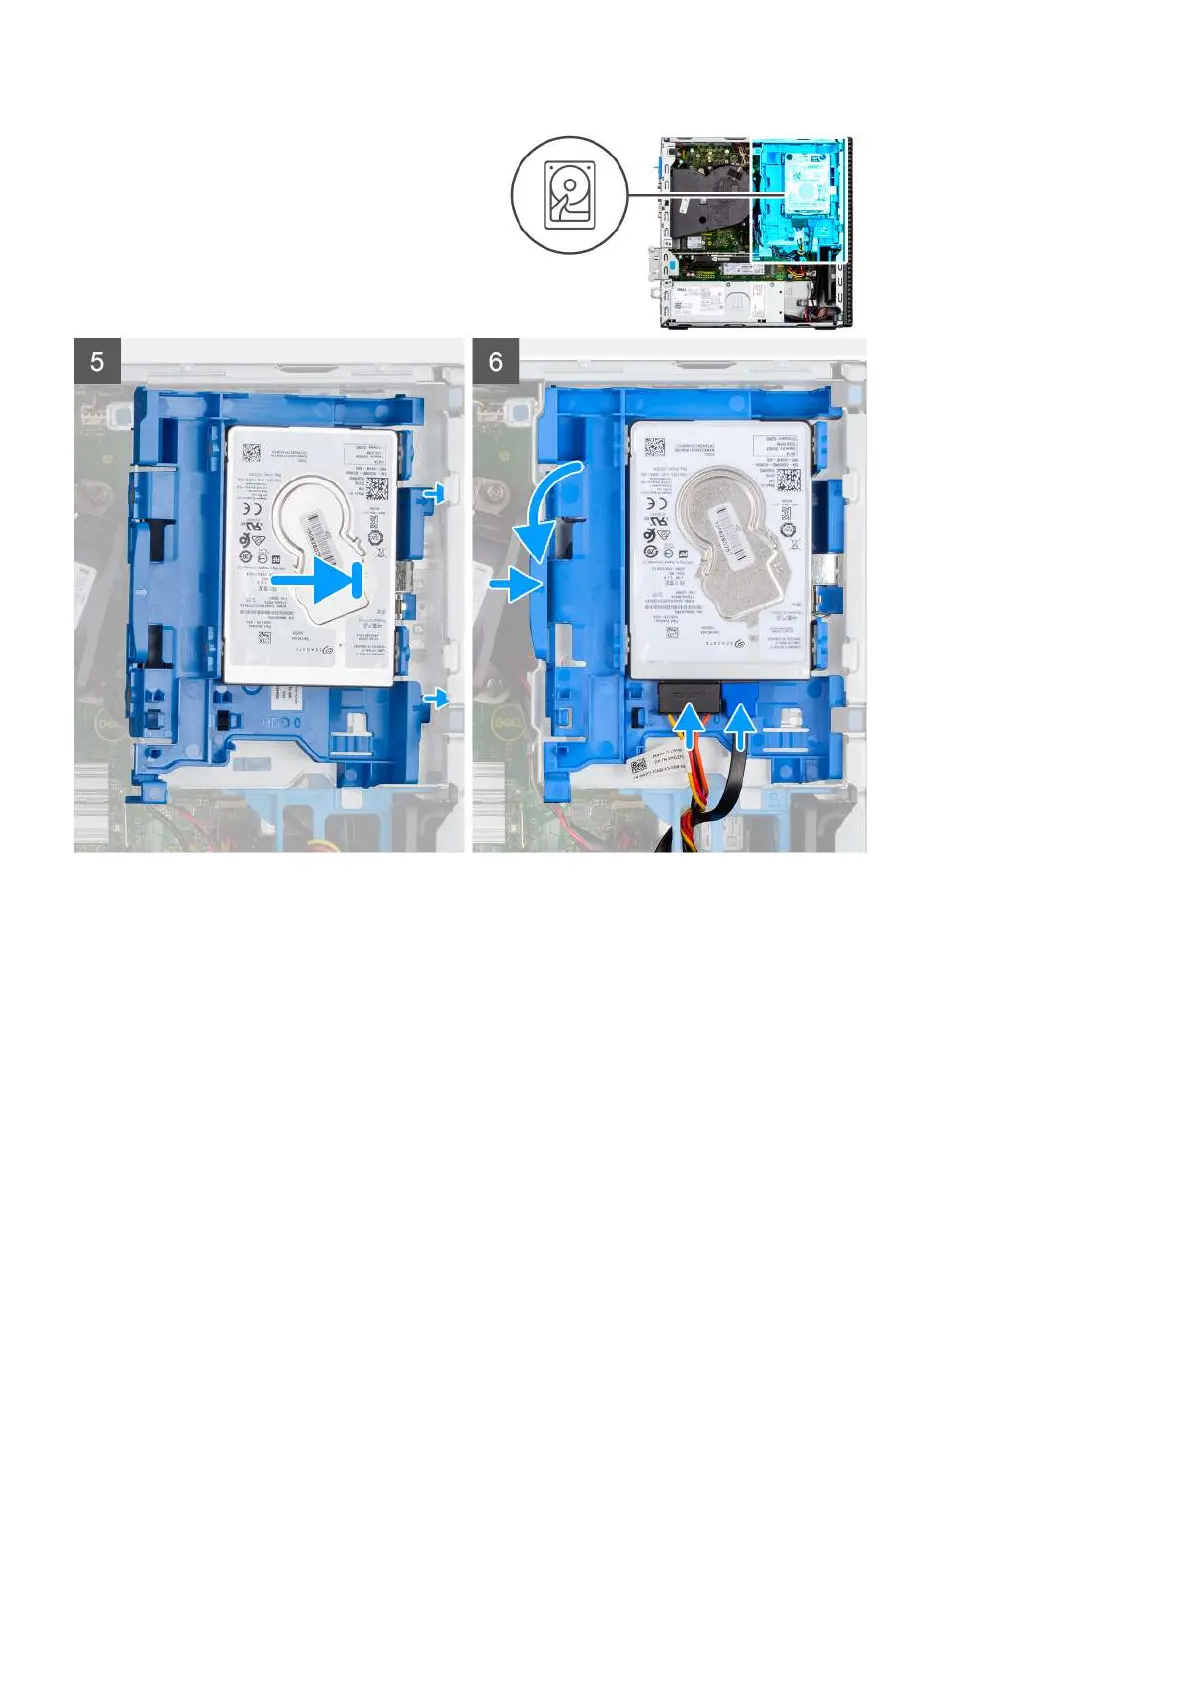
2. Pull the other end of the hard-disk drive caddy and insert the hard-disk drive into the slot.
3. Align the tabs on the hard-drive assembly with tabs on the chassis.
4. At an angle insert the hard-drive assembly into the slot on the chassis.
5. Press the hard-drive assembly down till it clicks in place.
6. Connect the hard drive data and power cables to the connectors on the hard drive.
Route the cable through the recess on the release latch.
Next steps
1. Install the front bezel.
2. Install the side cover.
3. Follow the procedure in after working inside your computer.
Removing the 3.5-inch hard drive
Prerequisites
1. Follow the procedure in before working inside your computer.
2. Remove the side cover.
3. Remove the front bezel.
20
Removing and installing components