64 Using Your Projector
3. After the IP Address, Subnet Mask, Gateway, and DNS is set up,
select Store and press button to store the settings.
4. If you select Store without pressing the Enter button, the system will
keep the original settings.
R
ESET—Press to reset network configuration.
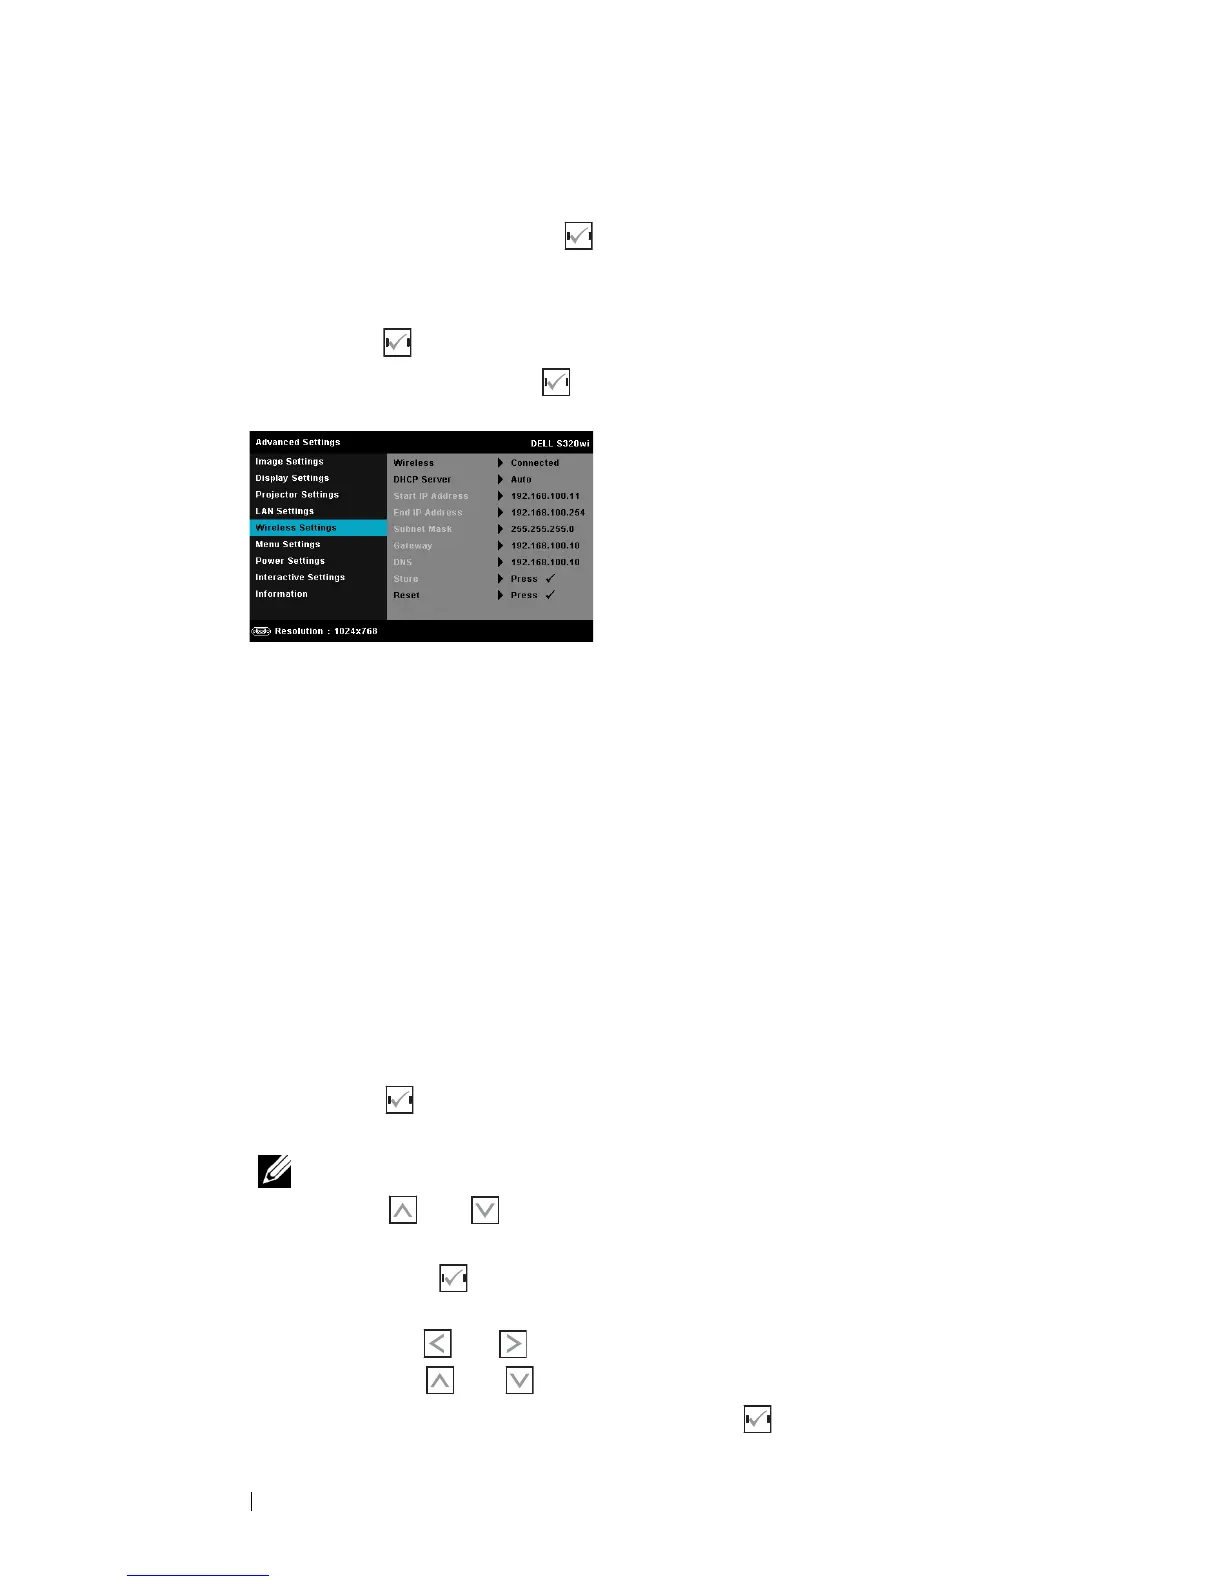
W
IRELESS SETTINGS—Select and press to activate wireless settings. The wireless
settings menu provides the following options:
WIRELESS—If your projector has been installed the wireless dongle, this
option is the Connected.
DHCP S
ERVER—Allows you to enable DHCP server of the wireless.
S
TART IP ADDRESS—Automatically or manually assigns the Start IP address
of the DHCP server to the projector connected to the wireless.
E
ND IP ADDRESS—Automatically or manually assigns the End IP address of
the DHCP server to the projector connected to the wireless.
S
UBNET MASK—Configure the Subnet Mask of the wireless connection.
G
ATEWAY—Check the Gateway address with your network/system
administrator if you configure it manually.
DNS—Check the DNS Server IP address with your network/system
administrator if you configure it manually.
S
TORE—Press to save the changes made in wireless configuration
settings.
NOTE:
1. Use and button to select IP Address, Subnet Mask,
Gateway, DNS, and Store.
2. Press the button to enter IP Address, Subnet Mask, Gateway, or
DNS to set the value. (The selected option is highlighted in blue)
a Use and buttonto select the option.
b Use and button to set the value.
c After the setup is complete, press the button to exit.
 Loading...