For Macintosh users
1 From System Preferences in the Apple menu, navigate to your printer, and then select Options & Supplies.
2 Navigate to the list of hardware options, and then add any installed options.
3 Apply the changes.
Networking
Notes:
• Purchase a wireless network adapter before setting up the printer on a wireless network. To install the
wireless network adapter, see the instruction sheet that came with the adapter.
• A Service Set Identifier (SSID) is a name assigned to a wireless network. Wired Equivalent Privacy (WEP),
Wi-Fi Protected Access (WPA), WPA2, and 802.1X - RADIUS are types of security used on a network.
Connecting the printer using the Wireless Setup Wizard
Before you begin, make sure that:
• A wireless network adapter is installed in the printer and is working properly. For more information, see the
instruction sheet that came with the wireless network adapter.
• An Ethernet cable is disconnected from the printer.
• Active NIC is set to Auto. To set this to Auto, navigate to:
> Network/Ports > Active NIC > Auto >
Note: Make sure to turn o the printer, then wait for at least five seconds, and then turn the printer back on.
1 From the printer control panel, navigate to:
> Network/Ports > Network [x] > Network [x] Setup > Wireless > Wireless Connection Setup
2 Select a wireless connection setup.
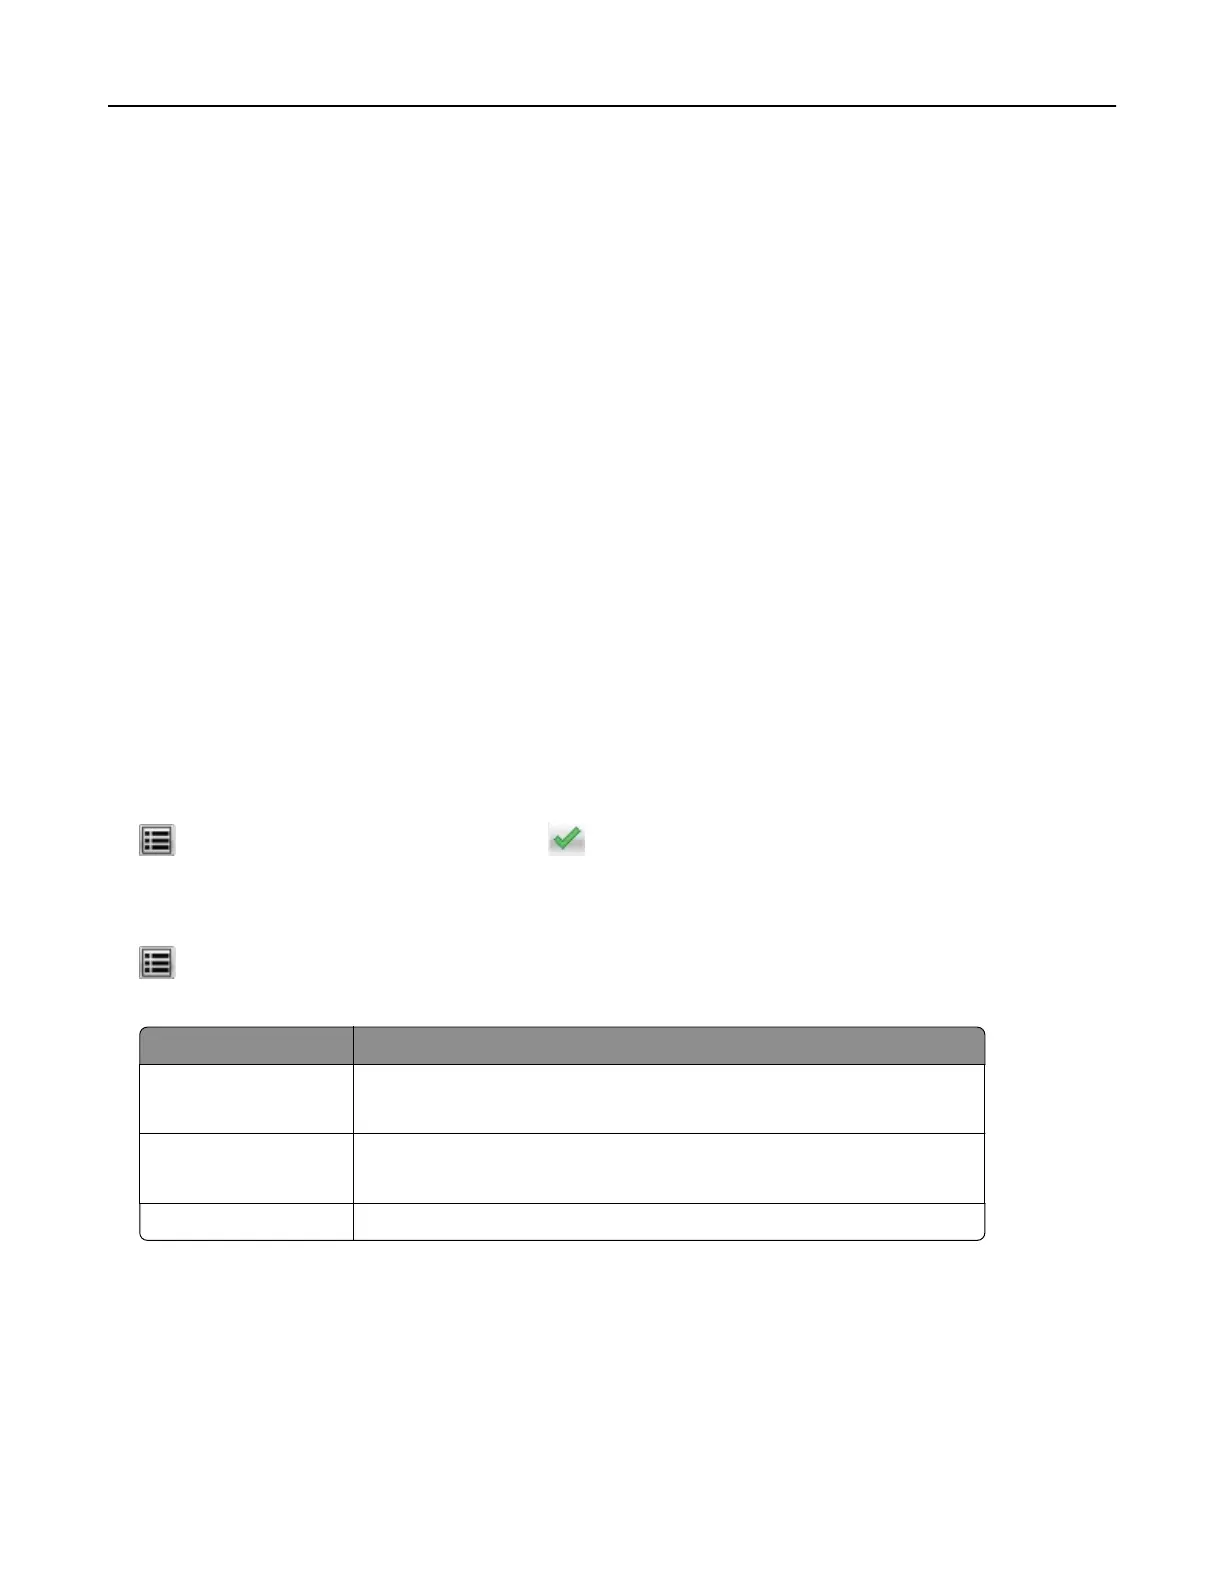
Use To
Search for networks Show available wireless connections.
Note: This menu shows all broadcast secured or unsecured SSIDs.
Enter a network name Manually type the SSID.
Note: Make sure to type the correct SSID.
Wi‑Fi Protected Setup Connect the printer to a wireless network using Wi‑Fi Protected Setup.
3 Follow the instructions on the printer display.
Additional printer setup 42