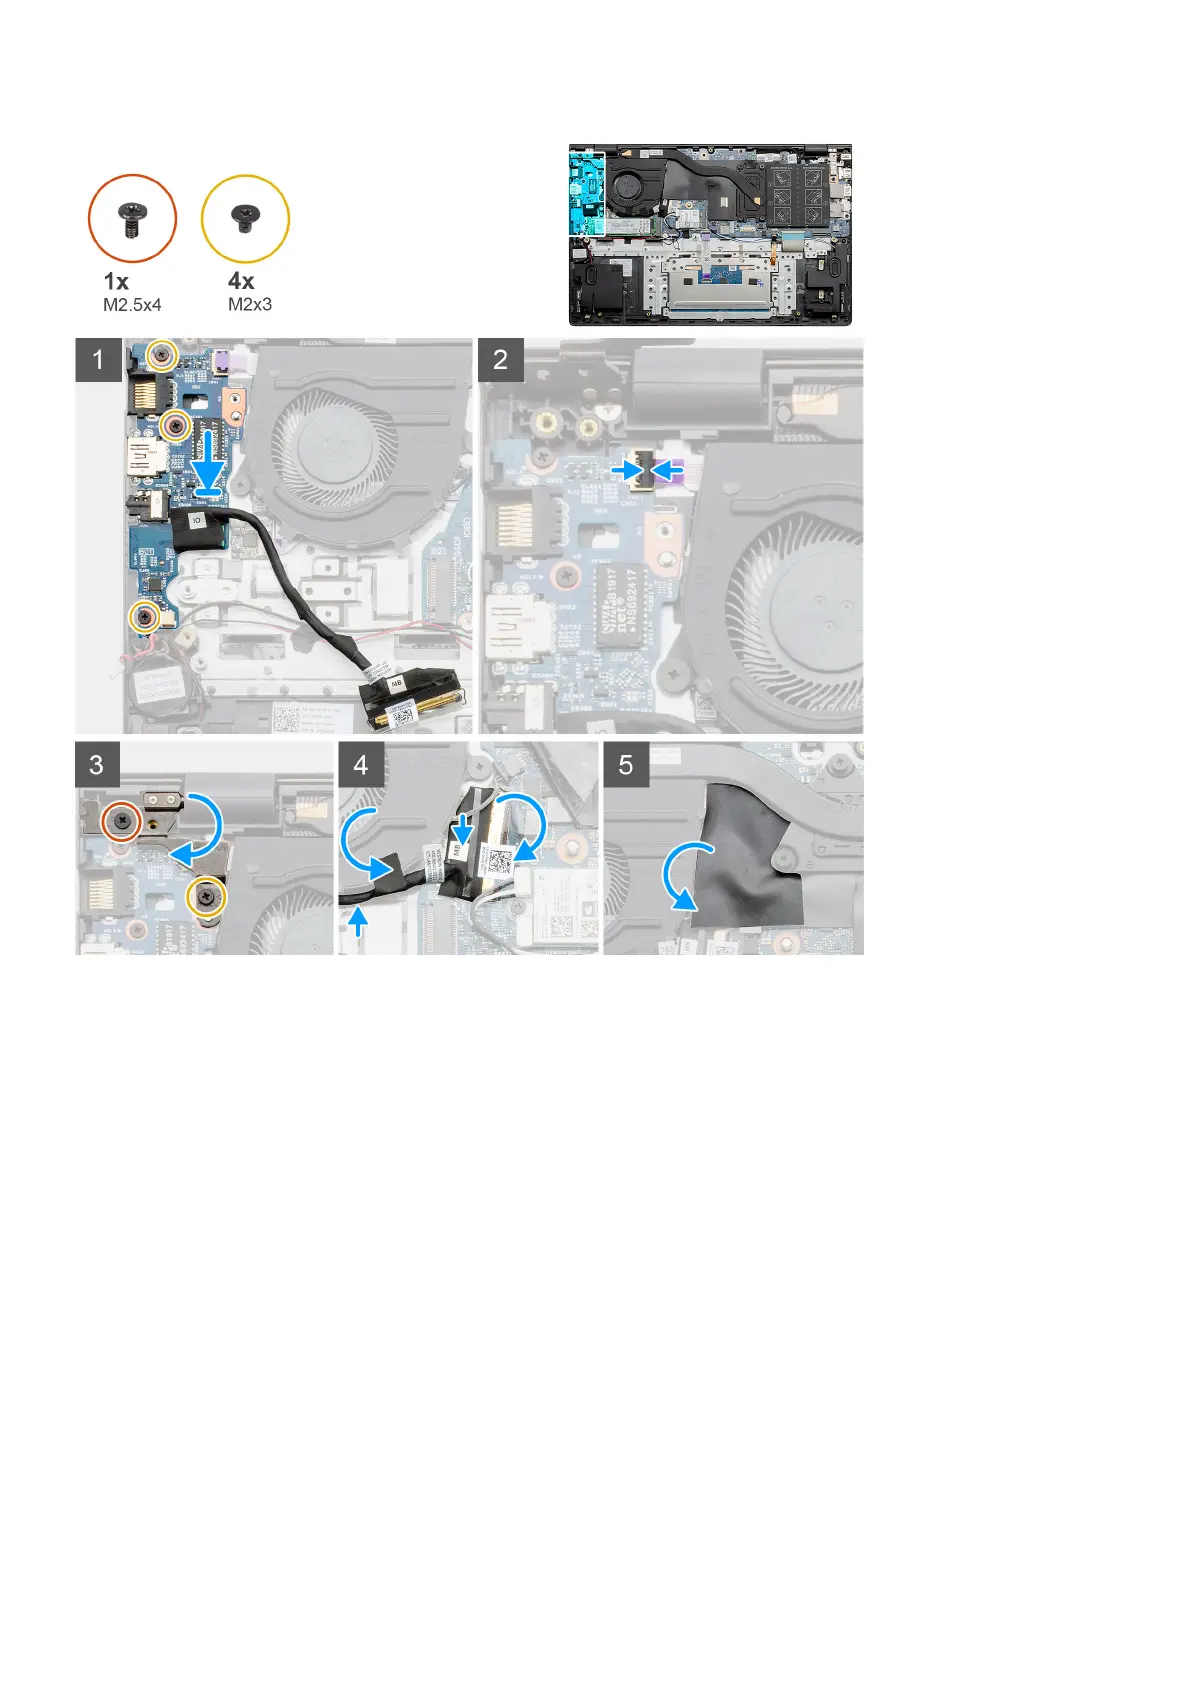
Steps
1. Place the I/O board on the palm-rest and keyboard assembly.
2. Align the screw holes on the I/O board with the screw holes on the palm-rest and keyboard assembly.
3. Replace the three screws (M2x3) that secure the I/O board to the palm-rest and keyboard assembly.
4. Connect the fingerprint reader cable to the I/O board and close the latch to secure the cable.
5. Lower the left hinge, and replace the two screws (M2.5x4) and (M2x3).
6. Route the I/O cable underneath the system fan using adhesive tape.
7. Connect the I/O-board cable to the I/O board and close the latch to secure the cable.
8. Place the mylar cover back.
Next steps
1. Install the coin-cell battery.
2. Install the system fan.
3. Install the battery.
4. Install the base cover.
5. Follow the procedure in after working inside your computer.
Disassembly and reassembly
57