The D1000
Installation and
Service
Version 2.1
1 6
Moving the unit between ‘operating’ and ‘service’ positions
All D1000 models have been congured as a standalone unit mounted to a wall plate. As such, the unit may
easily be tilted down into a service position, giving you access to the electronics and extinguisher tank, or be re-
moved completely for maintenance and cleaning. Provisions have been made to facilitate easy removal includ-
ing a minimal amount of fasteners and modular electrical connections.
To place the unit in the service position, a few simple steps are required. Be sure to wear safety glasses at all
times during this process:
1. Shut the unit o with the power switch on the front of the hood;
2. Remove the grease tray then the grease entrapment lter;
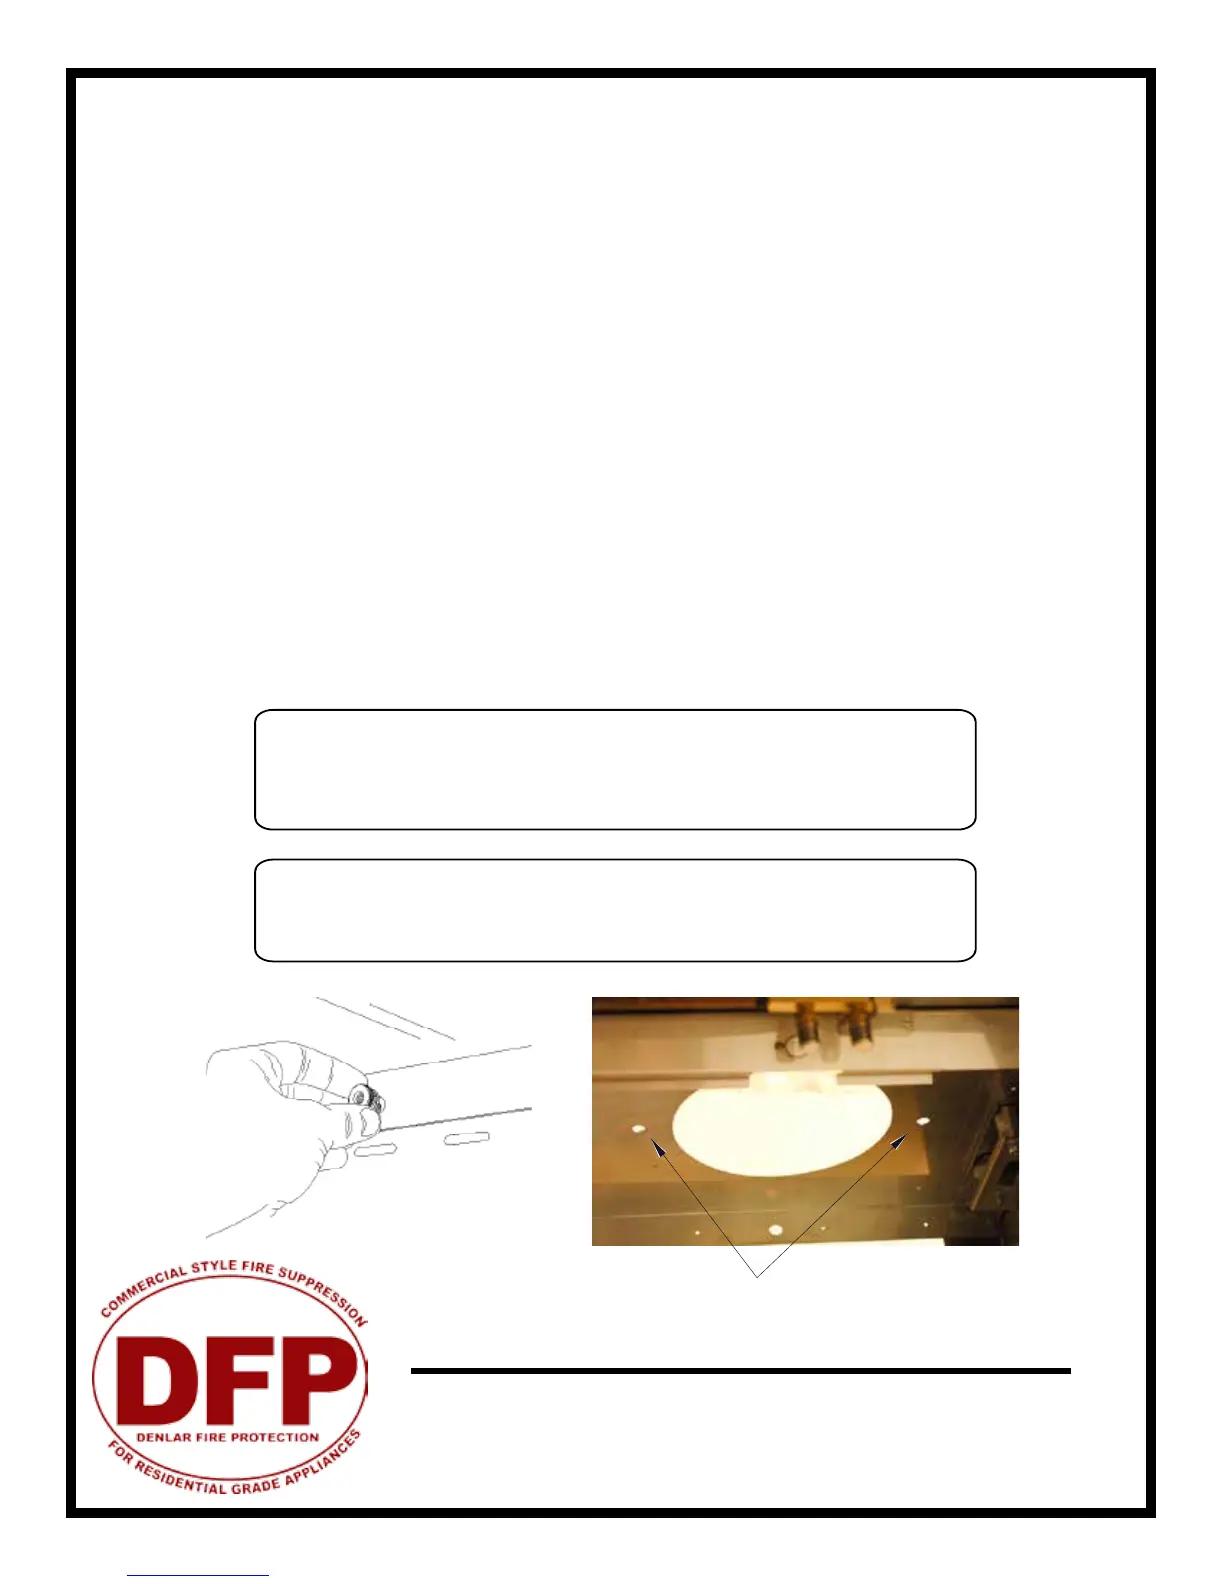
3. Loosen and remove the brass knurled service nuts that are on the rear inside wall of fan housing compart-
ment. On units with a ducted fan, remove the two thumbscrews located at the top inside near the fan intake
(refer to illustration below). Slowly lower the unit;
4. The unit will now freely pivot downward to a stop position. A safety cable is provided to prevent the unit
from falling or lowering too far.
5. Place safety pin in the tank valve to avoid accidental discharge.
With the unit in this position, basic servicing and cleaning may be performed, including servicing the extin
-
guisher tank assembly.
To move the unit back to the operating position, simply reverse the process as outlined above.
WARNING: An electrical shock hazard is present at the electrical compart-
ment whenever there is power to the hood. Use caution when working
around this device while the unit has power.
WARNING: Be careful while working with the unit in the service position.
Release of the cable system or applying force to the tank valve assembly may
cause discharge of the tank. The high pressure discharge has the potential to
cause skin or eye damage and injury!
(3x)
Thumbscrew locations (for ducted fan only)
Accessing the Internal Components