4
Chapter 3 Connection to the Host Computer—Setting up the USB Interface—
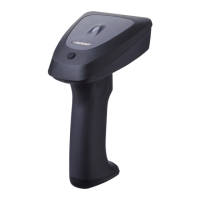
The scanner receives and sends data from/to the host computer through the USB keyboard interface or USB-COM
interface. You need to set up the device driver designed for the interface to be used.
Notes for connecting the USB interface cable
When plugging and unplugging the USB connector, put an interval of at least 10 seconds between those actions since
Windows may take several to 10 seconds to add or delete the USB device.
Hot plugging/unplugging is allowed for USB devices. However, when the computer is in suspend mode, do not plug or
unplug their cables.
When the host computer is processing the scanner connection, do not plug or unplug any other USB device cables.
Never disconnect the USB cable when the scanner is communicating. Doing so will not only lose data but affect the
system badly.
Directly connect the scanner to the USB port on the host computer or to the self-powered hub. The scanner may not be
connected to some types of hubs. If the operation of the hub-connected scanner is unstable, connect it directly to any
USB port on the host computer.
Do not use any extension cord.
3.1 Setting up the USB Keyboard Interface
The USB keyboard interface requires the USB device class driver for HID (Human Interface Device) which is included in
Windows 98 or later Operating Systems and whose setup wizard will automatically run. You do not need to install the
device driver.
Note: If the interface setting has been changed from the USB keyboard interface (factory default) to the USB-COM
interface, change it back to the USB keyboard interface by scanning the following bar code:
"USB keyboard interface" code
Connect the scanner interface cable to the USB port of the host computer, and the system-supplied driver setup wizard will
automatically run. Follow the wizard and set up the driver. The setup procedure on each of Windows 98/98SE, Windows
Me, Windows 2000, and Windows XP is described below.
Windows 98/98SE
(1) Switch the computer on to run Windows 98/98SE.
(2) Connect the scanner interface cable to the computer or USB hub.
Add New Hardware Wizard starts.
(3) Click Next to proceed.