31
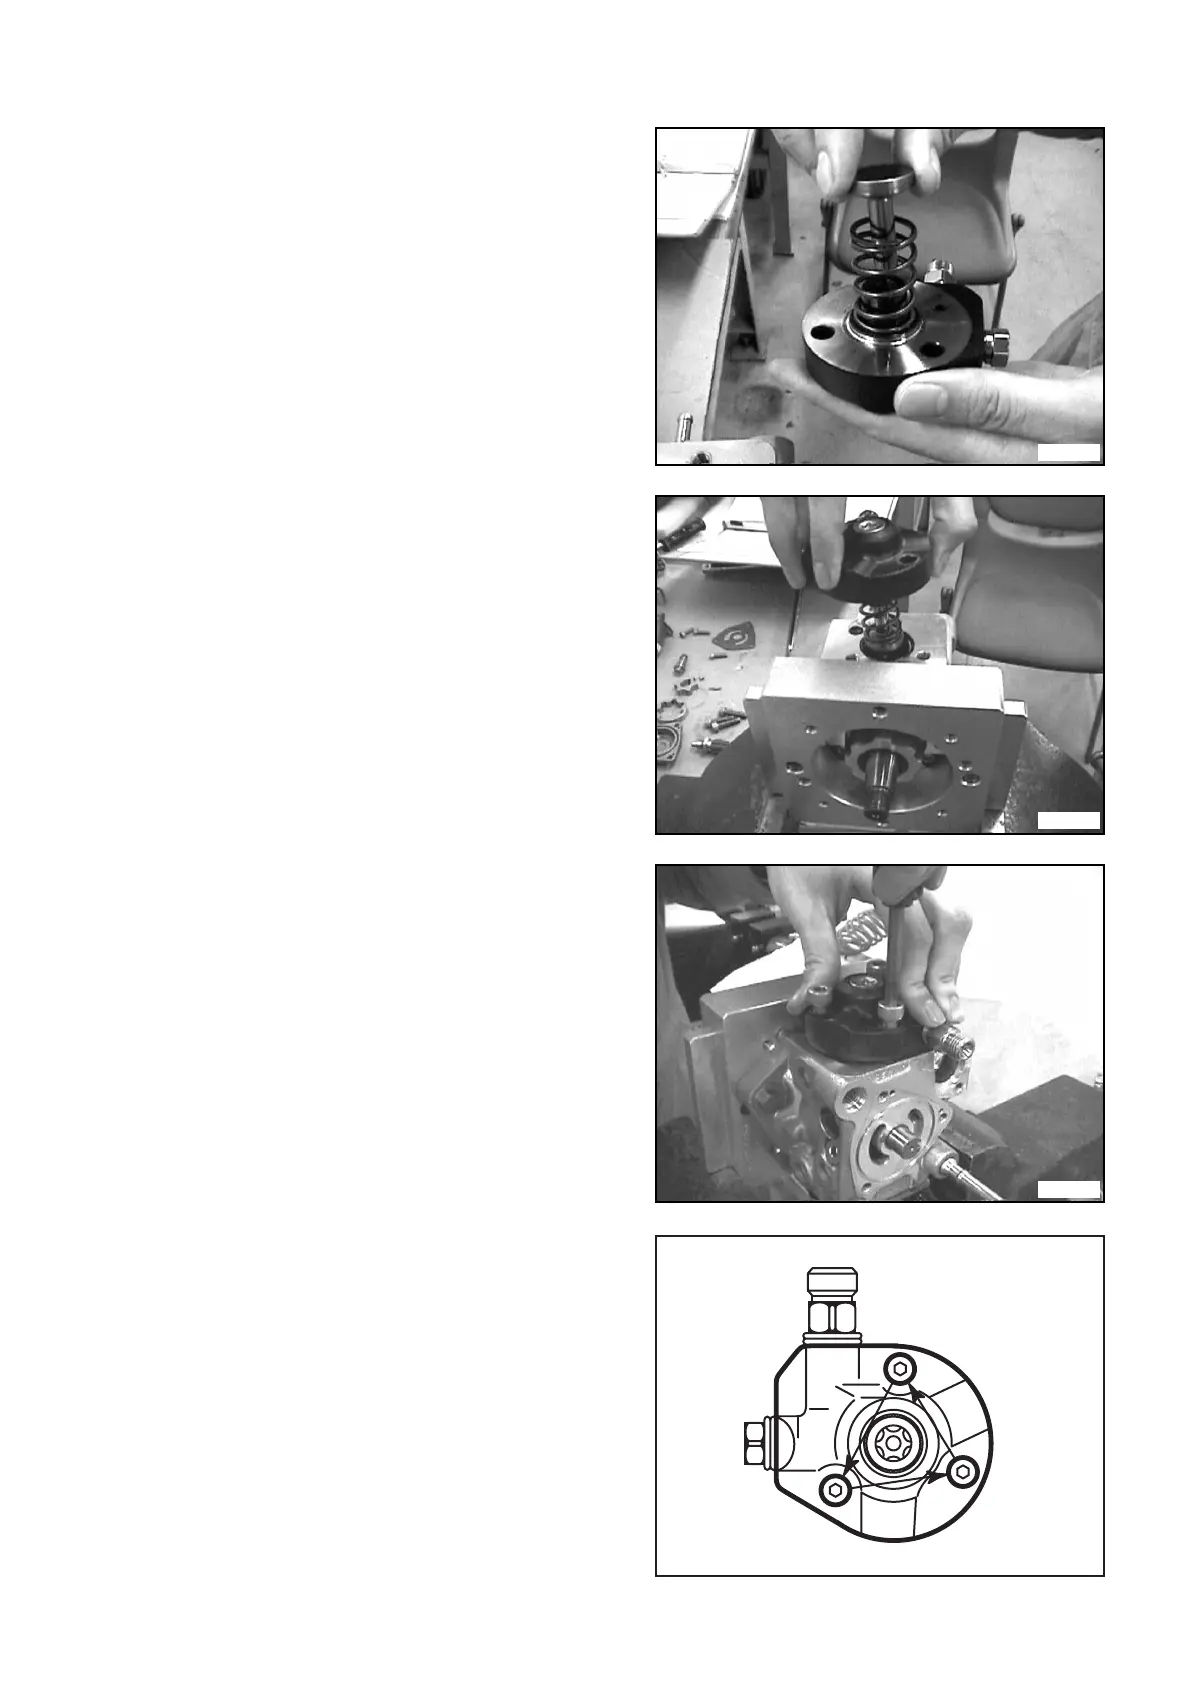
(6) Install the spring and plunger in the opposite
side of the element sub-assembly.
NOTE:
As much as possible, avoid touching the
polished parts.
(7) Install the element sub-assembly assembled in
step (6) to the pump body.
NOTE:
Before installing, make certain that the contact
point between the ring cam and the plunger
(which has been polished) faces upwards.
NOTE:
Check that the drive shaft key is 180 degrees
from the element being installed.
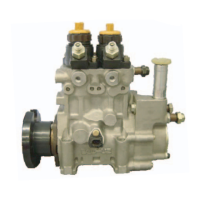
(8) While pressing the element sub-assembly
down, uniformly tighten the three hexagonal
bolts using the torque wrench (STT) and the
hexagonal bit (STT).
• STT: Torque Wrench (95813-10020)
• STT: Hexagonal Bit (95993-10040)
• STT: Driver Chuck (95992-10130)
NOTE:
Please tighten the three hexagonal bolts uniformly
in the order shown at right.
• Tightening Torque: 15.68 to 23.52 N·m
(1.6 to 2.4 kgf·m)
QD0929
QD0930
QD0931
QD1854
[3]
[2]
[1]