SmartSource Elite Series - Installation & Operations Guide
May 2019 8227 4907-005 Page 13 of 37
Installing the Inkjet Cartridge-4 line (Professional Elite, Expert Elite and Ultraviolet Elite Only)
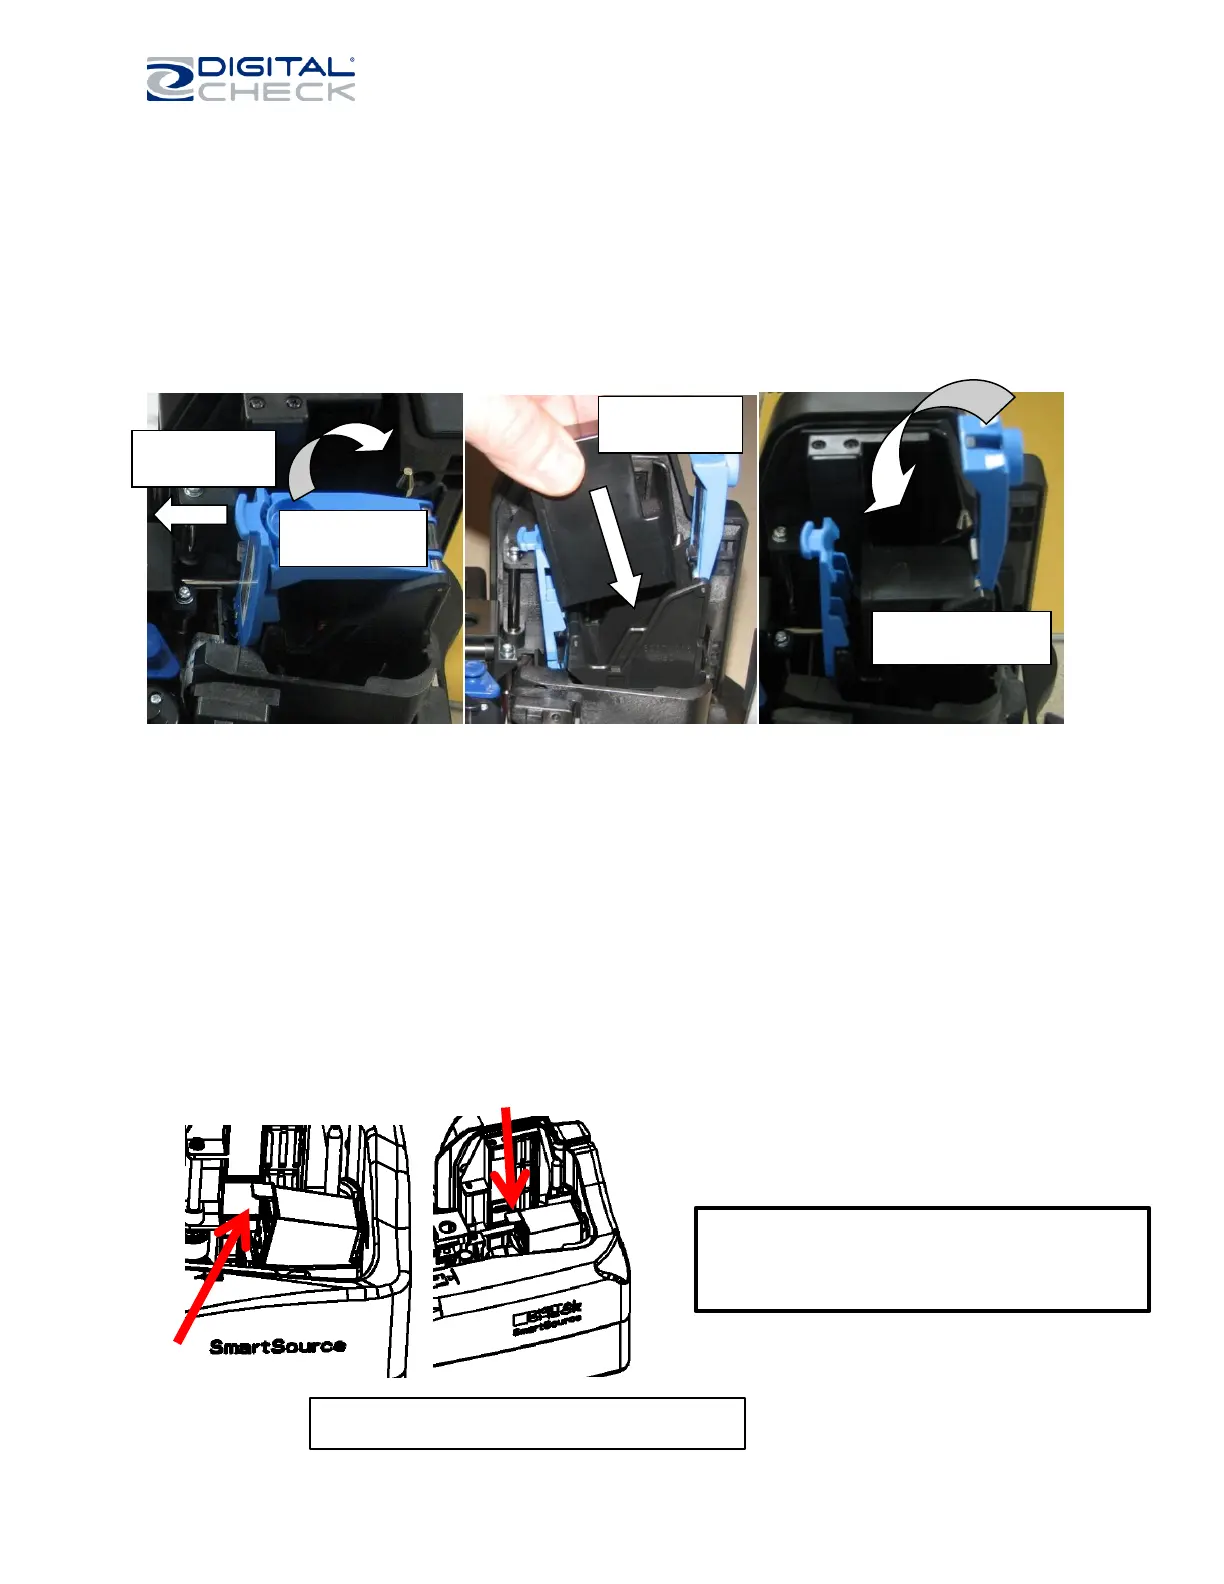
1. Lift off the endorser cover. The endorser housing is visible.
2. The housing may have packing tape on it to hold it closed during shipping. Remove this tape
carefully.
3. Open the housing by pressing on the blue latch as shown. The cover of the housing will pop open.
4. Open the sealed package containing the inkjet cartridge and remove the sealing tape as shown on
the cartridge.
5. Insert the cartridge into the housing as shown. There is no need to press down on the cartridge.
6. Once the cartridge is in place, press the top of the housing down until the housing latches shut.
Installing Cartridge-1 Line Ink Jet Cartridge:
1. Open the Ink Jet pouch and remove the protective tape from the new cartridge. Make sure that the
nozzles on the cartridge do not contact your fingers (or anything else)
2. Insert the cartridge at a slight angle, cartridge nozzles facing the rear of the scanner. Utilize the tab on
the cartridge housing for handling. Then push straight down from the top. The cartridge will snap in.
TAB
Remove the cartridge by lifting the tab up.
Note: it may be required to wipe the
nozzles gently with a tissue before
use.
 Loading...