6
(Step 3) – Get a Display/Picture
After you have connected your set top box to your TV you will need to get a display on
the screen to scan for channels and start enjoying digital television.
(1) Switch on your power supply (wall, power board etc.).
(2) Turn on your set top box at the button on the front of the unit.
(3) Turn on your television.
(4) Set your TV to the correct input setting by using the “TV/AV” or “SOURCE”
buttons on your TV remote control. You may need to check your TV user
manual or consult the TV manufacturer’s technical support for how to do
this.
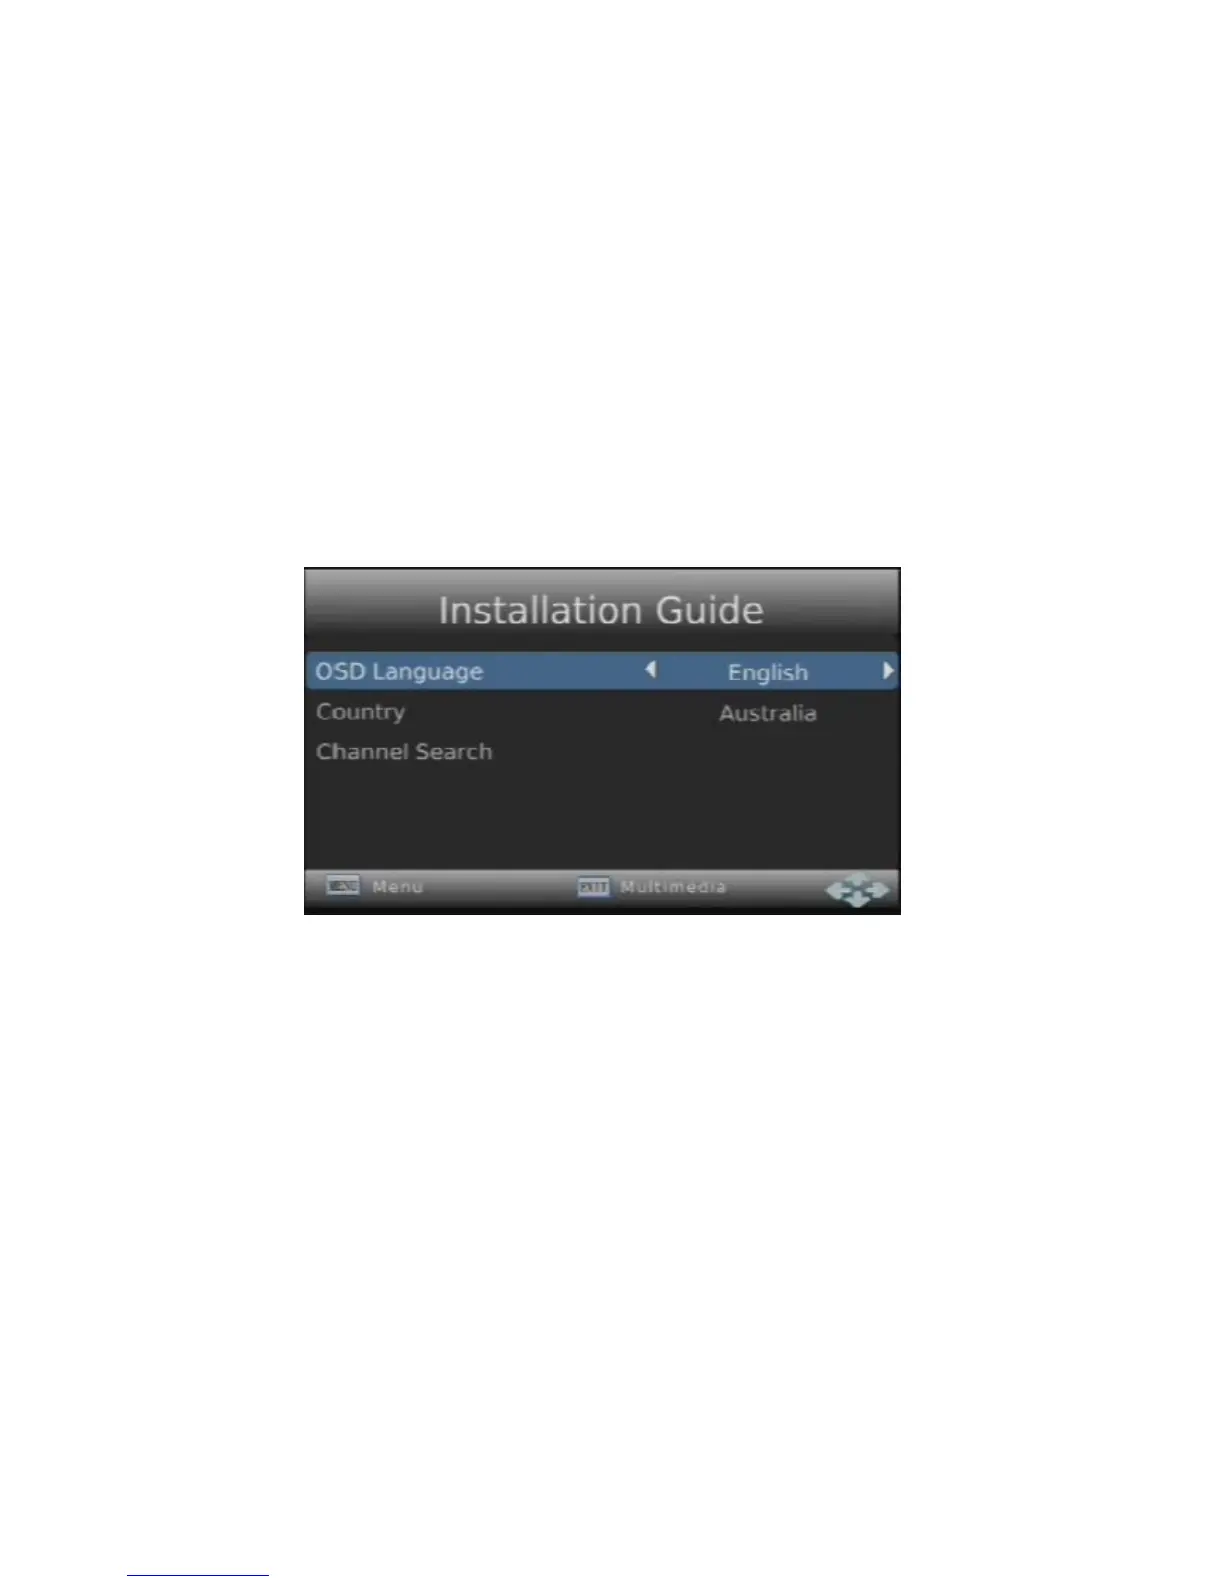
(5) With the set top box switched on, the television switched on and set to the
correct input you should see the following screen
(Step 4) – Scan for Channels
With the installation menu on the screen you are ready to scan your channels and step
into the world of digital television.
(1) Use the ◄ and ► arrow keys on your remote to select your preferred
language and press ▼ to move to the next option
(2) “Australia” will appear by default as Country, although you can change this
option with the ◄ and ► arrow keys and press ▼ to move to the next
option
(3) Press “OK” on Channel Search to begin scanning for digital channels, once
complete your set top box will display a digital channel and you are ready to
begin viewing!
Note: Depending on your location your Digitel+ unit may scan duplicate (weaker)
channel services. These services can be deleted via the “Program Edit” menu.
Please refer to the manual for further information on the “Program Edit” menu.