SETUP
52
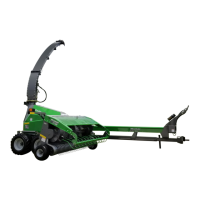
HEADER HEIGHT ADJUSTMENT
FIGURE 62
The header height adjustment is achieved through a double acting hydraulic cylinder which is controlled by a switch
located on the control box. For windrow pickups, refer to the operator’s manual to set the minimal working height with
gauge wheels.
NOTE: Push the locking arm in completely in order to unlock the lift cylinder of a header.
Figure 62 Header lift lock
STARTING UP AND BREAK-IN
Always engage the tractor’s power-take-off (PTO) at low speed (engine speed at idle) in order to prevent shearing the
safety bolt on the transmission line. The harvester has a high inertia and applies a high load on the PTO when starting.
Have the tractor PTO clutch calibrated by the tractor dealer in cases of hard starts.
Before going to the field, check that all control box functions are working properly.
WARNING: Make sure all harvester guards and shields are properly in place before starting up the tractor.
When starting up a new harvester, run the machine at mid PTO speed for about 5 minutes in stationary position. Then
run at full speed for at least 3 minutes. If no issues or bearing overheating is detected, the harvester is ready for operation.
KNIVES AND SHEAR BAR
If using the Forage Harvester in normal conditions (on a dry field, 5 to 6 hours a day), we recommend grinding the knives
once a day. However, if the conditions are excessively muddy or sandy terrain, or with a highly abrasive crop, two daily
grindings are recommended. Refer to the KNIFE SHARPENING section on page 54. The cutting head is as important as the
shear bar and vice versa when a perfect cut is desired. Proper maintenance and preparation of these two components
will result in the following:
Evenly cut silage
Less required power
Less downtime due to mechanical breakdowns
NOTE: The shear bar adjustment must always be done following one of these operations:
Knife grinding
Whenever knives must be moved forward
Knives have been replaced (always change knives in pairs, 180° from each other)
Shear bar has been replaced or flipped over
 Loading...