MAINTENANCE & AJUSTEMENTS
91
SHEAR BAR REPLACEMENT
FIGURE 108, FIGURE 109, FIGURE 110
NOTE: Always position the tungsten edges facing upwards (on top).
The shear bar cutting edge will remain sharp longer providing all knives have been properly sharpened and the shear bar
is adjusted every time the knives are sharpened. When the cutting edge becomes excessively worn, the shear bar can be
removed, turned around and then reinstalled.
WARNING: Stop the PTO and shut off tractor engine before servicing or performing maintenance. Refer to
SAFETY RULES on page 12.
To replace the shear bar, proceed as follows:
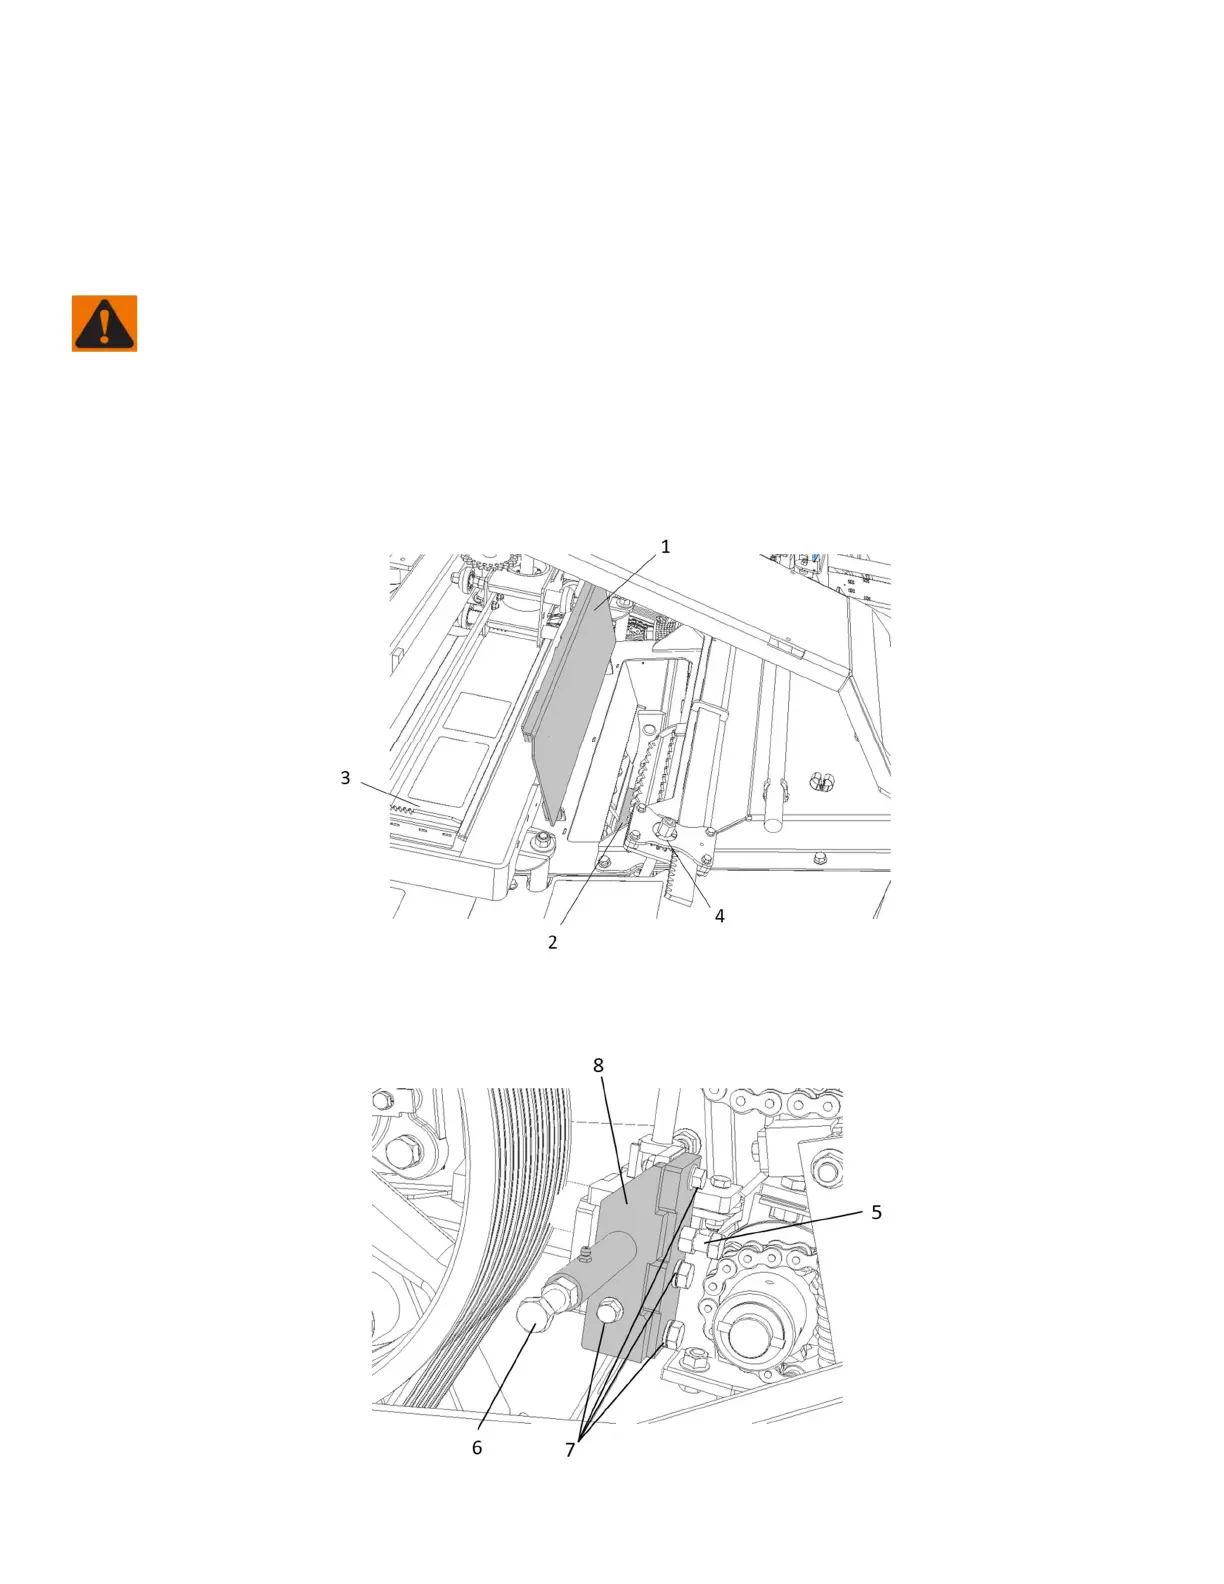
1. Open the shear bar cover (item 1 to access and clean the shear bar area (item 2).
NOTE: On the earlier models, the shear bar must be removed towards the inside of the harvester. On later models, the
adjustment module is removable to allow the bar to be pushed out towards the right-hand side of the harvester. A kit
is available for purchase to update the older models to the removable module configuration for easier shear bar
maintenance. Contact your dealer about Service Bulletin #FH2002.
Figure 108 Shear bar replacement
2. Loosen the shear bar clamping rod (item 4 - Figure 108 Shear bar replacement). Loosen the pointer nuts and
screws (item 5) completely to clear the path for the shear bar and then unscrew the adjuster bolt (item 6).
Figure 109 Shear bar replacement
 Loading...