MAINTENANCE & AJUSTEMENTS
92
3. Remove the shear bar adjuster module (item 8, see note above for serial# 8XXXXX1.) by removing bolts (item 7).
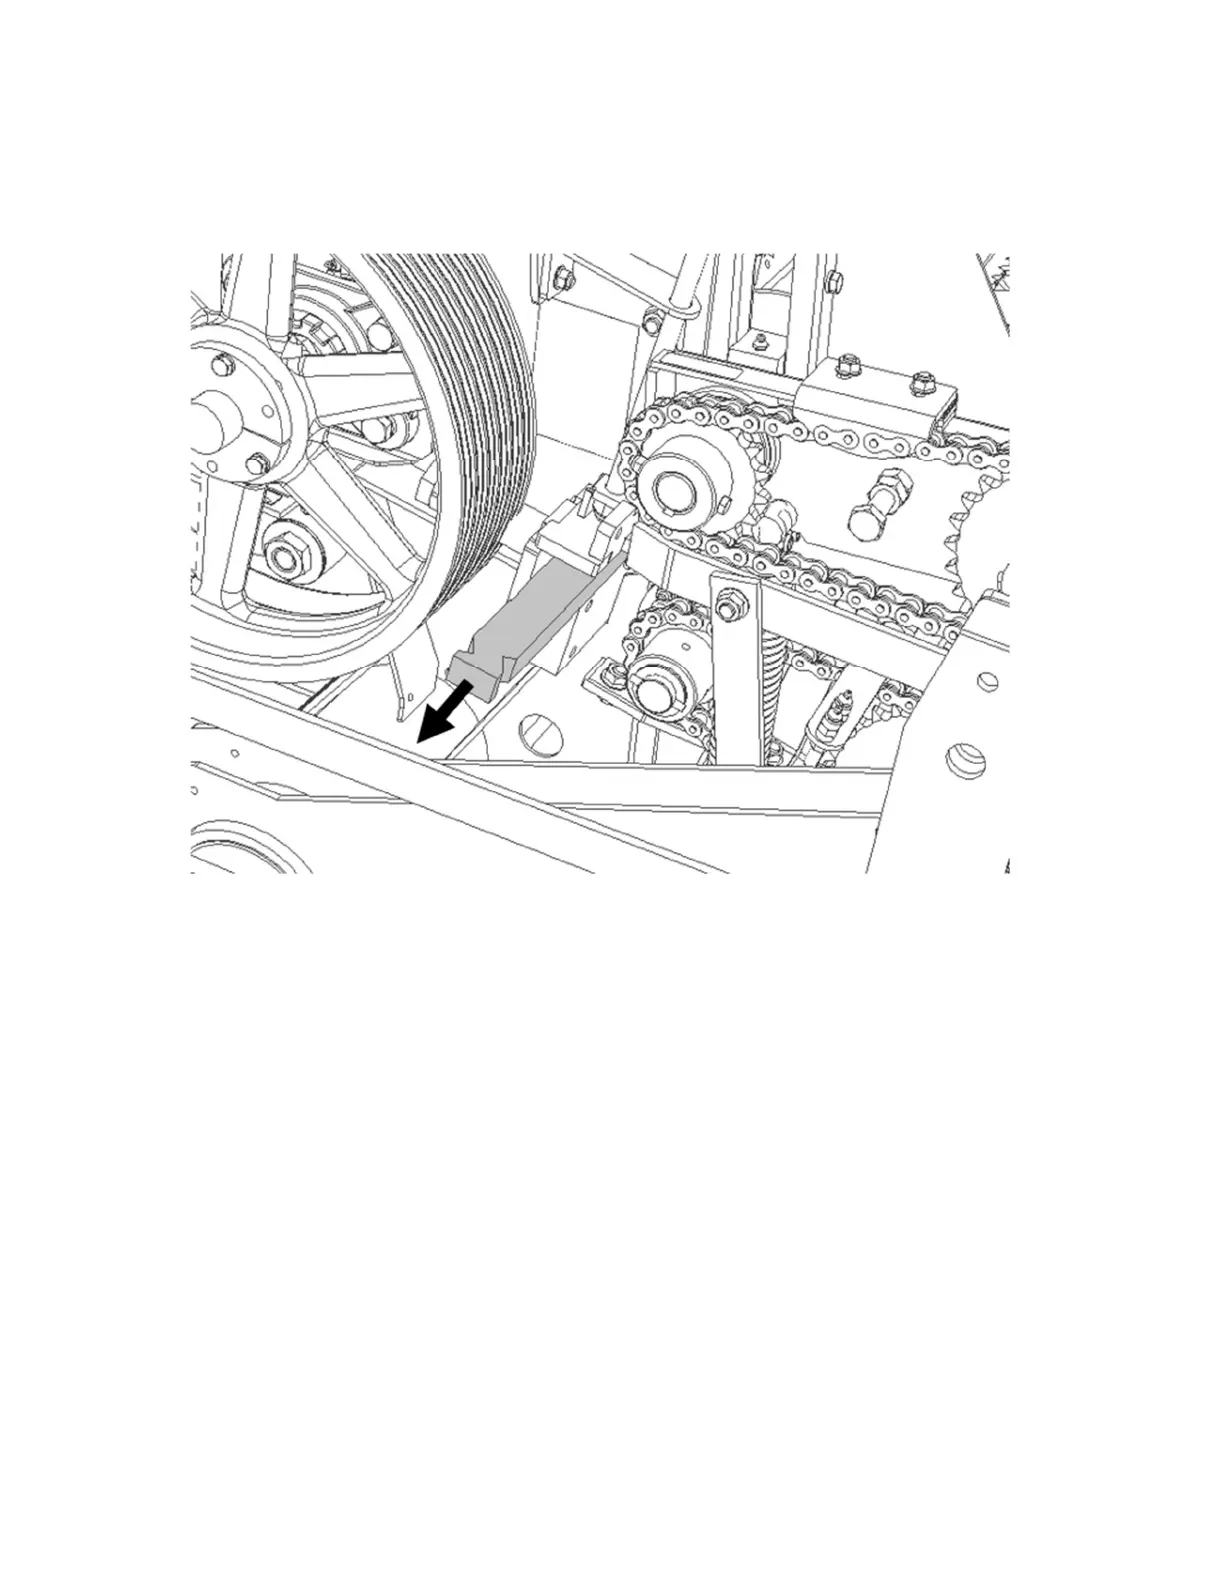
4. Remove the shear bar (Figure 110 Removing the shear bar), clean it, and verify the condition of the cutting edge.
a. If the worn edge is still sharp and the bar is straight, reinstall in the same position.
b. If 1 edge is worn or rounded but the bar is straight, reinstall with the sharp edge towards the knives.
c. If the bar has worn out both tungsten edges or is bent or warped, replace it.
Figure 110 Removing the shear bar
5. Thoroughly remove the forage debris between the bar and the smooth roll cleaner and between the shear bar
and its support.
6. Coat the entire underside of the shear bar with a thin layer of “never seize” to ensure movement when adjusting.
7. Reinstall the shear bar back in place.
NOTE: Always install the shear bar with the tungsten carbide facing upwards.
NOTE: Position the shear bar so that the parallelism adjustment screws (item 1) are embedded in the notches of the
bar (see arrow Figure 111 Shear bar initial adjustment).
IMPORTANT: Apply “Never Seize” to all bolts and the bottom of the shear bar (items 5 and 6) every time a shear bar is
replaced.
 Loading...