105
Connecting to the Nearby TV (TV1)
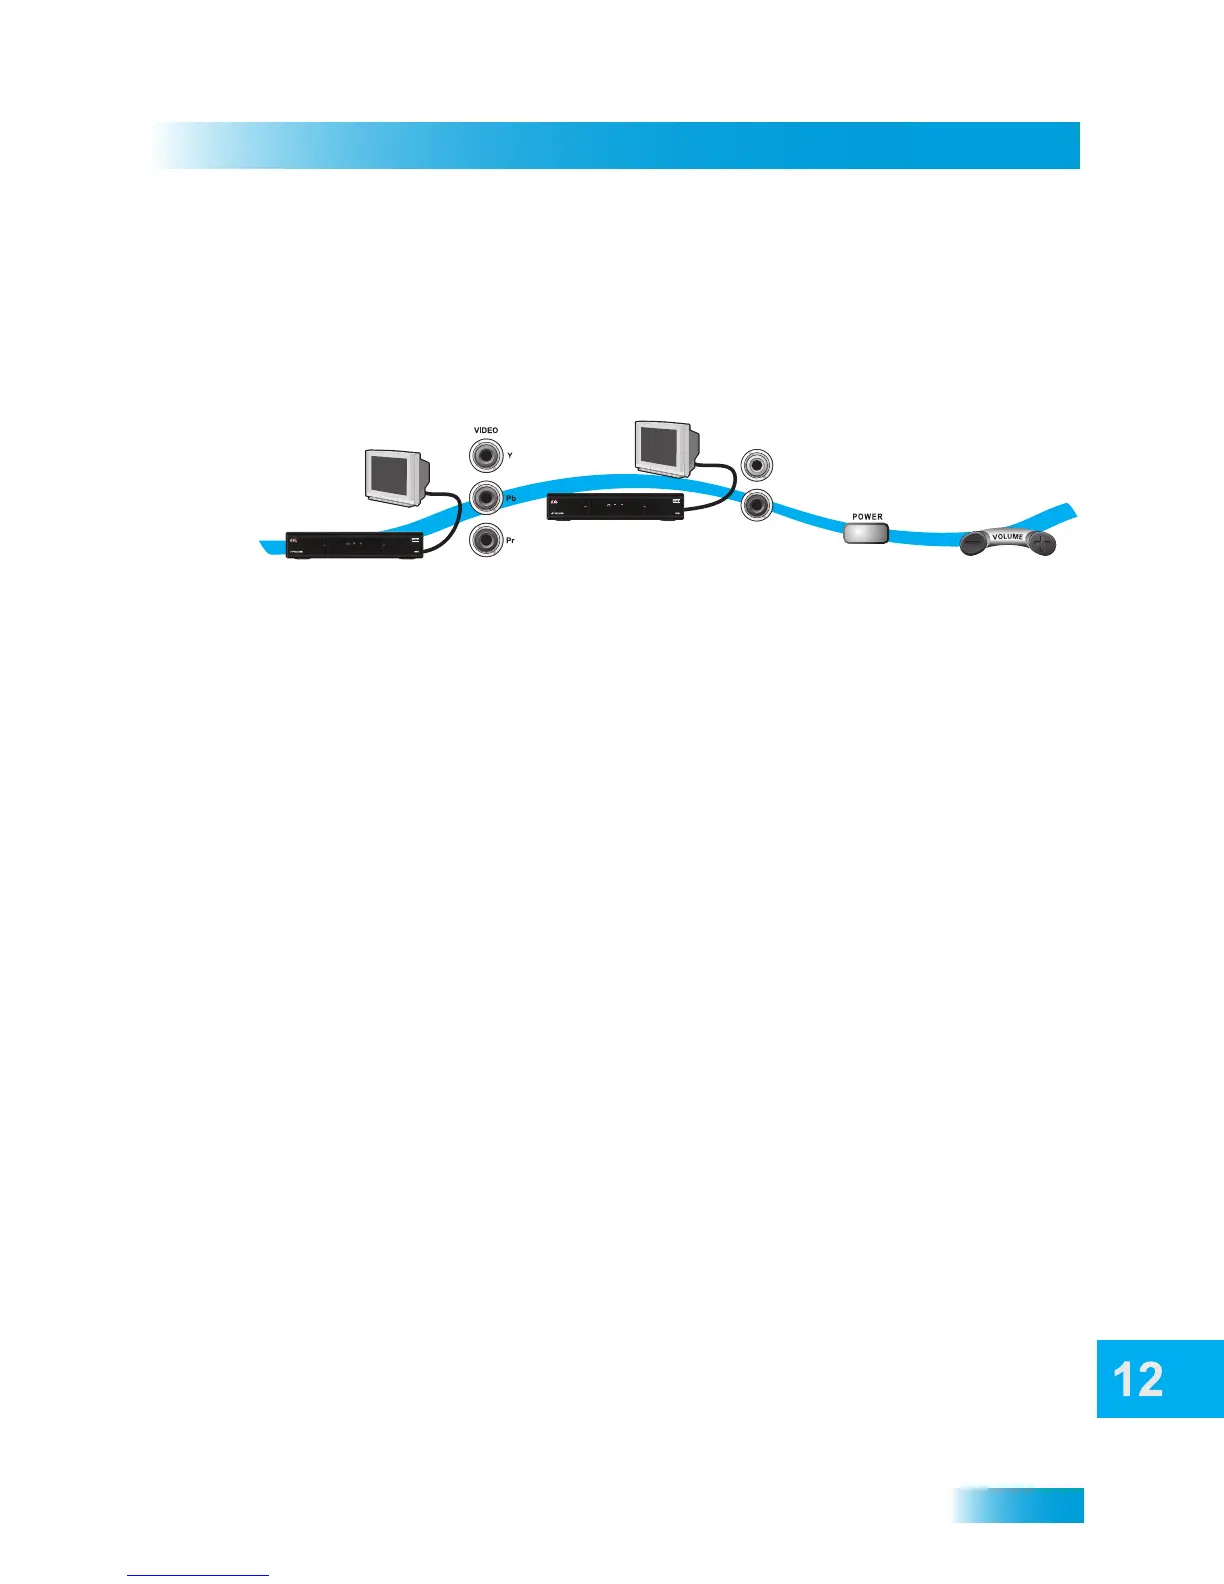
YPbPr Connections
The YPBPR (component) connections provide high-quality video to your HDTV or HD
monitor. If an HDMI audio/video connection between your receiver and nearby TV is
unavailable or not applicable, then you should use component video with separate audio.
1 Connect between the YPBPR component video connections on the receiver and the
nearby TV using component (usually red/green/blue) video cables.
2 Connect audio (red and white) RCA-type cables between the receiver AUDIO OUTPUTS and
audio input connections that go with the YPbPr connectors on your HDTV or monitor.
3 If you do not see a picture, change the resolution setting on the receiver. Use the steps
below and Setting Up to Display in HD on the next page.
4 Turn up the volume on your HDTV and confirm you have sound. Check the RCA-type
connections if you don’t have sound.
No Picture on the Nearby TV
This section will help you make a picture appear on the nearby TV in case you could not
do so in the previous sections.
1 Connect the three RCA-type cable connections (yellow for video and red/white for audio)
between the receiver TV1 O
UT and the nearby TV.
2 Make sure that both the receiver and nearby TV are turned on (not in standby or power-
saving mode).
3 Make sure the nearby TV is set to view the RCA-type audio/video inputs or source. Look
on the back of your HDTV or consult your HDTV user’s guide for more information.
4 Change the receiver’s HDTV settings, as described on page 106.
5 Switch to the nearby TV to display from the HD inputs (HDMI or component video) that
you selected in the previous sections. If you have a picture from TV1, you are finished.
6 Repeat steps 4 and 5 until the nearby TV displays a video image from the receiver.
1
3
4
Connect receiver
and monitor with
YPbPr Component
connections
Turn monitor
and receiver on
and confirm
picture
Confirm
sound and
volume
2
Connect receiver and
monitor with Audio cables
AUDIO
L
R