12
©
2017 DJI OSMO All Rights Reserved.
Balancing
To obtain the best performance from the Ronin 2, proper balancing is essential. Accurate
balance is critical for shots where the Ronin 2 will be subjected to fast motion or
acceleration (running, biking, moving in cars, attached to aircraft, etc.). Proper balance
will also offer longer battery runtimes. There are three axes that need to be accurately
balanced prior to turning on the Ronin 2 and setting up the software.
Before Balancing
1. Before balancing the camera, connect the SDI cable and the camera’s power cable
and install a Focus system.
2. The camera needs to be fully congured, with all accessories and cables connected,
prior to installing and balancing the camera on the gimbal. If the camera has a lens
cap, be sure to remove it prior to balancing.
3. Be sure that the Ronin 2’s power and camera are turned off while balancing the
camera.
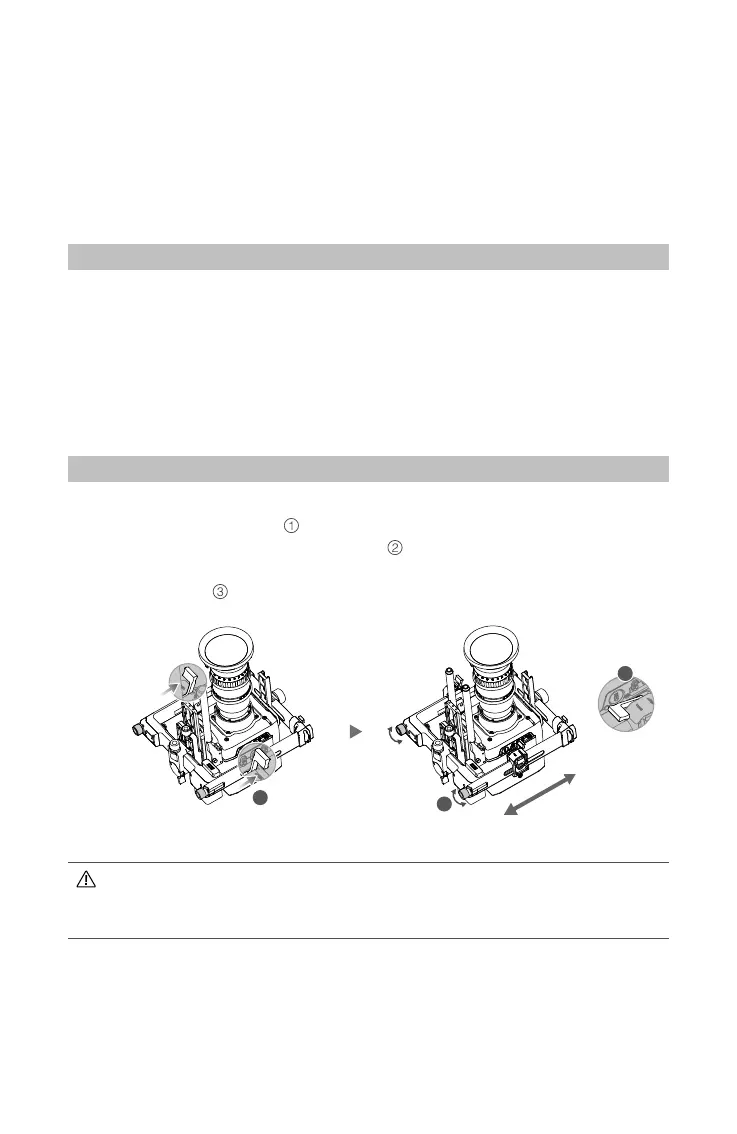
Step 1: Balancing the Vertical Tilt
1. Unlock the tilt axis. Rotate the tilt axis so that the camera lens is pointing up.
2. Push up on the side levers
to their unlocked position. Then adjust the camera's
balance by turning the adjustment knob
. Make adjustments until the camera
appears balanced without tilting up or down.
3. Tighten the levers
.
1
2
3
Ensure that the measurement marks match up on both of the vertical bars. If
they do not match up, the assembly could possibly be skewed higher or lower
on one side, which would cause the tilt motor to bind.