©
2017 DJI OSMO All Rights Reserved.
21
Gimbal Settings
Built-in Touch Panel Settings
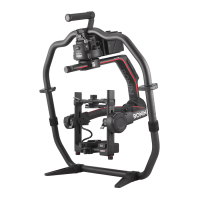
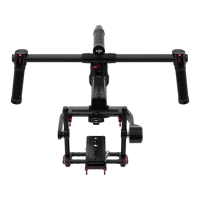
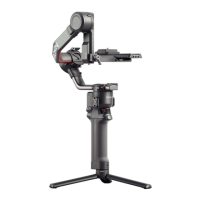
After balancing and powering on the Ronin 2, you can adjust gimbal settings directly on
the Built-in Touch Panel.
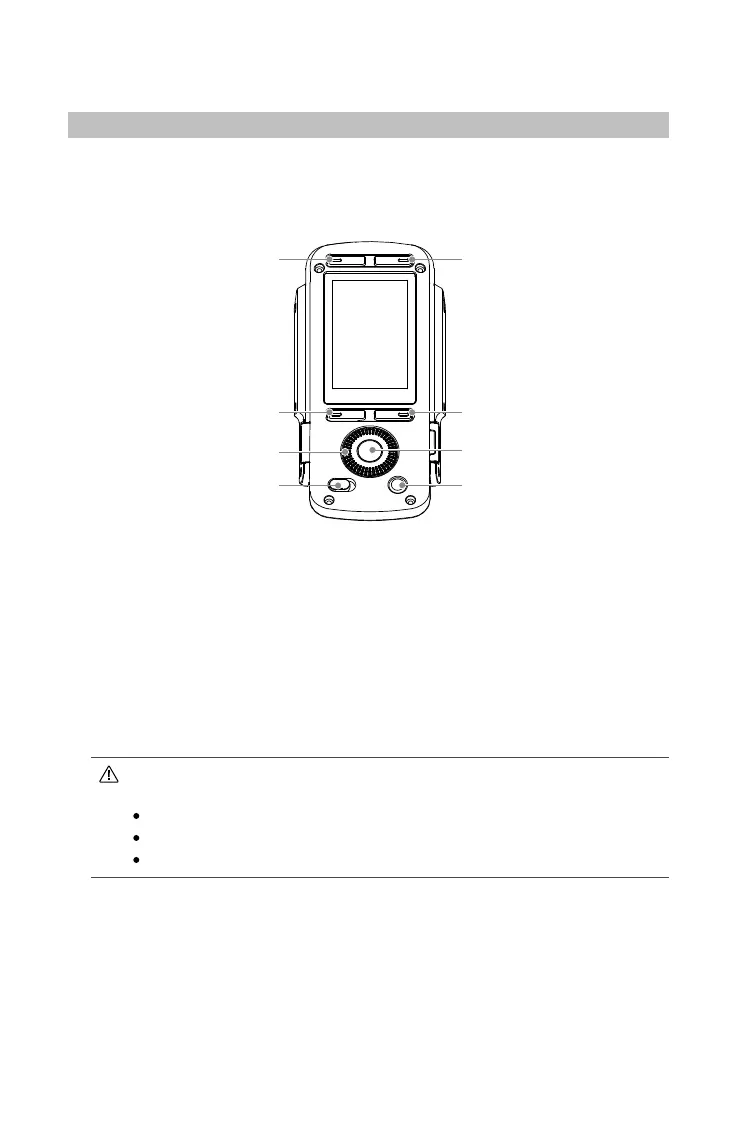
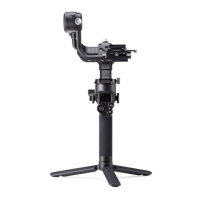
Buttons Description
Follow Mode ButtonMounting Mode Button
Back Button
Toggle Button
Jog Wheel
OK Button
Lock Button
Motor Pause Button
1. Mounting Mode Button
Press the Mounting Mode button to select a mounting mode.
Handheld: Select Handheld mode when using the Ronin 2 handheld.
Car Mount: Select Car Mount mode when mounting the Ronin 2 on vehicle-mounted
camera jibs. The Ronin 2 can remain stable for high-speed situations using the built-in
GPS and offer increased holding strength.
Aerial: Select Aerial mode when mounting the Ronin 2 onto an aircraft and connected
to a DJI A3 Flight Controller.
Tripod Mode: Select Tripod mode with static shots or when using a cable cam. Even
for long periods of lming, the gimbal will not drift.
If the Ronin 2 needs to be mounted on different mounting plates and switched
between them, it is recommended to select the mounting modes listed below:
Aerial, Car Mount and Handheld: select Aerial mode.
Aerial and Handheld: select Aerial mode.
Car Mount and Handheld: select Car Mount mode.
2. Follow Mode Button
Press the Follow Mode button to select a Follow mode.
Free Mode: The Ronin 2 will stay in its current position, regardless of Grip movement.
Follow Mode: When Follow mode is enabled, the camera operator can “steer” the
Ronin 2 on a selected axis. When the Grip is rotated left or right, the camera will
smoothly follow the user’s input and stop at the appropriate angle. The SmoothTrack
settings are applied in this mode, and the settings for the pan, roll, and tilt axes can
be independently adjusted. SmoothTrack settings are affected when Follow mode is