Ronin 2
User Manual
©
2017 DJI OSMO All Rights Reserved.
17
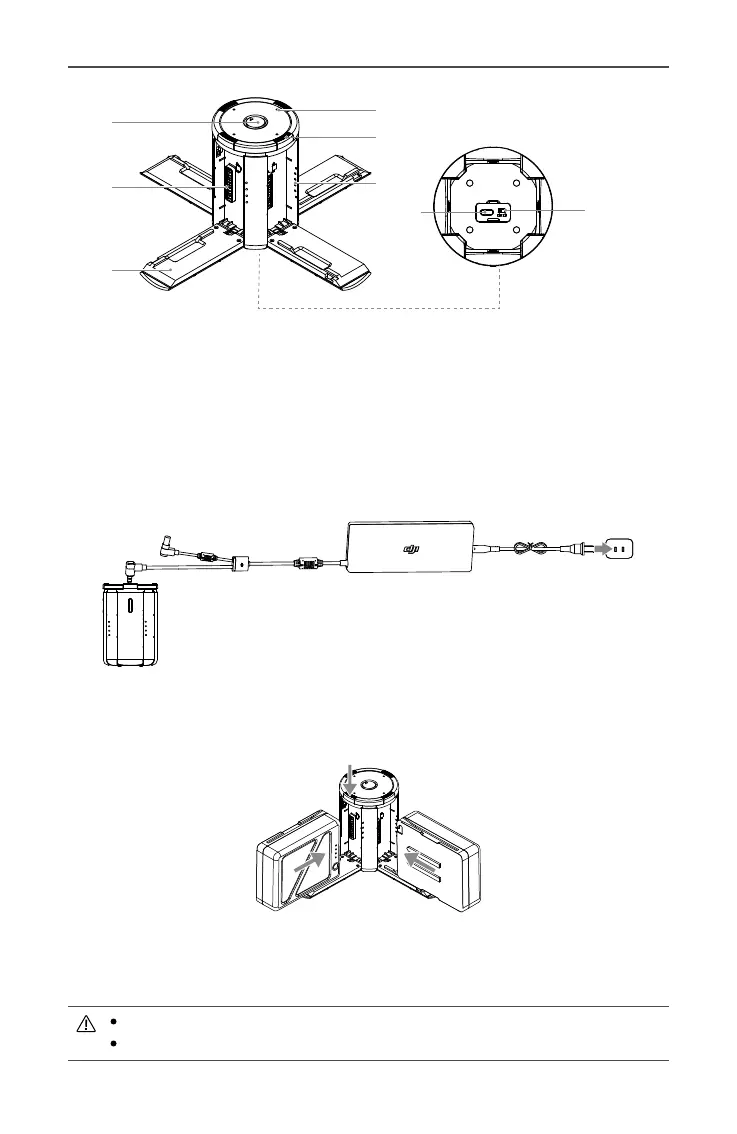
1. Connect the Battery Charger to a power outlet (100-240 V, 50/60 Hz), then uncover the
rubber cover on the power port to connect the Charging Hub to the Battery Charger.
2. Press the Release button and open the corresponding charging port cover. Insert the
Intelligent Battery into the charging port to begin charging.
Power OutletCharging Hub Charger
3
1
2
8
6
5
4
7
1. Power Port
2. Charging Port
3. Charging Port Cover
4. Battery Charging Level Indicators
5. Cover/Battery Release Button
6. Status LEDs
7. Firmware Update Port (Micro USB)
8. Speaker Switch
Refer to the "Status LED Descriptions” section for more information about Status LED
blinking patterns. The Speaker will begin beeping when charging is complete. Refer to the
“Speaker Beeping Descriptions” for more information about Speaker beeping patterns.
Press the Release button to detach batteries after charging is complete.
DO NOT leave metal terminals exposed to open air when not in use.