Ronin-MX
User Manual
16
©
2016 DJI All Rights Reserved.
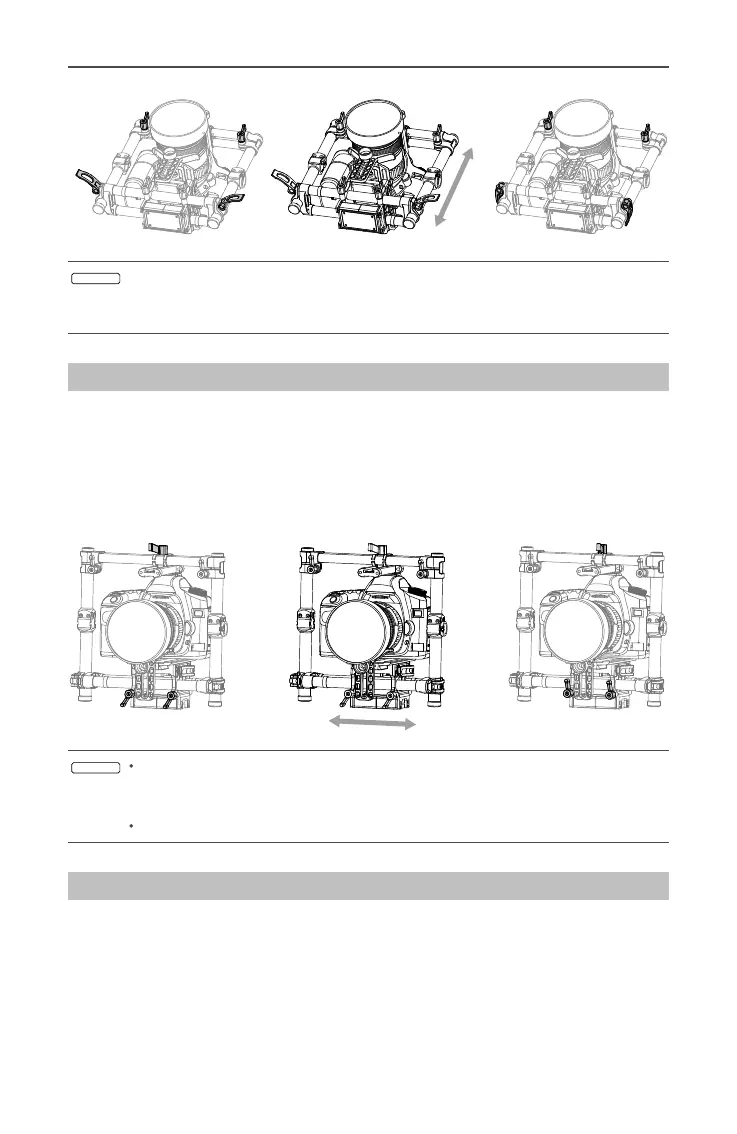
Ensure that the measurement marks match up on both of the vertical bars. If
they do not match up, the assembly may be skewed higher or lower on one
side which could cause the tilt motor to bind.
Step 2: Balancing the Roll Axis
Balancing the camera from left to right on the roll axis is also required. When the proper
left/right roll balance is achieved, the camera will remain level.
1. Loosen the three lock-knobs to allow the camera and mounting plate to slide left and
right.
2. Slide the camera left or right until the roll axis remains level.
3. Tighten the three lock-knobs to lock the camera mounting plate in position.
When adjusting the roll balance position of the camera, only loosen the three lock-
knobs a few turns to allow the camera base to slide. Do not loosen the lock-knobs
excessively.
The lock-knob can be pulled outwards and repositioned if there is an obstruction.
Step 3: Balancing the Tilt Axis
1. Loosen the camera base’s side clamp and the lock-knob on the center of the crossbar
to allow the camera and mounting plate to slide forwards and backwards.
2. Slide the camera forwards or backwards until the tilt axis remains level. Only very small
adjustments are required to achieve the proper balance.
3. Tighten the side clamp and the lock-knob to lock the camera and mounting plate in
position. When the proper fore and aft tilt balance is achieved, the camera will stay
level when you remove your hand (while holding the roll axis in position).