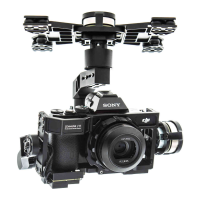
Zenmuse Z15-A7
User Manual
10
©
2015 DJI. All Rights Reserved.
Ensure the lens is pointing in the same direction as the aircraft's nose.
Ensure the top and bottom plates of the damping unit stay parallel when mounting. This prevents
stretching and distortion.
Maintain good overall balance when mounting in order to ensure the center of gravity is balanced
on each of the three axis lines.
The gimbal’s center of gravity has been set by the factory. The center of gravity directly determines
the gimbal’s overall performance. Follow the instructions in this manual to adjust the center of
gravity if you are using the Sony ILCE 7R camera, otherwise do not adjust the gimbal’s center of
gravity.
The gimbal is highly precise and depends on this precision for optimal performance. Do not remove
any screws on the gimbal, as this may result in poor performance or damage to the gimbal.
Do not unplug any cables attached to the gimbal ports or change the mechanical structure.
Make sure the wiring is correct, otherwise the gimbal may behave abnormally.
S1000+ Landing Gear
Lens Direction
Aircraft's Nose Direction
Mounting the Gimbal to the Landing Gear
The following diagram shows the gimbal mounted on a DJI S1000+. Mount the gimbal onto the landing gear
with the mounting brackets. Tighten the screws and use thread-locking uid.
You may also mount the gimbal onto different landing gear by referring to this diagram.
Whenever you test the gimbal, ensure all the screws on the gimbal are tightened.

 Loading...