The menu » Calibration «
58
The menu » Calibration «
The menu » Calibration « contains all functions needed for the calibration and
adjustment of the installed sensor.
Notes on handling the calibration gas and calibration accessories can be
found in the section "Maintenance" on page 44.
If the calibration functions have not been operated for 60 minutes, the device
will switch back to the measuring mode.
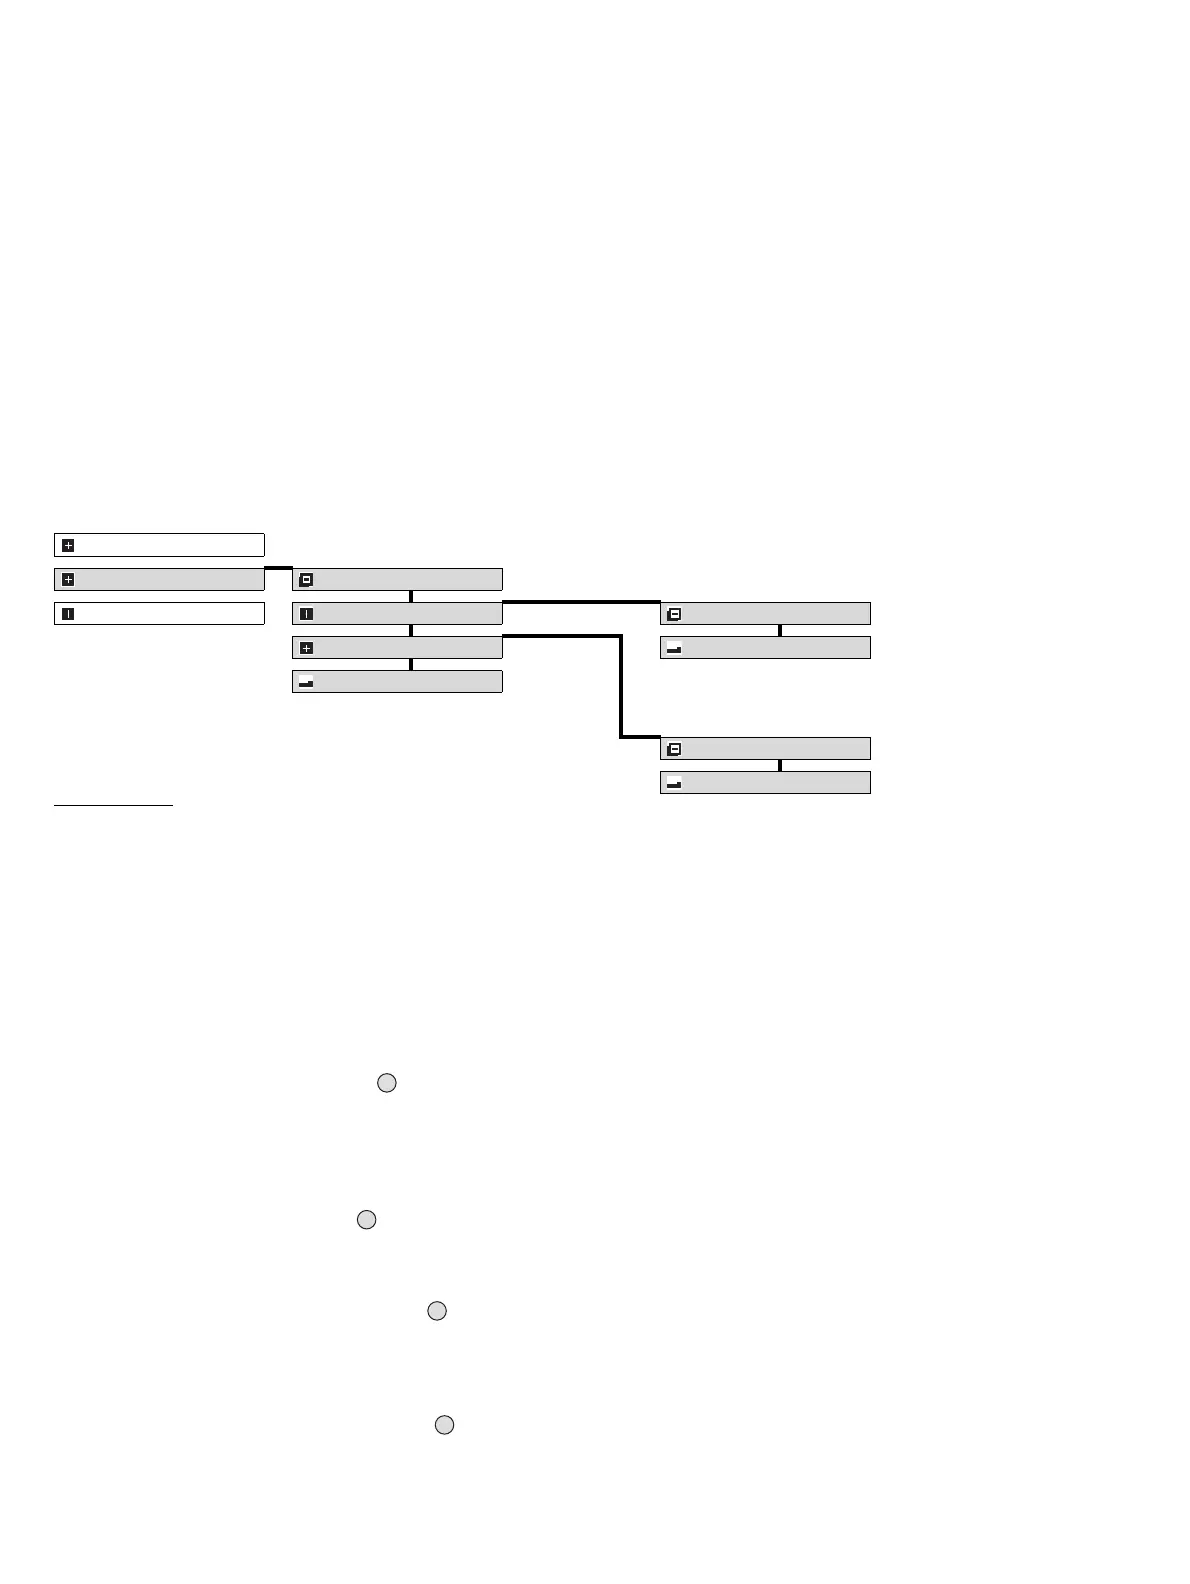
Overview
Submenu » Zero calibration «
The submenu » Zero calibration « contains the functions for calibrating /
adjusting the zero point of the installed sensor.
Zero-point calibration / adjustment
Calibration procedure (using an EC–H
2
S sensor as an example):
Select the menu items » Calibration «, » Zero calibration « and » EC–
H
2
S « in this order, pressing the » « key after each selection.
— The maintenance signal is transmitted on the analogue interface.
— The alarm and fault relays are not triggered.
— The message » Supply zero gas with flow rate 500 mL/min" is displayed
Connect zero gas to the sensor (for some sensors, N
2
must be used – see
information in the section "Maintenance" on page 44).
Select » Next « and press the » « key.
— The current value and the expired time are now displayed.
When the displayed value has stabilised:
Select » Accept value « and press the » « key.
— The message » Zero calibration running « is displayed
— The required value and the actual value are now displayed.
If these are correct as displayed:
Select » Back to menu « and press the » « key.
Disconnect the flow of zero gas.
Information
Calibration Calibration
Settings Zero calibration
page 58
Zero cal.
page 58
Span calibration
page 59
EC–H
2
S
1)
1) The sensor shown in the overview serves only as an example and may differ from the sensor actually installed in the unit.
page 58
Auto calibration
page 60
Span calibration
EC–H
2
S
1)
page 59
OK