30 of 36
User Manual - ProVideo GUI v1.2.4
Alternatively you can use the automatic table generation. Therefore you should point the
camera at a grey test image which is evenly illuminated, so that you can detect both hot
and dead pixels. If you just want to spot hot pixels it is sufficient to place the lens cap on
the lens to generate a dark test image for the camera. Then configure the "Correction
Mode" to "Combined" and increase the detection level of the automatic detection until all
defect pixels are corrected. Then click "Automatic Table Generation" and it will
automatically fill the table.
Do not forget to click "Transmit Table to Device", with “Save Table Permanently” checked,
to store the table on the camera.
You can then change the "Correction Mode" to "Table Based", or leave it on “Combined”
and reduce the auto detection level to reduce the occurrence of false positives.
Please note that if you change the image orientation by using the Flip setting (see chapter
4.1 point 19) you will have to re-calibrate your defect pixel table
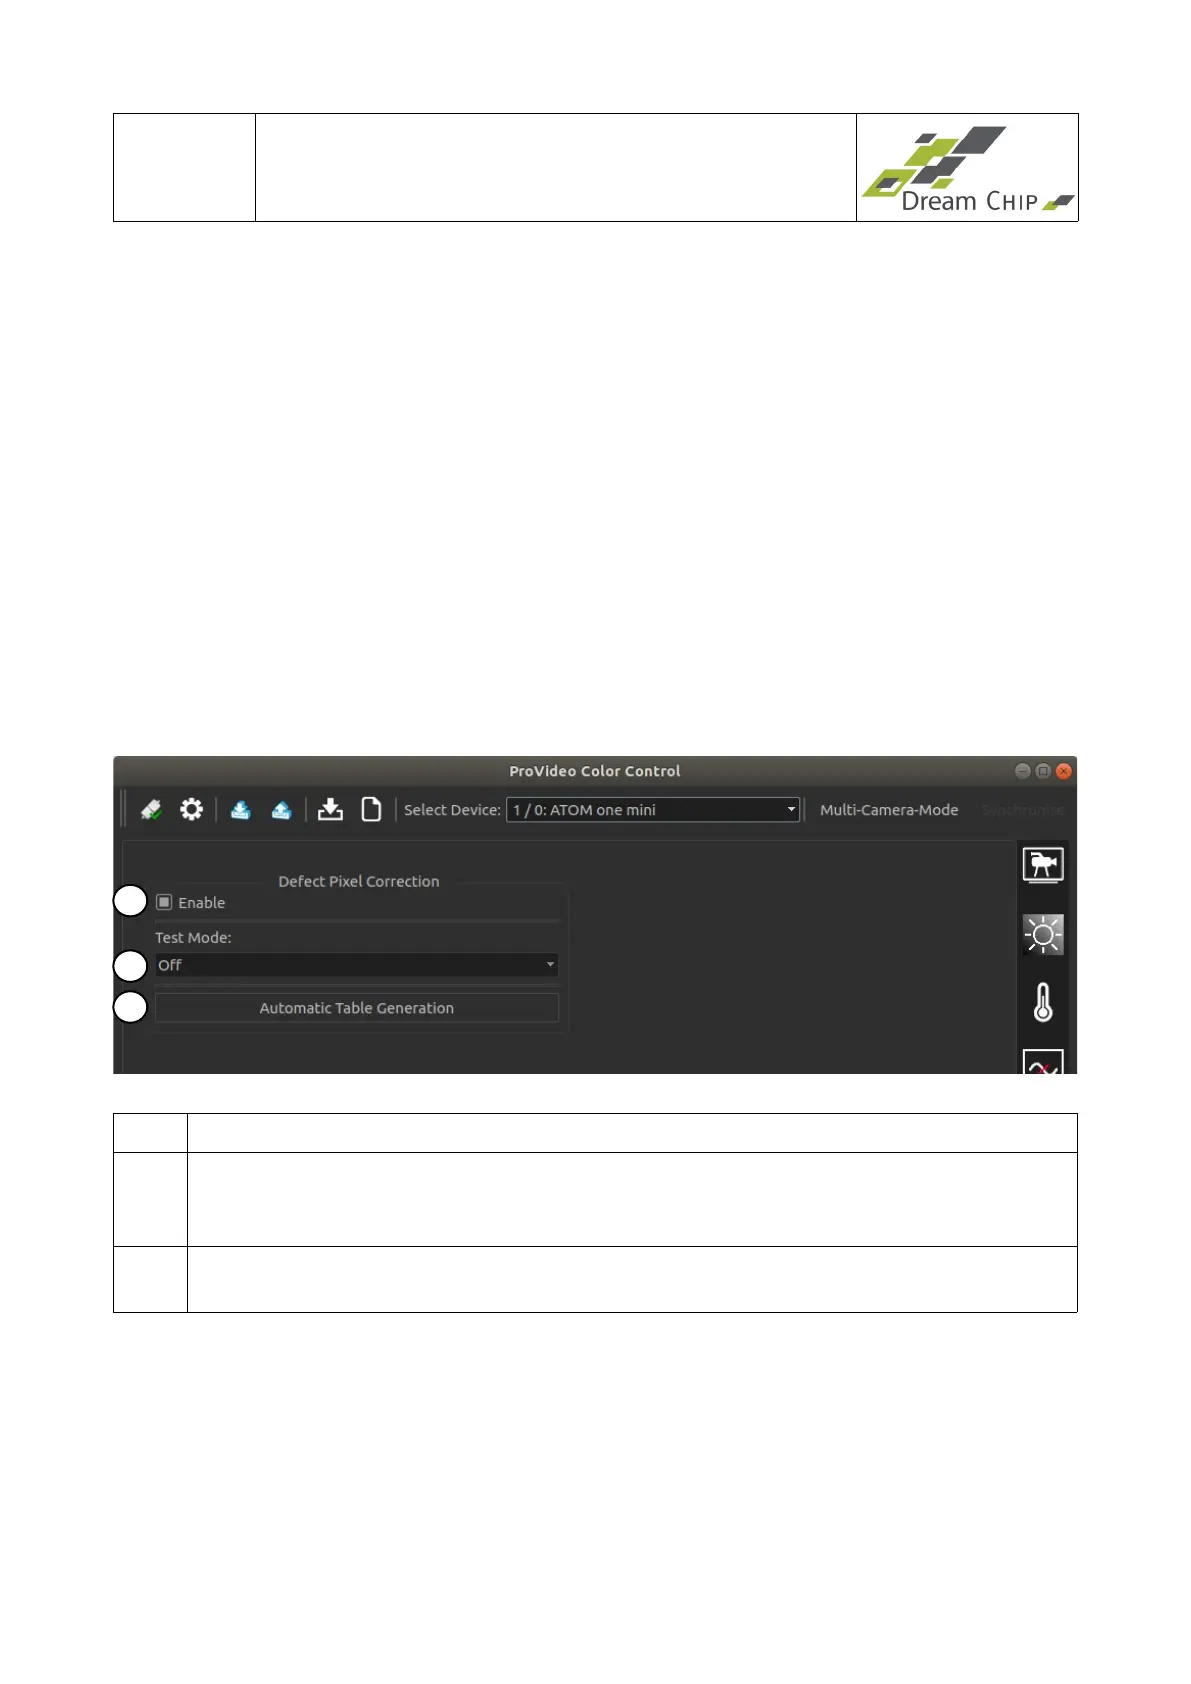
4.11 Defect Pixel Correction Tab – Reduced Version (ATOM one mini
and ATOM one SSM500)
1 Enable the defect pixel correction module.
2 The “Calibration” test mode will configure a black and white output mode, in which
defect pixels can be spotted more easily. The “Validation” mode will turn the output
image black and highlight currently setup defect pixels.
3 Automatically generate defect pixel tables for all image rotations (see chapter 4.1
point 19). For more details see the notes below.
How-To use the defect pixel correction:
The ATOM one mini (including the AIR and waterproof variants) and ATOM one SSM500
models only support a simple defect pixel correction mechanism. It does not support
automatic correction during runtime and the user can not edit the defect pixel table.
Instead a one-shot calibration is done which has to be repeated from time to time if new
defect pixels occur.
To calibrate the defect pixel correction place the lens cap on the lens to generate a dark
1
2
3