5 of 36
User Manual - ProVideo GUI v1.2.4
3 General navigation
After the connection was established, the main window will open. It has toolbar for general
options and a sidebar to navigate through the sub pages of the GUI.
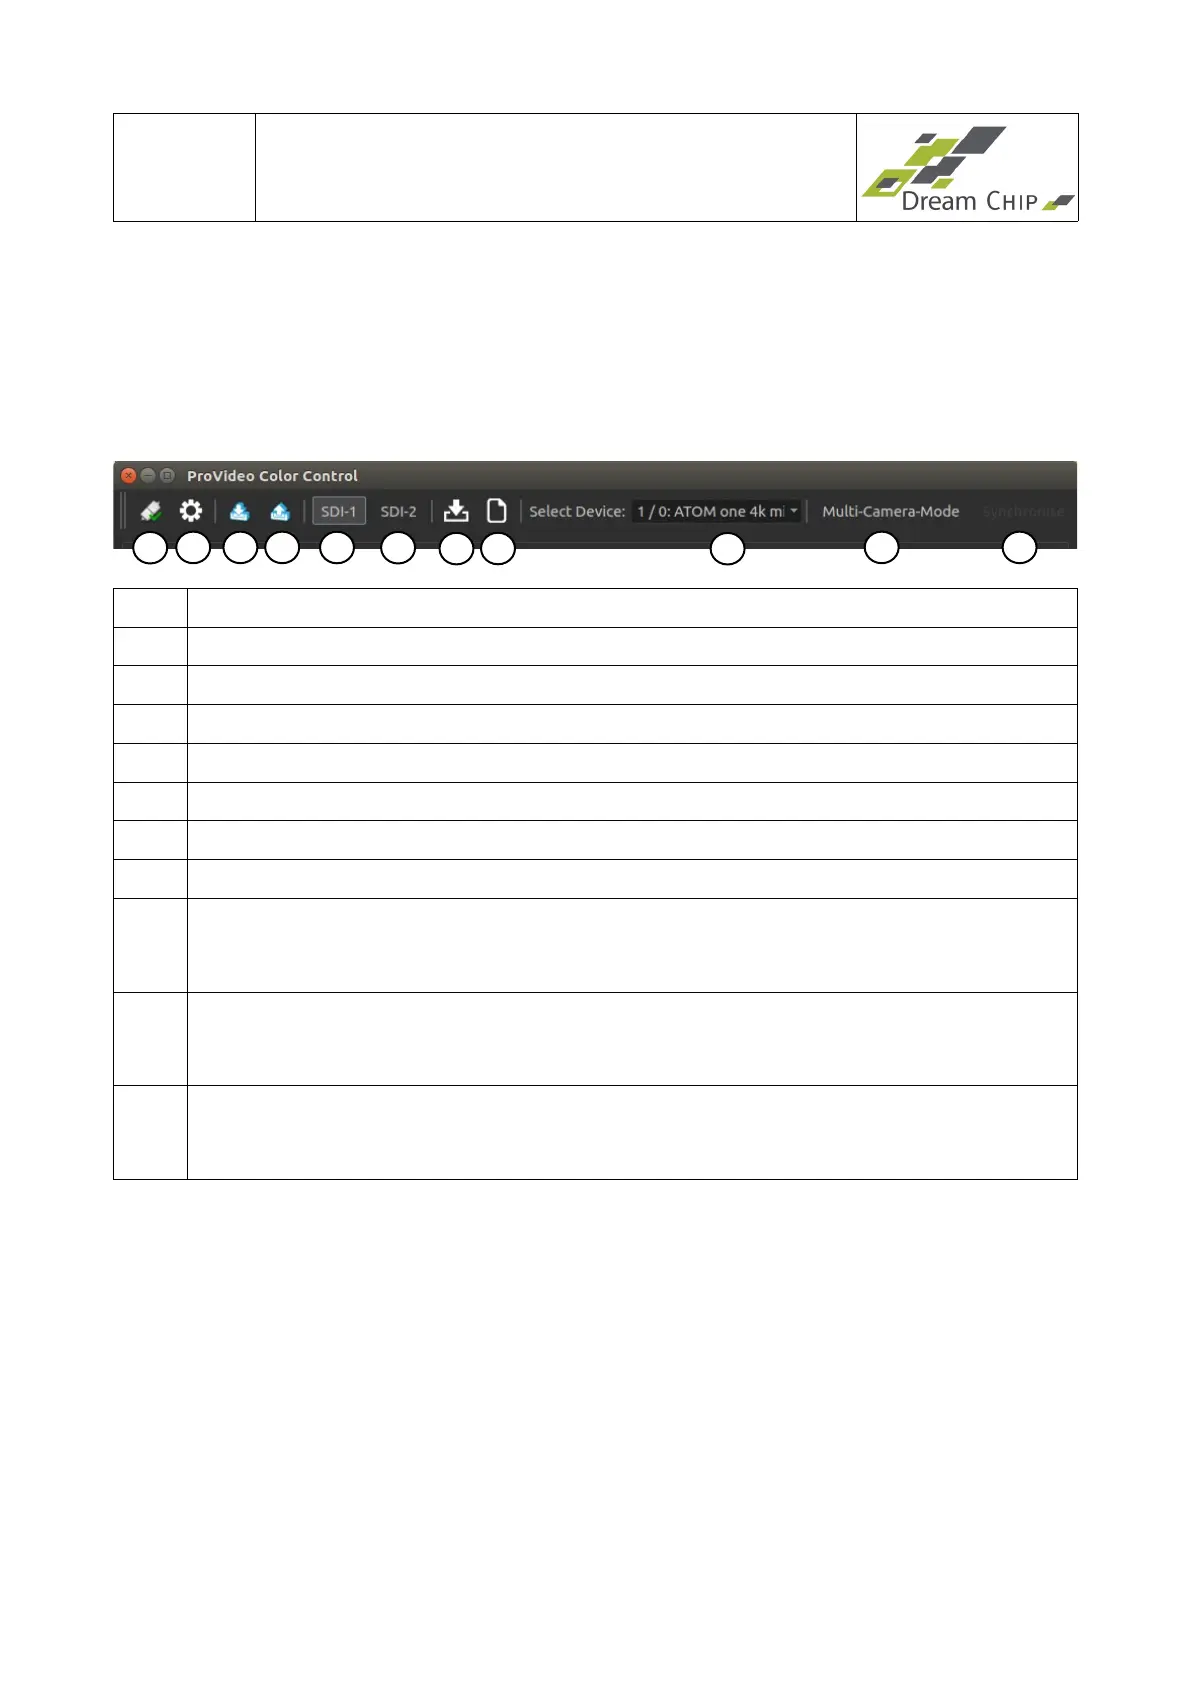
3.1 Toolbar
1 Open the connect dialog (see chapter 2).
2 Open the system settings dialog ( see chapter 3.3)
3 Load settings from camera to GUI.
4 Save settings from GUI to camera for startup configuration.
5 Switch to configuration of SDI 1 LUT.
6 Switch to configuration of SDI 2 LUT.
7 Save current system settings to disk.
8 Load settings from disk into GUI and transfer them to the device.
9 Switch between connected devices. Only visible if the auto-detection was used to
connect with the device over RS485. The first number represents the device
address, the second number the device broadcast address.
10 Toggle broadcast mode. In broadcast mode the currently selected device will be
the broadcast master, all other devices in the same broadcast group will be slaves.
Settings applied to the master will also be applied on all slaves.
11 The Synchronise button is only enabled, if broadcast mode is active. Click it to
apply the settings of the current device (broadcast master) on all other devices
(broadcast slaves).
Note regarding ATOM one SSM500 cameras in Trigger Mode:
The ATOM one SSM500 in Trigger Mode has two independent chains (Live and Playback).
The “SDI-1” and “SDI-2” buttons will thus be shown as “LIVE” and “PLAY” and can be used
to switch to setup of either chain.
Additionally a new button “LIVE → PLAY” will be shown if an ATOM one SSM500 in
Trigger Mode is detected. This button can be used to copy all settings from the Live chain
to the Playback chain. If you want to always apply all settings for both chains, enable the
“Link” button which is placed to the right of the “LIVE → PLAY” button.
1
2 4
5
1110
9
87
3
6