SECTION 6 COOLING SYSTEM
Page 10
TD-25M EXTRA DRESSTA
23. Remove bolts securing front radiator door, and swing them open. Remove upper and lower air
baffles (2, Fig. 6.6).
24. Tag and remove hydraulic hoses (1, 3 and 4, Fig. 6.6) from fan drive hydraulic motor. Secure
hoses in an upright position to frame.
25. Use the slings to lift the radiator. Wrap the slings around the radiator bottom plate
and tighten.
IMPORTANT: Do not use the hydraulic motor bracket for radiator assy hoisting.
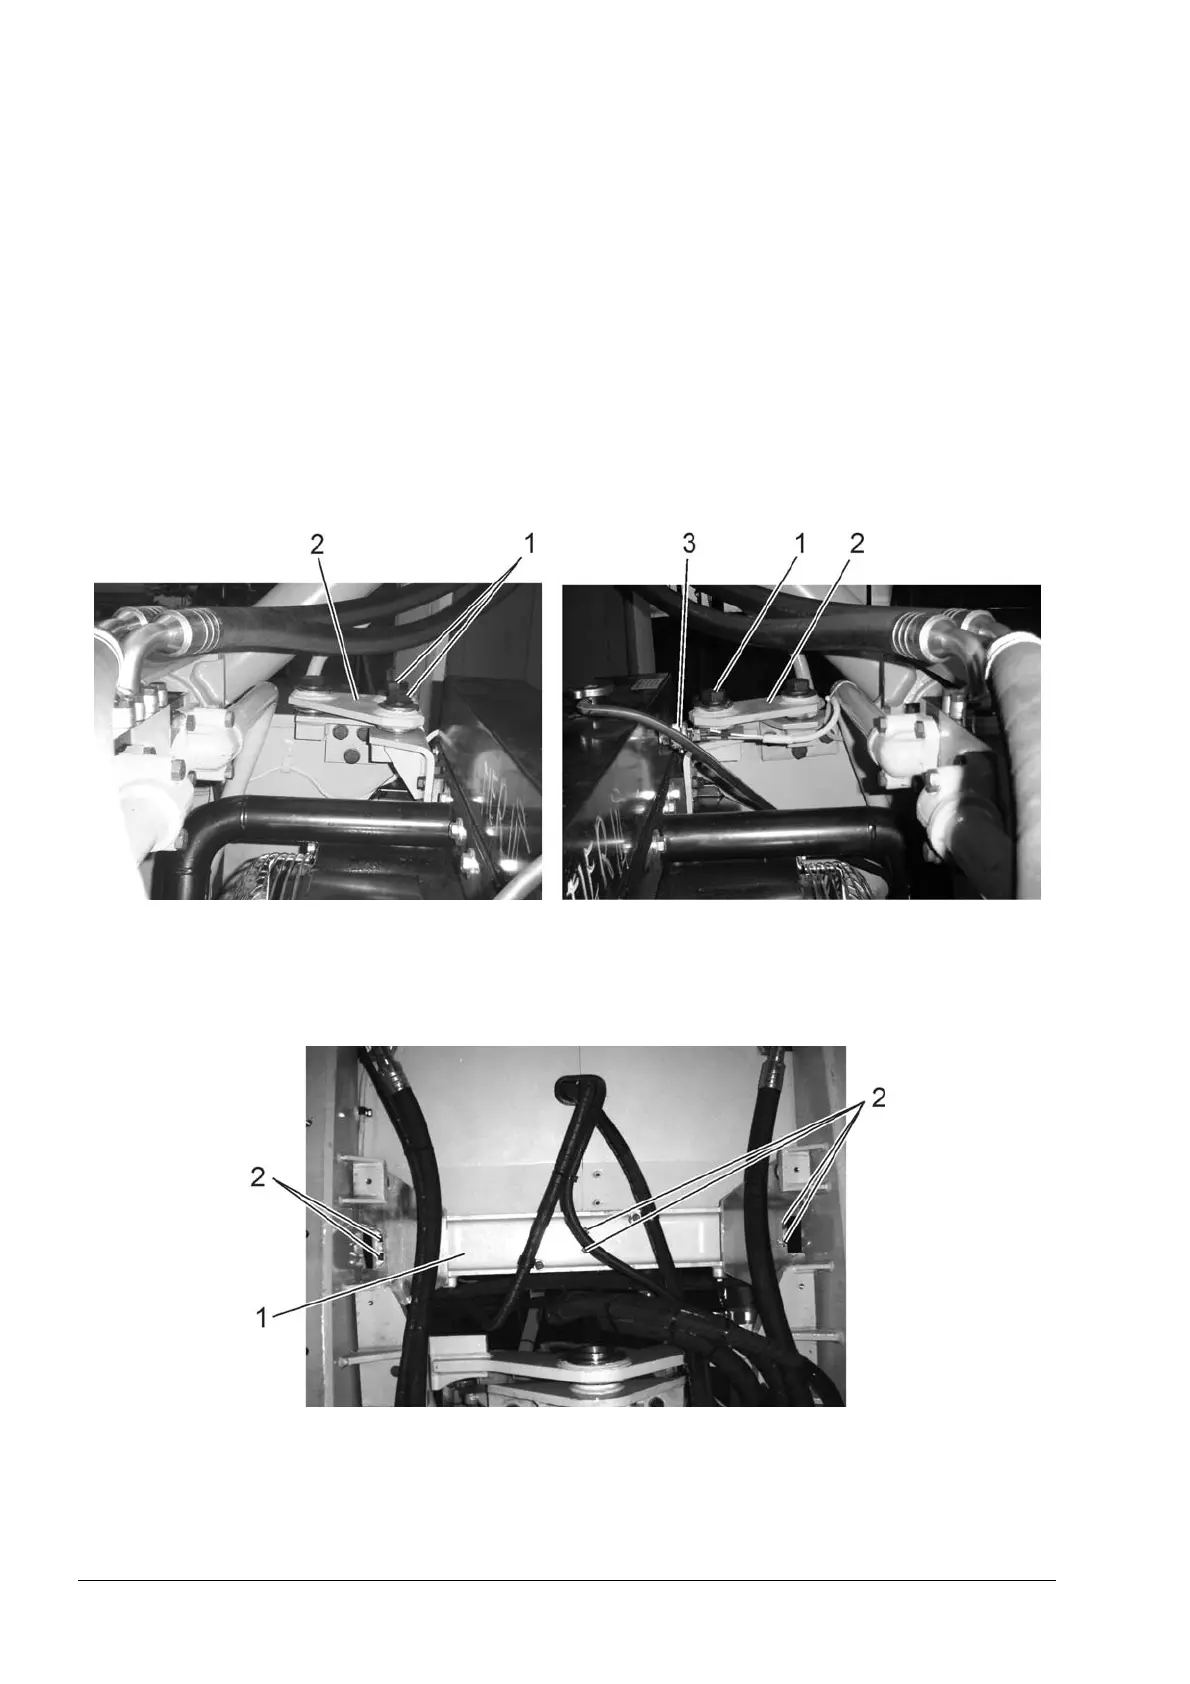
26. Unscrew bolts (1, Fig. 6.7) securing radiator to plate (2).
27. Unscrew bolts (2, Fig. 6.8) securing radiator assy to channel (1) at the bottom.
28. Carefully hoist the radiator assy up and over frame. Position assy horizontally hydraulic motor
up, using suitable height wooden pads.
Fig. 6.7. Radiator Assy Disassembly Points LH and RH (upper brackets)
1. Bolts
2. Plate (link)
3. Coolant Level Switch
Fig. 6.8. Radiator Assy Disassembly Points (bottom view)
1. Radiator Assy Channel (bracket) 2. Mounting Bolts
 Loading...