36
DEHUMIDIFIER INSTALLATION, OPERATION, AND MAINTENANCE MANUAL
INSTALLATION
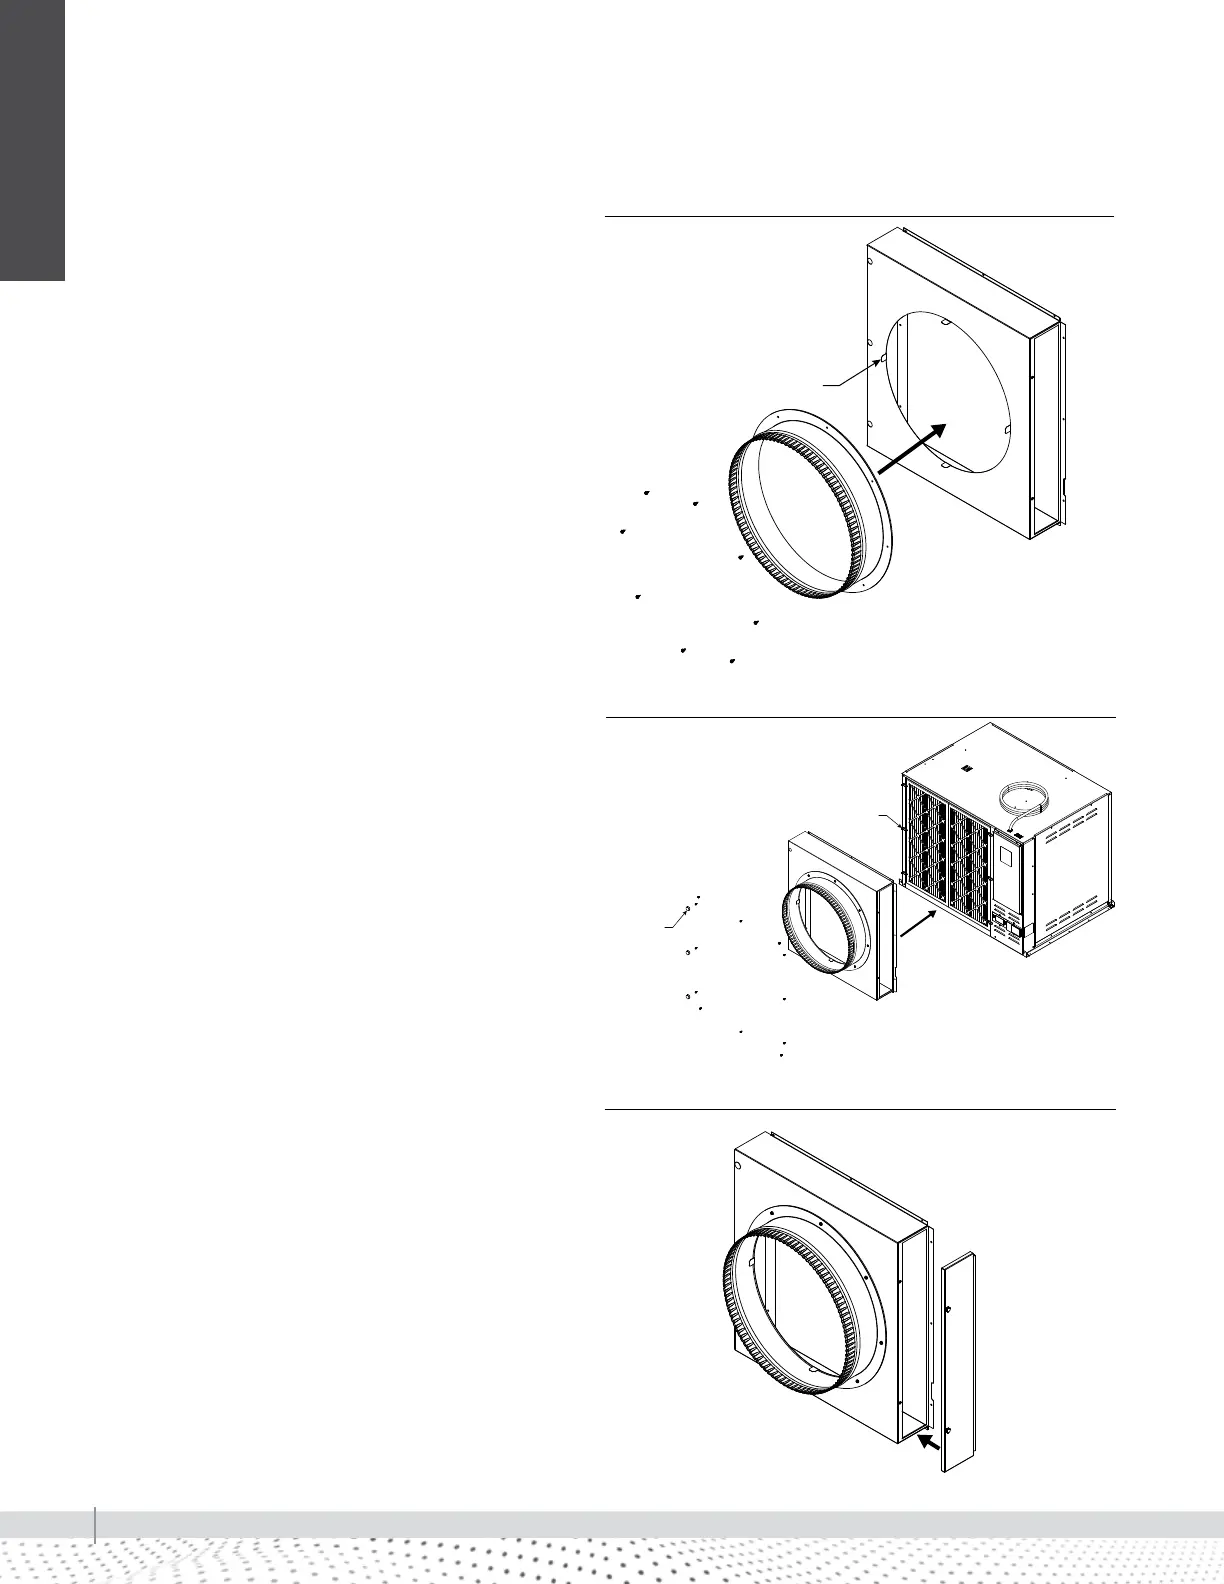
ALIGNMENT TABS x4
REMOVE 6 CLIPS
90-2582
90-2583
90-2584
DUCT KIT INSTALLATION
1. On each housing, bend the four alignment tabs so
they are protruding out of the front as shown. These
are to be used as alignment features for the 24" (610
mm) collar. See Figure 36-1.
2. Attach the assembled duct housing to the dehumidifier
using screws provided. Additional holes will need to
be made in the cabinet where holes did not previously
exist. To properly seal the unit, use a 5/32" (4 mm)
bit to pre-drill holes and use the screws provided.
If you choose to use self drilling screws, make sure
they are no longer than 1" (25 mm). To secure the
3screws on the left side of the duct kit (opposite the
filter access door), a bit extension of at least 6" (152
mm) is required. After securing all screws, insert the
sealing plugs provided into the access holes on the left
hand side. See Figure 36-2.
3. Install the filter access door and secure with the two
thumb screws. See Figure 36-3.
FIGURE 36-1: ALIGN TABS
FIGURE 36-2: ATTACH ASSEMBLED DUCT HOUSING
FIGURE 36-3: INSTALL
Model RL-31 duct installation