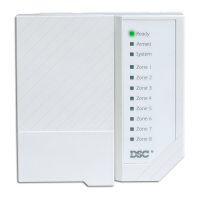
6: Power up
Connect panel battery and AC power. Once powered, view key items on the LCD. Ensure that the module has
been fully connected to the alarm panel via quad cable as shown in wiring diagram.
Step 3: Verify installer code to activate Alarm.com module
Alarms and other signals will not be sent to Alarm.com until the installer code is verified. To activate the
account, perform the following steps:
1. Connect the Alarm.com module to the panel. Ensure [382] option 5 is ON.
2. Press [*][8] to enter Installer Programming.
3. Enter the installer code.
4. Press [#] to exit Installer Programming.
To remotely activate a system that is already signaling, do the following steps:
1. Go to www.alarm.com/dealer.
2. Go to the customer's account.
3. Select the error message at the top of the page.
4. Enter the installer code.
Step 4: Perform dual-path test (module registration)
To initiate module communication with Alarm.com and the cellular network for the first time, perform a
“Dual-Path phone test”. Note that the test can also be used at any time by the installer to force communication
with Alarm.com. To test the cellular path, press and hold [3] for two seconds. To test the broadband path,
press and hold [4] for two seconds. A Dual-Path test can also be completed through the Interactive Services
menu. To perform the Dual-Path test, press [*][6] followed by the master code and [04].
The panel indicates when the test has completed by activating the siren output on medium volume for 2 seconds
followed by full volume for 2 seconds. However, if the test was initiated via the [3] or [4] key, or through the
Interactive Services menu, the siren will not sound. All display lights and LCD pixels turn on. This indicates
that Alarm.com has received and acknowledged the signal. This does not guarantee that the signal went
through to a central station; it confirms that Alarm.com’s Network Operations Center received the signal. The
central station should be contacted directly to verify that the signal was received on the correct account and
that the central station routing settings have been set up correctly. If the signal does not go through to the cent-
ral station, the panel displays a “Failure to Communicate” message. Double check the account’s central station
Forwarding Settings on Alarm.com and contact technical support if the trouble persists.
Step 5: Allow module to auto-program
After a successful dual-path test, wait 2 minutes for the module to automatically program and initialize before
entering the Installer Programming menus. Entering Installer Programming during module initialization will
cancel the process. LCD keypads display a message indicating when auto-programming is occurring and when
it has completed. During the auto-programming session, the module automatically programs panel settings
required for proper functionality with Alarm.com as noted in the “Panel Settings” section.
Enroll Alarm.com Image Sensor
Note: This feature can be enabled or disabled on the product. Please check with your installer if this feature is
activated in your application.
Alarm.com's Image Sensor built-in capability is not UL evaluated.
- 11 -
Installation