Page 49
Pulmonary Function Test • Publication 014181-001 Rev 02 • www.datasci.com ©2023 Data Sciences International
When you look at the frozen screen like this, you should go through the following check list:
Is the entire injection captured?
As shown above it clearly is. You can see this because the signal starts at zero, rises, and then
returns to zero. If not, you must Retry the injection.
Is the red line firmly on zero?
If not, you can move it down to zero or Retry the injection.
Is the entire injection within the shaded blue area?
If not, you can adjust the shaded area using your mouse, or Retry the injection.
If you are satisfied that your injection, Accept the injection to continue to the last page of the wizard.
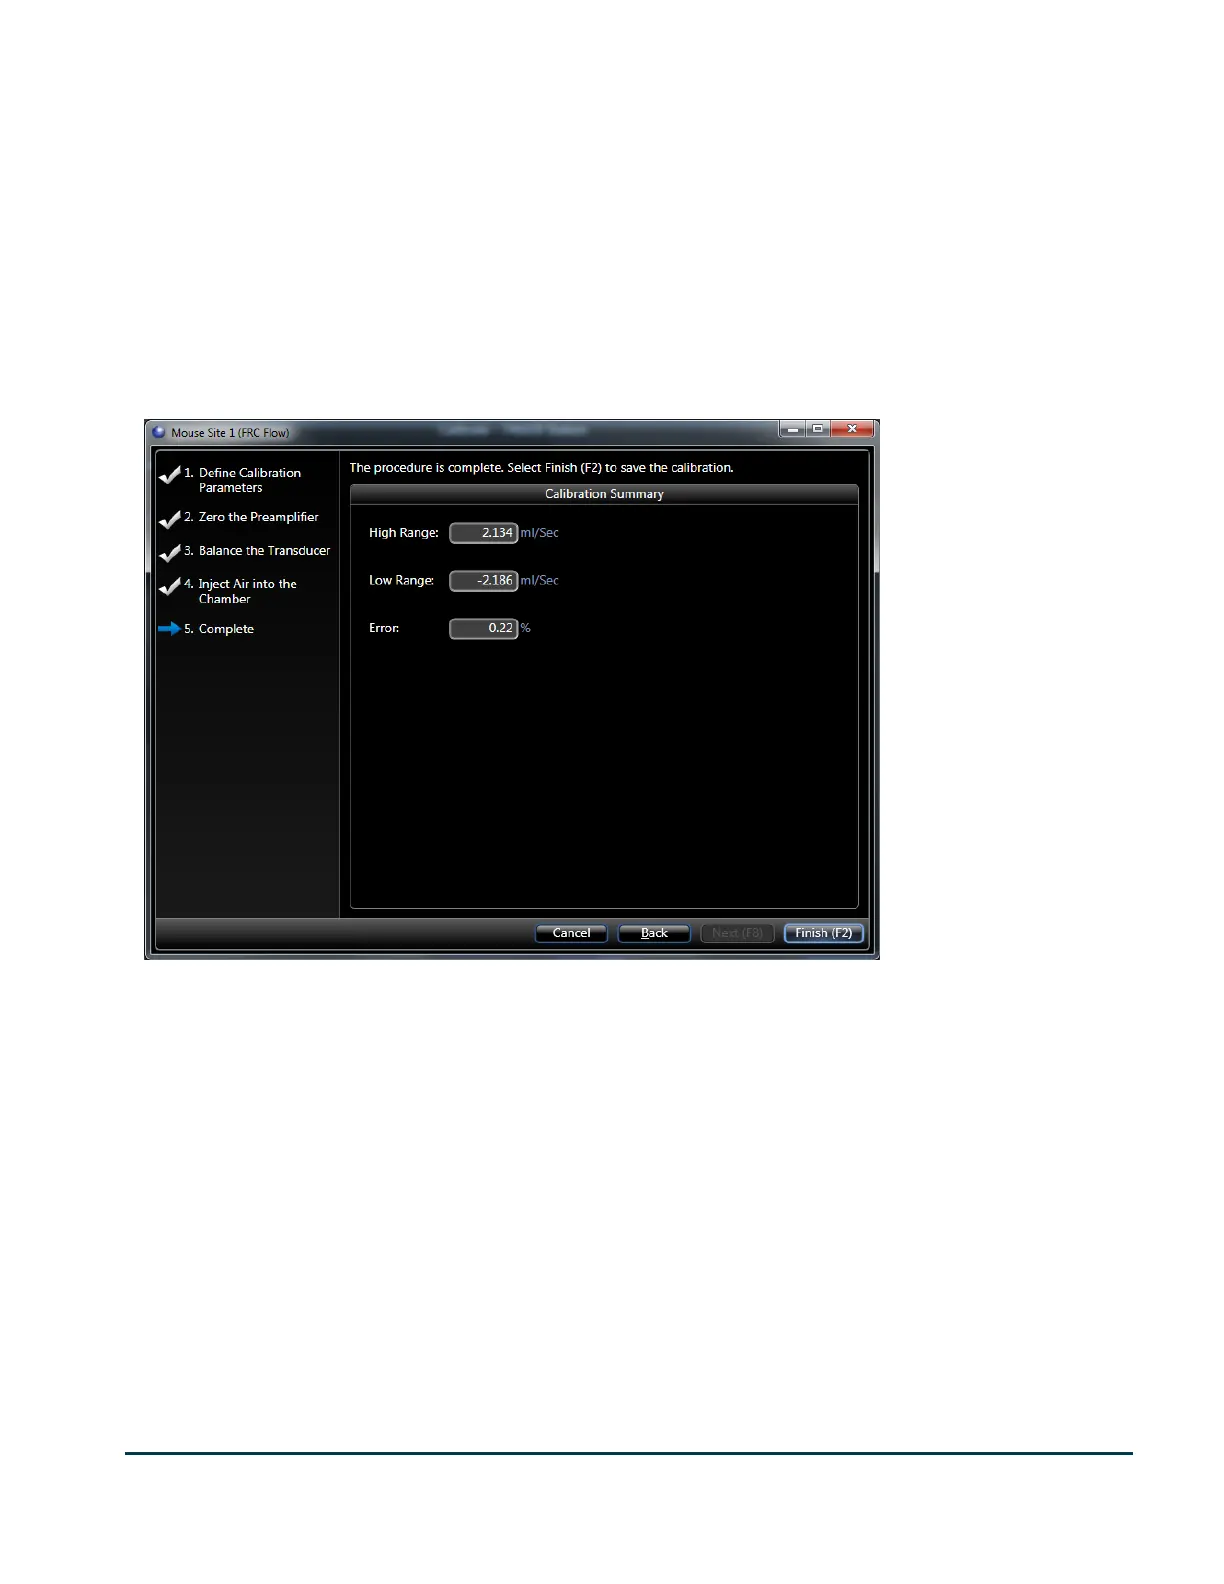
The final page of each calibration presents you with the effective range of that signal as determined by that
calibration.
The calibration wizards for the other two flows are essentially identical except the volume you inject is
progressively larger, and you should not touch the preamplifier at all. If you do, you need to repeat the FRC Flow
calibration.
Since all the flows are derived from the same preamplifier and are created by applying fixed gains, you should
observe that same relationship between the effective ranges of each of the flows. So, since the Flow gain is 4x (for
mouse) or 8x (for all other species) the gain used for High Flow, and FRC Flow gain is 5x Flow gain, then the High
Flow effective range is 4x or 8x the effective range of Flow, and the effective range for Flow is 5x the effective range
of FRC Flow.