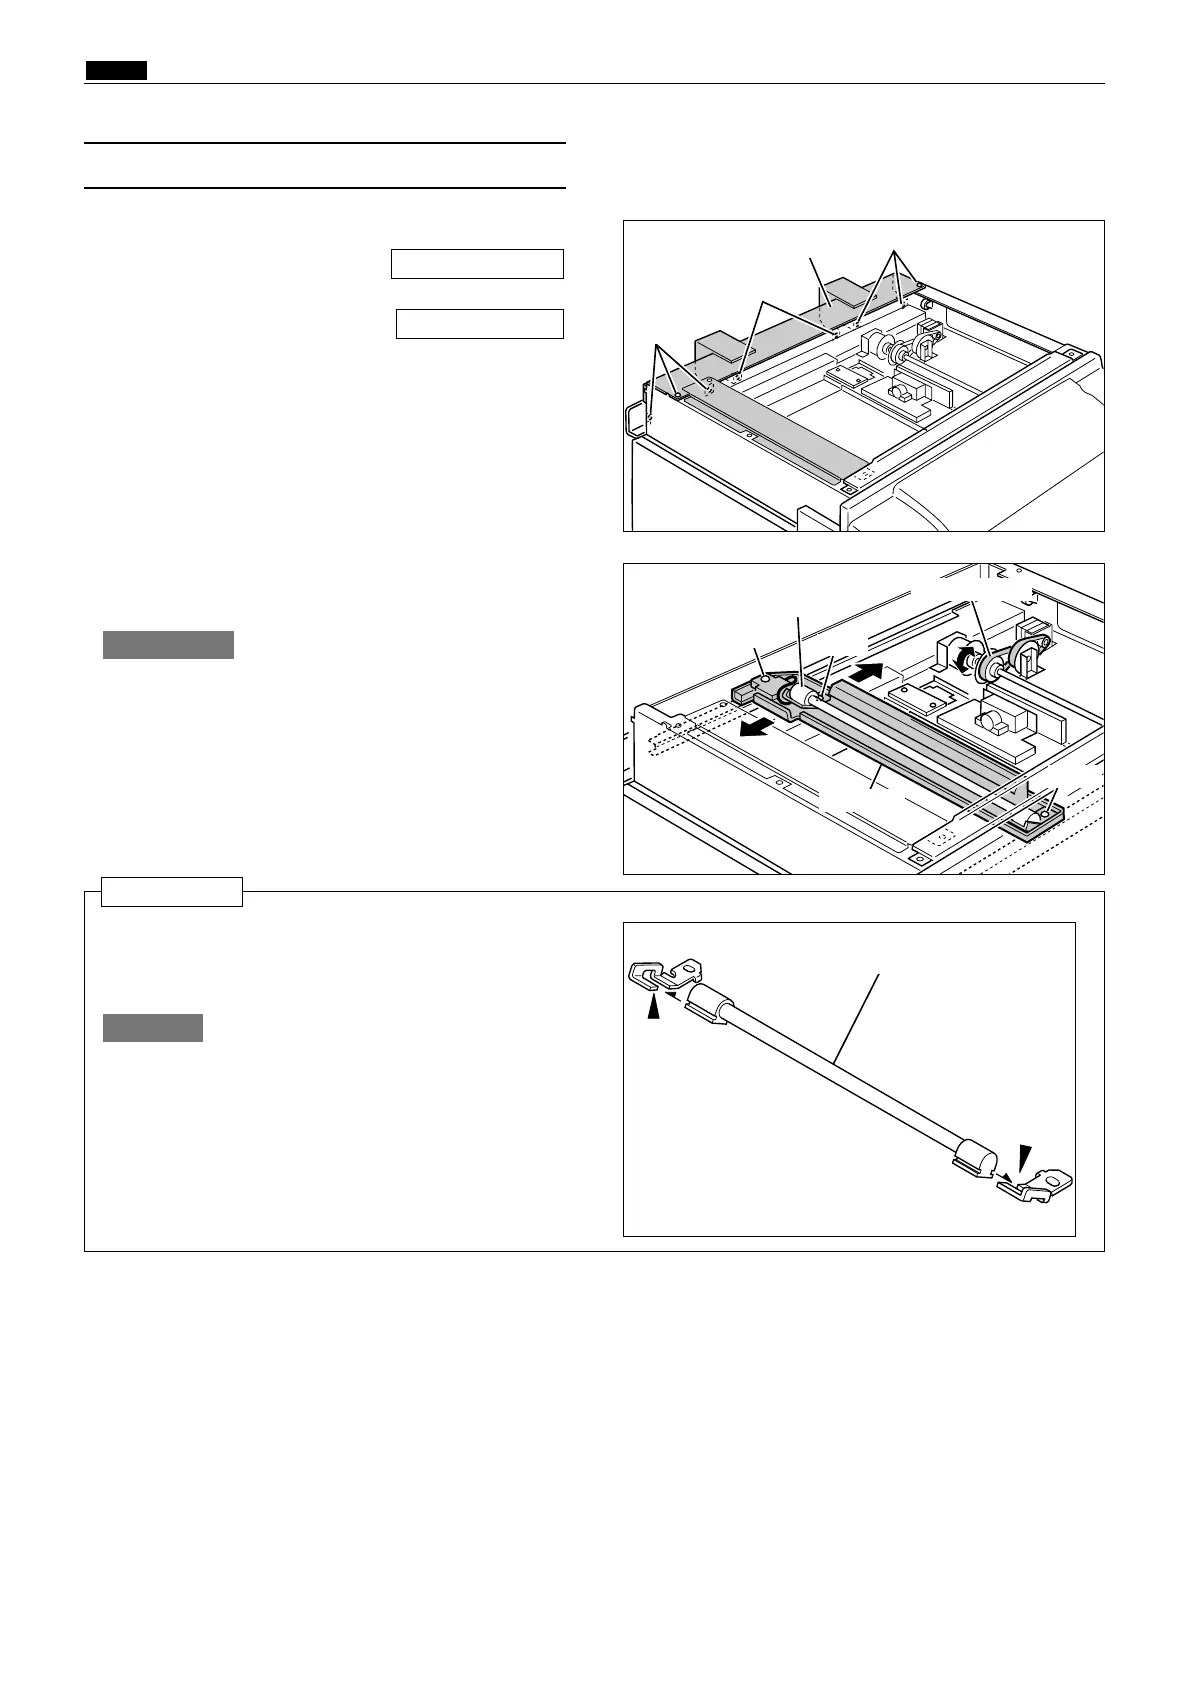
(4) Removal of Lamp Unit
4. Turn the timing pulley, and move Slider A to the
position shown in the diagram.
R8S03020
Lamp unit
1. Perform steps 1 through 2 of procedure (3).
2.
Remove the scanner cover(L,R).
3. Remove the 8 spacers indicated, and remove the
scanner R bracket.
\See page 99
\See page 103
Do not move Slider A by hand.
IMPORTANT :
5. Remove the 3 screws indicated, and remove the
lamp unit.
The lamp is fragile; handle it with care.
IMPORTANT :
Reinstallation
¡ Insert the slotted parts of the lamp unit into
the grooves on the brackets.
Bracket groove
Bracket groove
104
x Scanner Section
chap.3
R8S03018
Screws
Scanner R bracket
R8S03019
Screw
Timing pulley
Lamp unit
Screws
Screws
Screw
Screw
Slider A
 Loading...