Dyna-Flo Control Valve Services Ltd.
Phone: 780 • 469 • 4000 Toll Free: 1 • 866 • 396 • 2356 Fax: 780 • 469 • 4035 Website: www.dynafl o.com
Model 360/361 Control Valves
P-360M1019A
12
Operation, Parts, and Instruction Manual
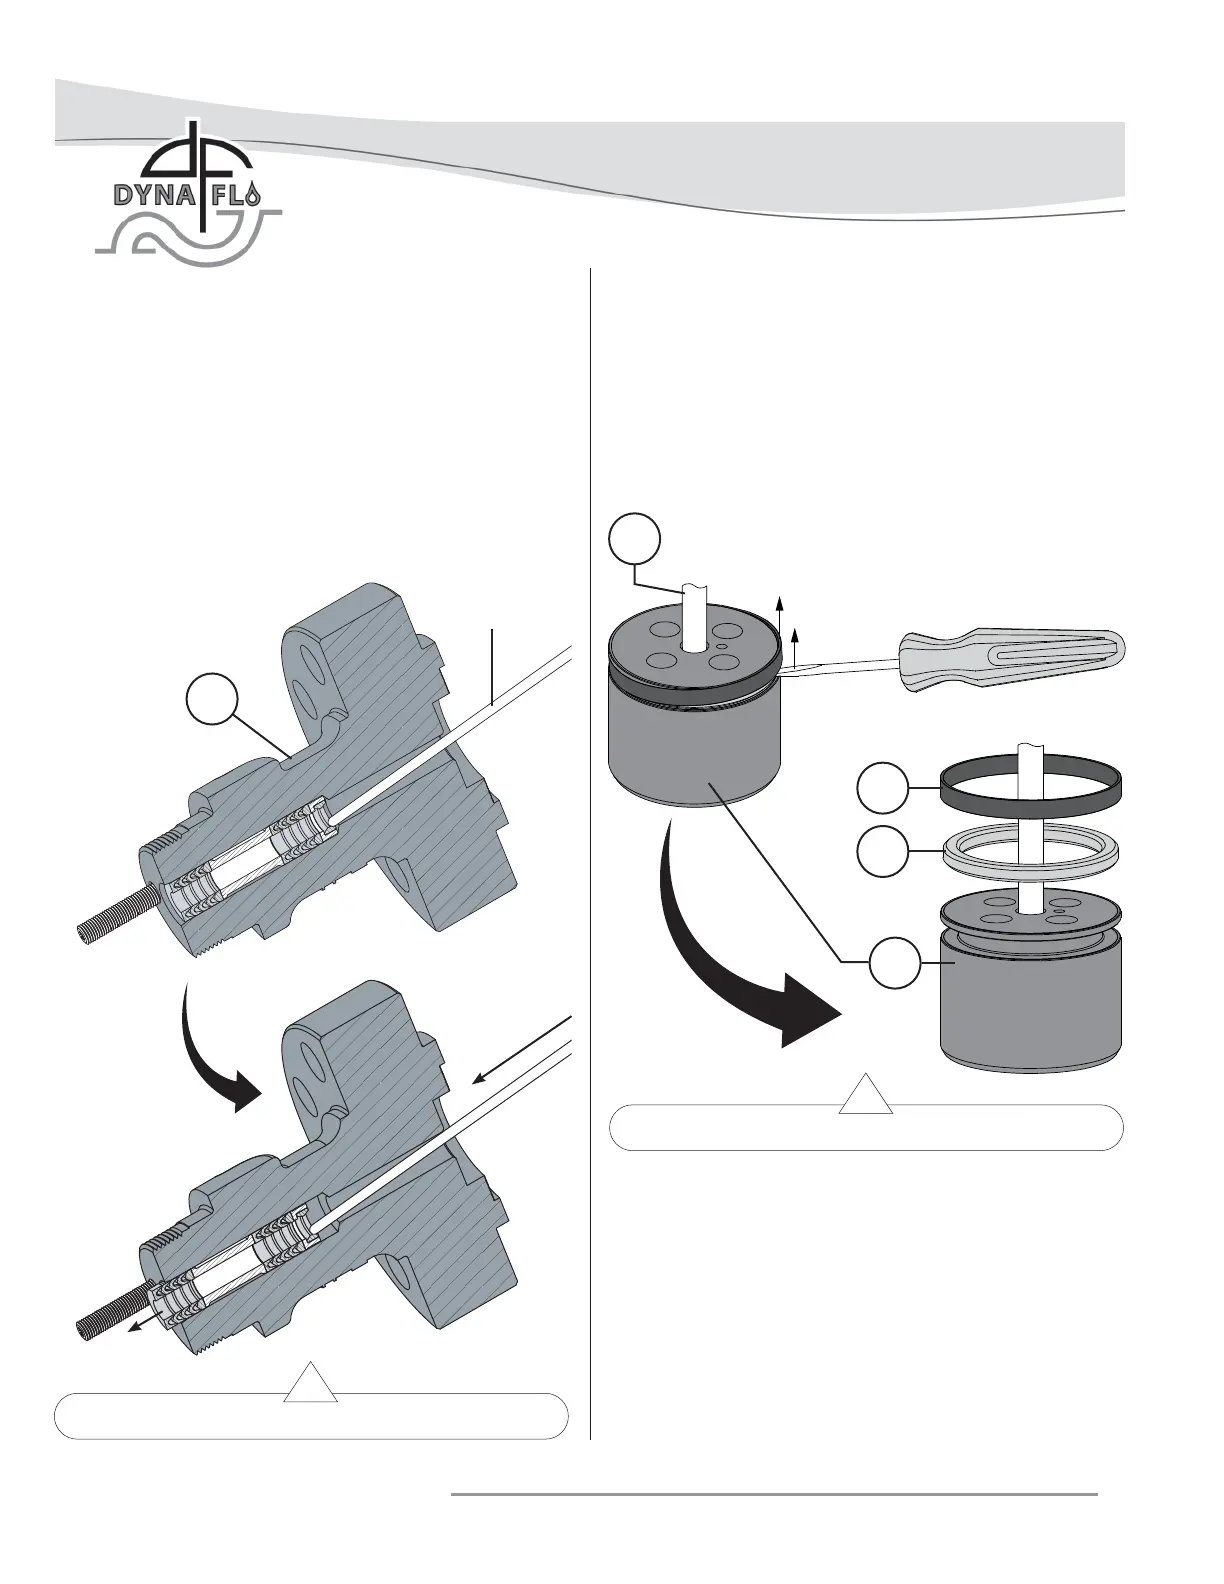
PLUG SEAL REMOVAL
For Model 360 Two-Piece Plug Seal Ring Assemblies:
1 Carefully remove the seal ring (Key 7) from the plug
groove, a pick set or fl at screw driver may be required.
Refer to Figure 11.
2 Carefully remove the backup ring (Key 6) from the plug
groove, a pick set or fl at screw driver may be required.
Figure 10 Packing Parts Removal (Step 1)
DISASSEMBLY (Continued)
PACKING PARTS REMOVAL (Continued)
2 Clean and inspect the bonnet for damage, pay particular
attention to the packing bore surface and the gasket
sealing surface. Replace or repair the bonnet as necessary.
Metal packing parts can be reused if they are not
damaged, all other packing parts should be replaced.
Figure 11 Two-Piece Plug Seal Ring Removal (Model 360)
For Model 360 Three-Piece Seal Ring Assemblies:
NOTE: 8 inch valve assemblies have only one-piece plug seals,
they only use a seal ring (Key 8).
1 Carefully remove the retaining ring (Key 10) from the plug
groove, a pick set or fl at screw driver may be required.
Refer to Figure 12.
2 Remove the backup ring (Key 9).
3 Remove the seal ring (Key 8).
BLUNT
ROD
26
5
7
6
3