Model 360/361 Control Valves
Dyna-Flo Control Valve Services Ltd.
Phone: 780 • 469 • 4000 Toll Free: 1 • 866 • 396 • 2356 Fax: 780 • 469 • 4035 Website: www.dynafl o.com
P-360M1019A
9
Operation, Parts, and Instruction Manual
DISASSEMBLY
Before You Begin:
• Read Safety Caution (Page 2).
• Use safe work practices and lock out procedures.
• Remove the actuator from the valve (Refer to Actuator
Removal Instructions, Page 7).
• Relieve process pressure and drain the process fl uid from up
and down stream of valve.
• Be aware of potentially hazardous process material that may
be present in-line and in-valve. Isolate the valve from
process pressure. Use a bypass or block valve if necessary, or
completely shut off the process.
• For Angle Body Valves refer to Figure 34.
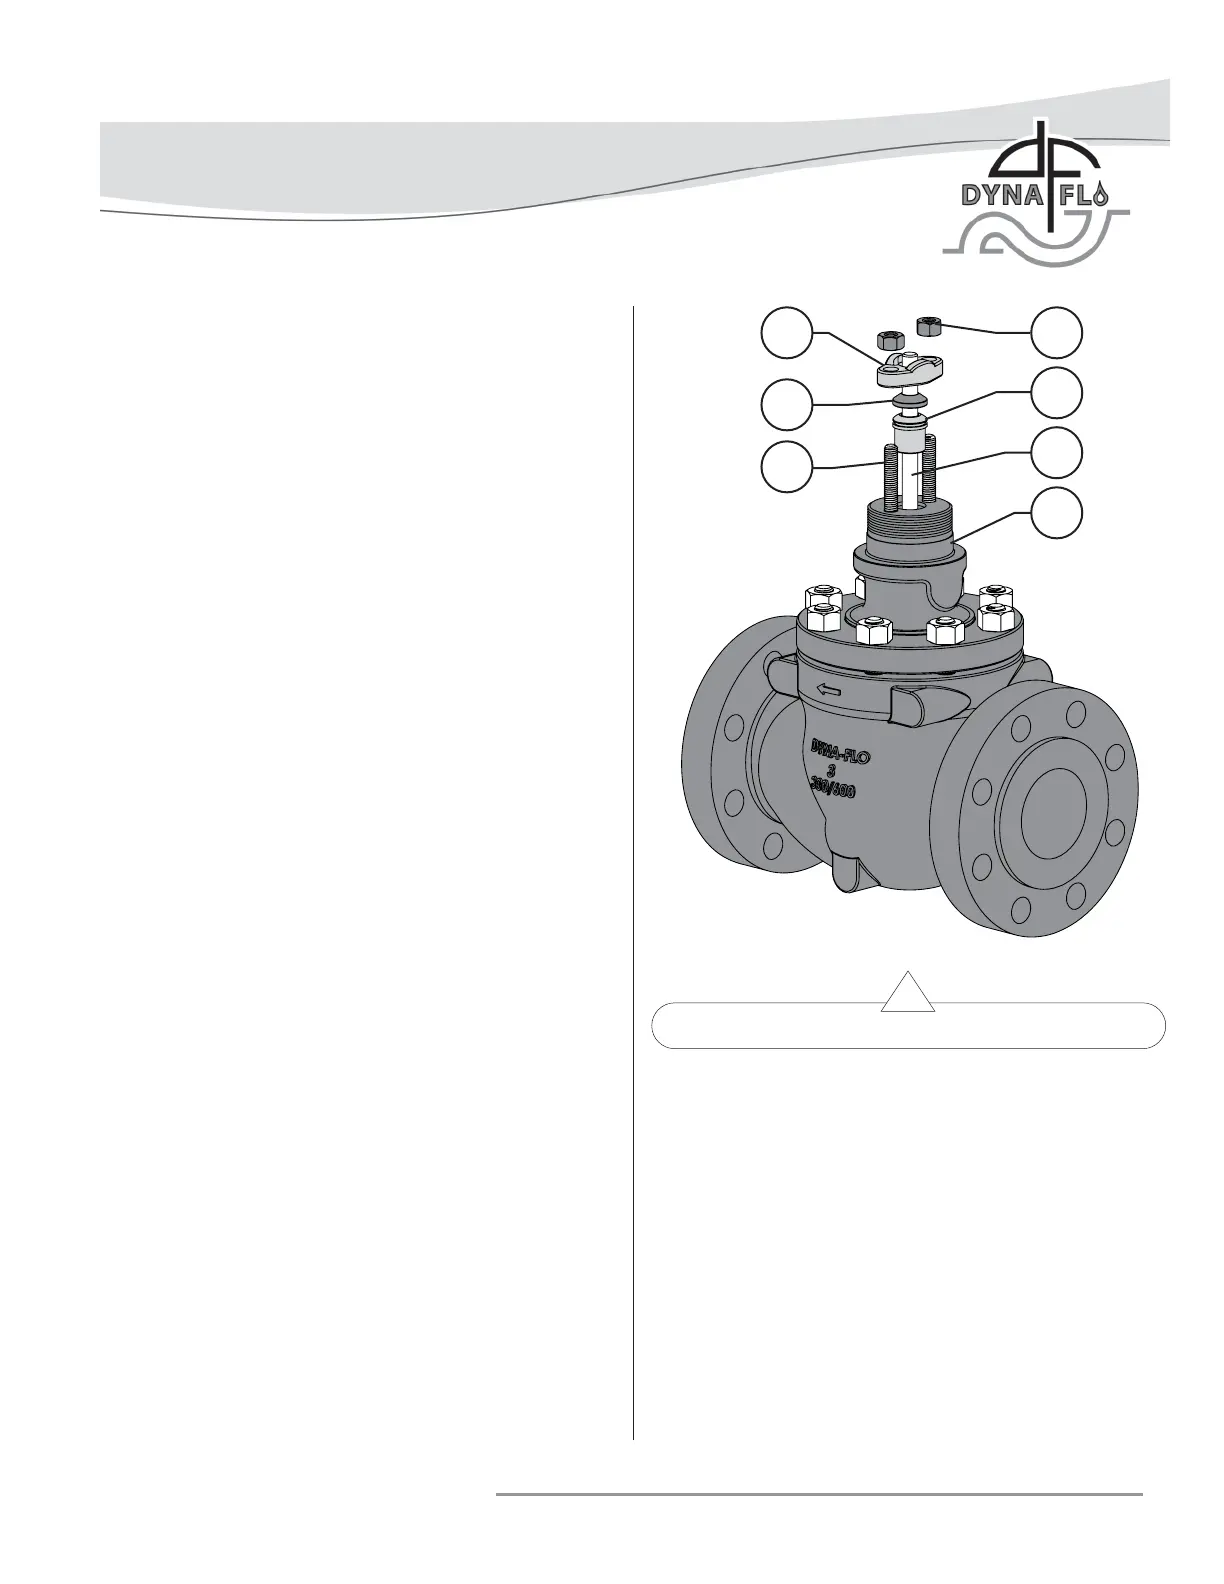
PACKING REMOVAL
For Live Loaded Packing refer to Figure 31 and the Live Loaded
Sliding Stem Packing Manual (P-LLPS).
Special Tools Required:
• Mechanics Pick Set
NOTE: Packing box parts are easier to remove after the bonnet
(Key 26) has been separated from the valve body (Key 1) and
the valve stem (Key 5) has been removed. If the packing is all
that needs to be removed, it is possible to extract packing box
parts carefully using a mechanics pick set.
WARNING: Process medium and pressure may become stored
in the packing, use caution when removing packing parts.
1 Remove the packing nuts (Key 38).
2 Remove the upper wiper (Key 36) if present, graphite
packing does not include an upper wiper.
3 Remove the packing follower (Key 35).
4 It is recommended to proceed to the Bonnet Removal
section to continue with valve disassembly. If the packing
is all that needs to be removed, remove the contents of the
packing box (Keys 30, 31, 32, 33, & 34) using a mechanics
pick set being careful not to damage the valve stem (Key
5) or wall of the packing box of the bonnet (Key 26). For
packing reassembly refer to Packing Installation section
(Page 21).
Figure 6 Packing Removal (Steps 1 - 3)
BONNET REMOVAL
WARNING: Process medium and pressure may be trapped
inside the valve body (Key 1). Use caution when removing the
valve bonnet (Key 26). Refer to Safety Caution on Page 2.
1 Loosen the bonnet nuts (Key 28) 1 full turn after the
contact between the nuts and the top surface of the bonnet
(Key 26) has been broken. Do not remove the bonnet nuts
until any trapped process pressure has been vented. Refer
to Figure 7.
2 Break the contact between the valve body (Key 1) and the
bonnet (Key 26), use a pry bar or blunt chisel to help with
the separation if necessary.
38
35
37
36
29
26
5