Model 360/361 Control Valves
Dyna-Flo Control Valve Services Ltd.
Phone: 780 • 469 • 4000 Toll Free: 1 • 866 • 396 • 2356 Fax: 780 • 469 • 4035 Website: www.dynafl o.com
P-360M1019A
15
Operation, Parts, and Instruction Manual
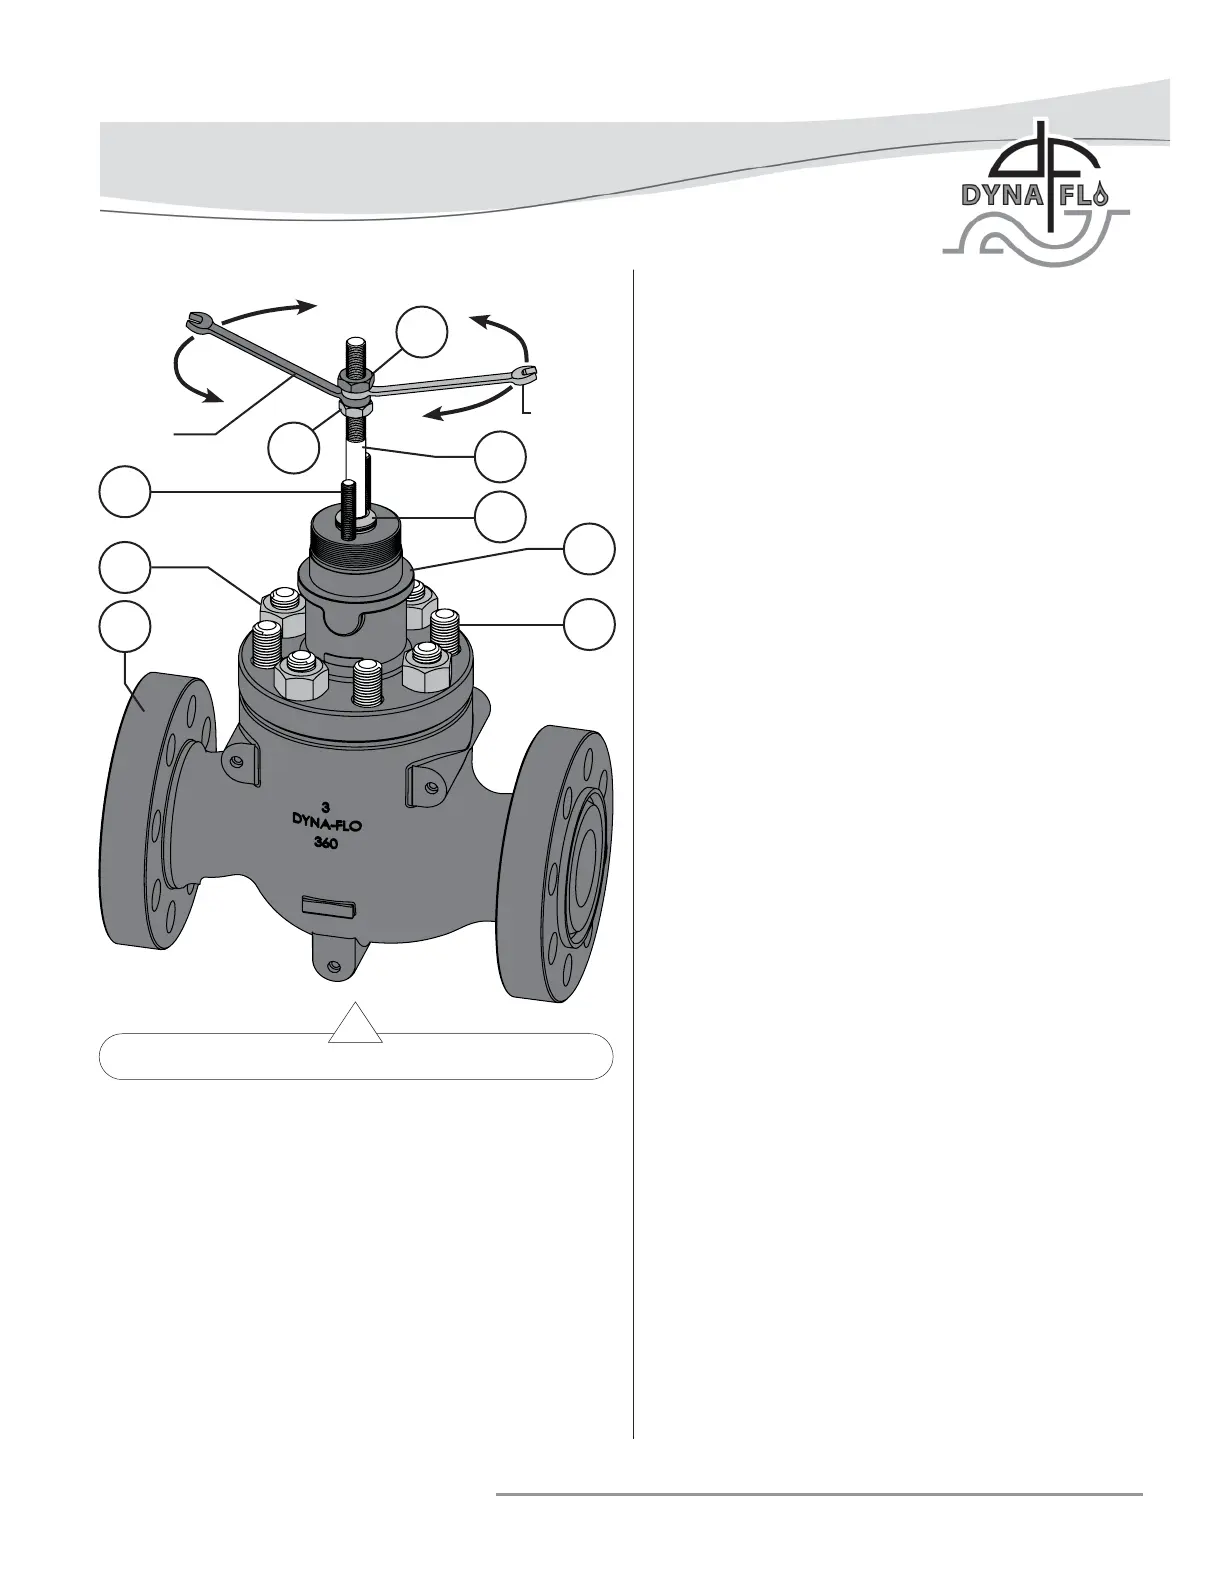
Figure 16 Lapping Procedure Setup (Steps 8 - 10)
STUD INSTALLATION
1 If the studs (Key 2) were replaced, removed, or never
installed, apply nickel anti-seize (Key A) to the threads
of the end of the stud without a material stamp.
2 Thread the studs (Key 2) into the valve body (Key 1)
nickel anti-seize coated end fi rst, until they are completely
threaded into the valve body.
PLUG SEAL ASSEMBLY
For Model 360 Two-Piece Plug Seal Ring Assemblies:
Note: Two-piece seals are not available for 8 inch valves.
1 Apply Lubriplate® No. 105 (Key C) to the surface of the
backup ring (Key 6).
2 Carefully slide the backup ring (Key 6) over the top of the
valve plug (Key 3) and into the groove. Refer to Figure
17.
3 Apply Lubriplate® No. 105 (Key C) to the seal ring (Key
7). Carefully slide the seal ring over the top edge of the
valve plug (Key 3) and into the groove, refer to Figure 17.
4 Allow time for the seal ring (Key 7) to shrink back to its
original size after installation.
5 Before installing the plug/stem assembly into the valve,
apply Lubriplate® No. 105 (Key C) to the outside surface of
the plug (Key 3) as shown in Figure 17.
For Model 360 Three-Piece Plug Seal Ring Assemblies:
1 Apply Lubriplate® No. 105 (Key C) to the surface of the
seal ring (Key 8).
2 Install the seal ring (Key 8) onto the valve plug (Key 3),
refer to Figure 18 for proper seal ring orientation. NOTE:
8 inch valves are technically one-piece plug seals, 8 inch
valve assemblies use a seal ring only and do not make use
of a backup ring (Key 9) or retaining ring (Key 10).
4 Apply Lubriplate® No. 105 (Key C) to the backup ring
(Key 9) and install the backup ring onto the valve plug
(Key 3).
5 Apply Lubriplate® No. 105 (Key C) to the retaining ring
(Key 10) and install the retaining ring into the retaining
ring groove on the valve plug (Key 3).
6 Allow time for the seal ring material to shrink back to its
original size after being stretched over the valve plug
before installing the plug assembly into the cage (Key 19).
ASSEMBLY
Before You Begin:
• Read Safety Caution (Page 2).
• Use safe work practices and lock out procedures.
• Clean and inspect all parts.
• Replace or repair damaged parts. Replace all soft parts
(Seals, o-rings, gaskets, live loaded packing).
Lubricants Required:
• Permatex® Nickel Anti-Seize or equivalent (Key A)
• Dow Corning Molykote® 111 or equivalent (Key B)
• Lubriplate® No. 105 Grease or equivalent (Key C)
43
42
28
1
26
2
29
35
5
WRENCH
WRENCH