Dyna-Flo Control Valve Services Ltd.
Phone: 780 • 469 • 4000 Toll Free: 1 • 866 • 396 • 2356 Fax: 780 • 469 • 4035 Website: www.dynafl o.com
Model 360/361 Control Valves
P-360M1019A
14
Operation, Parts, and Instruction Manual
LAPPING (Continued)
Special Tools Required:
• Soft felt marker
• Two wrenches that will slide over the valve stem (Key 5)
• 400 – 600 grit (fi ne grit) Loctite® Clover® compound (Key D)
Lapping Procedure
1 Install the used seat ring gasket (Key 12) into the valve
body (Key 1).
2 Install the seat ring (Key 15). Mark the position of seat
ring using the marker.
3 Install the cage (Key 19). Mark the position of cage using
the marker.
4 Do not install any plug seals into the valve plug (Key 3).
Apply fi ne grit Clover® compound to the seating surface of
the valve plug. Install the valve plug / stem assembly
(Keys 3, 4, 5) into the valve. Mark the position of the
plug / stem assembly using the marker.
5 Install used bonnet gaskets (Keys 20, 21, & 22).
6 Carefully lift the bonnet (Key 26) into place and secure the
bonnet using half of the bonnet nuts (Key 28). Mark the
position of the valve plug (Key 3) on the bonnet (Key 26)
using the marker.
7 Install the packing follower (Key 35).
8 Install the jam nut (Key 42) on to the valve stem (Key 5)
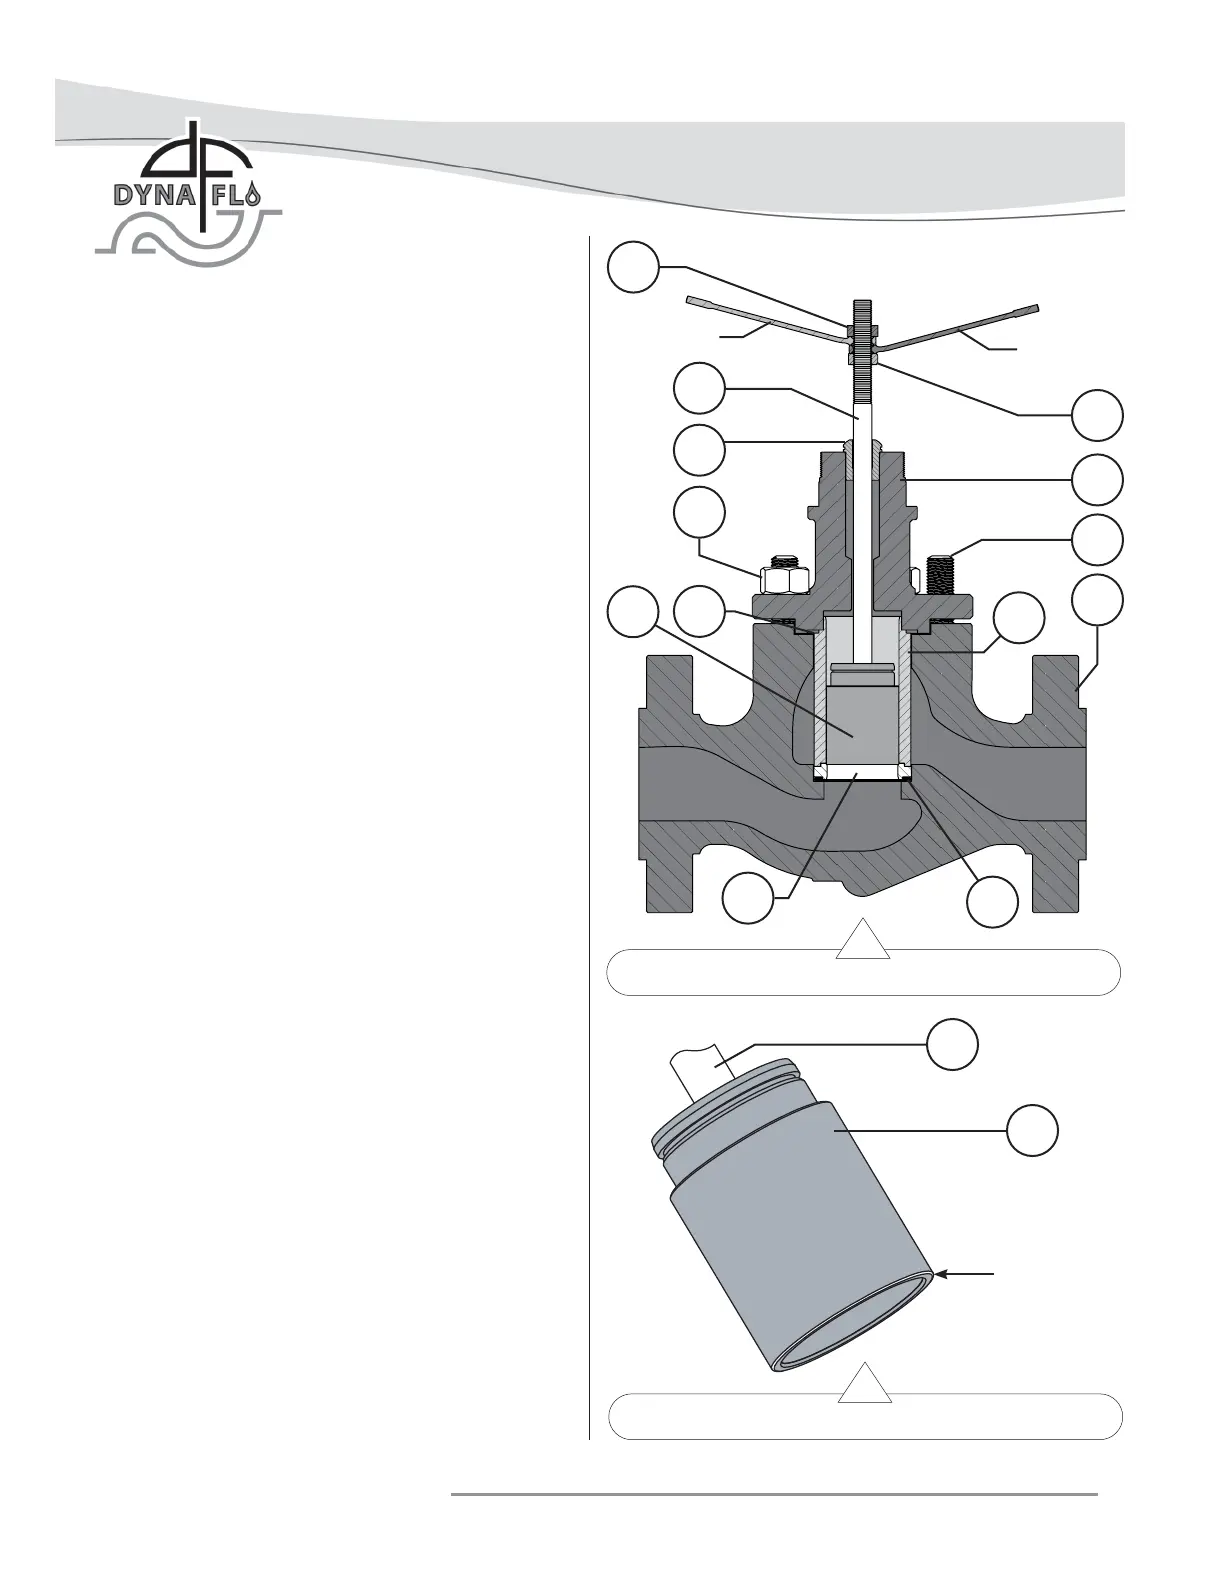
and build a handle as shown in Figure 14 and 16
using the two wrenches and the hex nut (Key 43).
9 Rotate the valve plug (Key 3) back and forth about
a quarter of a full rotation (only a small amount of
movement is required, do not make full rotations)
over the seat ring (Key 15) using the wrench handles.
10 If a seat leak test is to be performed after lapping to test
valve shut off, disassemble the lapping setup after a few
cycles of back and forth plug movement. Replace the used
gaskets (Keys 12, 20, 21, & 22) with new gaskets and
reassemble the valve for testing. NOTE: Another set of
new gaskets will need to be used for the fi nal valve
assembly if the lapping procedure needs to be repeated
after seat leak testing.
Figure 14 Lapping Procedure Setup (Steps 1 - 8)
Figure 15 Lapping Compound Application
42
35
26
5
43
28
2
1
20
19
3
12
15
WRENCH
WRENCH
5
3
APPLY FINE
GRIT CLOVER®
COMPOUND
(KEY D) TO
THE SEATING
SURFACE OF
THE PLUG