Model 360/361 Control Valves
Dyna-Flo Control Valve Services Ltd.
Phone: 780 • 469 • 4000 Toll Free: 1 • 866 • 396 • 2356 Fax: 780 • 469 • 4035 Website: www.dynafl o.com
P-360M1019A
13
Operation, Parts, and Instruction Manual
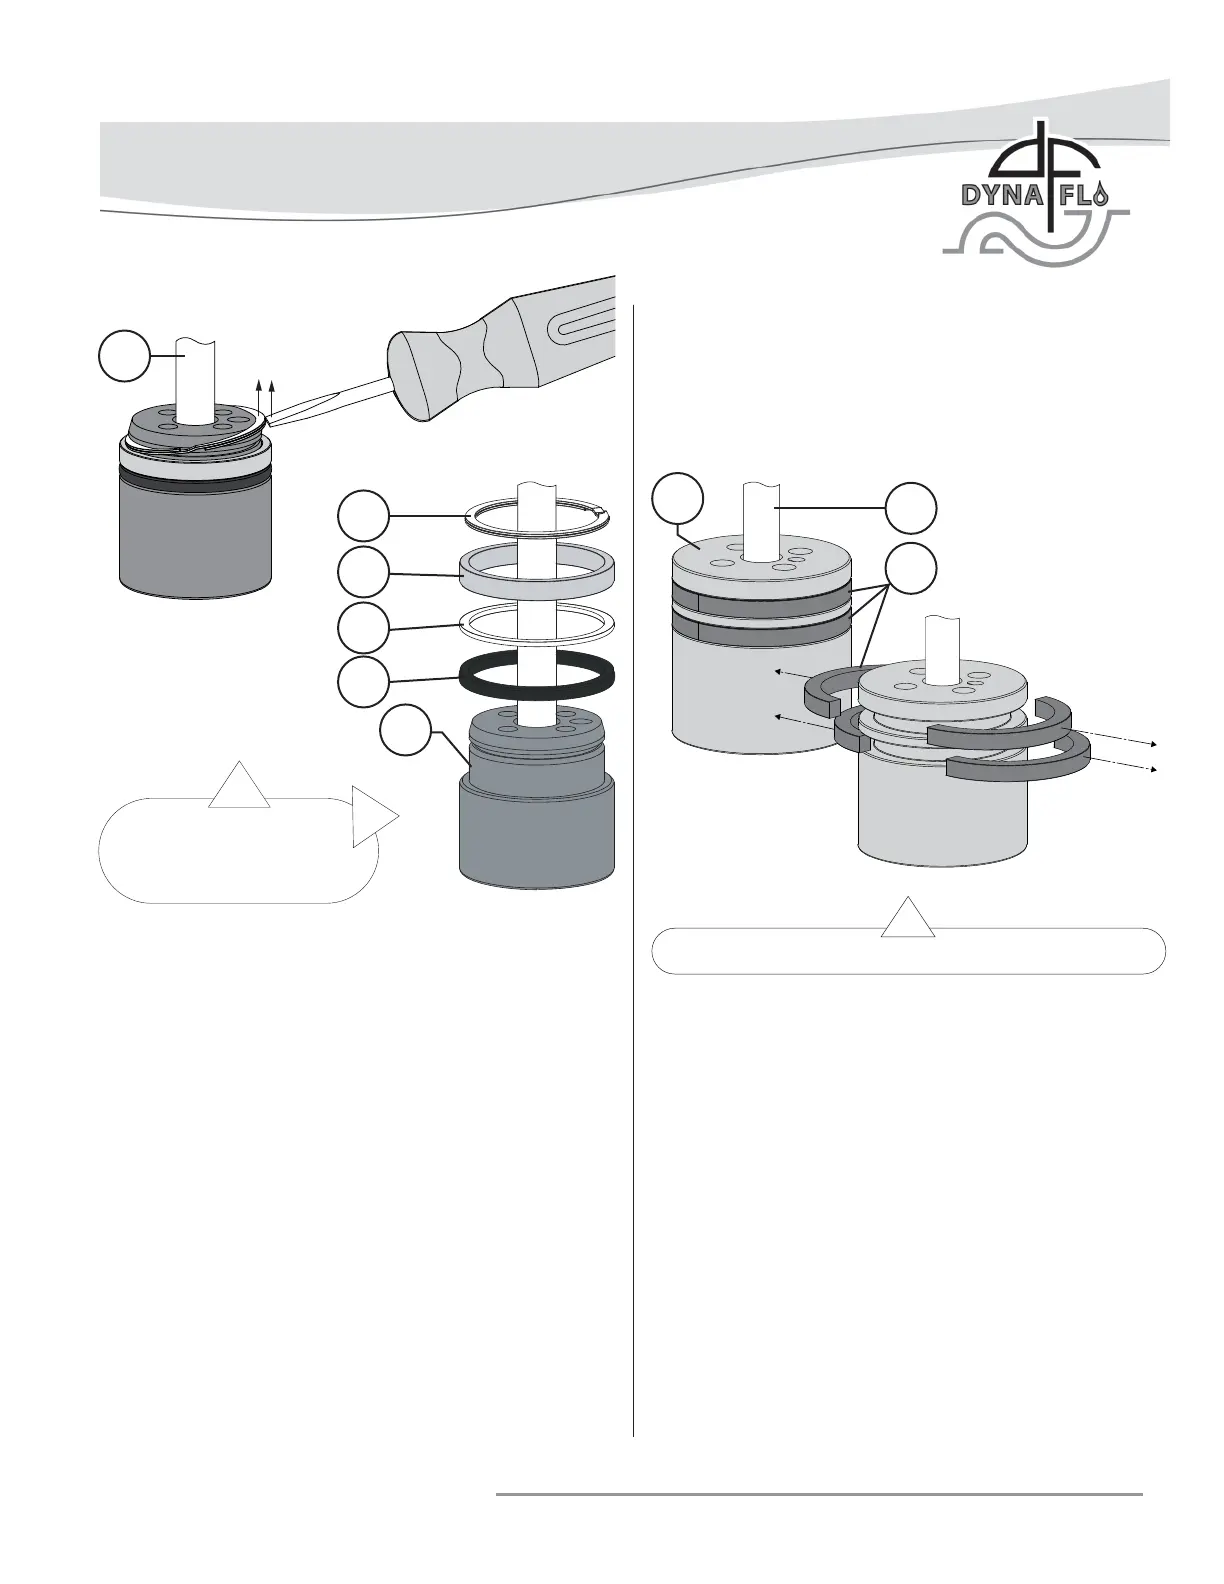
DISASSEMBLY (Continued)
PLUG SEAL REMOVAL (Continued)
For Model 360 Three-Piece Plug Seal Ring Assemblies
with Anti-Extrusion Rings:
1 Carefully remove the retaining ring (Key 10) from the plug,
a pick set or fl at screw driver may be required to pry the
spiral rings of the retaining ring apart to assist removal.
Refer to Figure 12.
2 Remove the backup ring (Key 9).
3 Remove the anti-extrusion ring (Key 11). The anti-
extrusion ring is only included in valve assemblies rated
for over 450°F (232°C).
4 Remove the seal ring (Key 8).
For Model 361 Valves (Refer to Figure 13):
1 Remove the piston rings (Key 48). NOTE: Piston rings are
broken in half and can be easily pulled apart.
Figure 12
Three-Piece Plug Seal
Removal (Model 360 Only)
For All Models:
Clean and inspect all parts for damage, especially the stem
(Key 5) and plug (Key 3) surfaces. Minor scratches can be
buffed or lapped out, major scratches (scratches that will stop
a fi nger nail) will need to be machined or replaced. Replace all
damaged parts and soft parts with new parts.
Figure 13 Model 361 Piston Ring Removal
LAPPING
Expect a certain amount of leakage in valves with metal
seats. In some cases where leakage has become excessive,
lapping can improve sealing performance. Before performing
the lapping process, insure all trim parts have been thoroughly
cleaned and are free of debris. Do not lap soft seat valves.
NOTE: Spiral wound gaskets (Key 20) make their seal by being
crushed and cannot be reused, this includes gaskets required to
be used during the lapping process. It may be desirable to use
an already crushed gasket in the lapping process to be replaced
with new gaskets during reassembly.
CAUTION: Once lapping has been performed with a previously
crushed gasket, it is important to mark the position and
alignment of all trim parts (Keys 3, 15, and 19) before
removal and reassembly. If trim parts are reassembled out of
their lapped alignment excessive leakage may result.
10
9
8
3
5
11*
*Only included in valve
assemblies rated over
450°F (232°C).
5
48
3