Leaders in Pipeline Survey Systems
OPERATOR’S MANUAL
Issue 4.04 - 1207 18
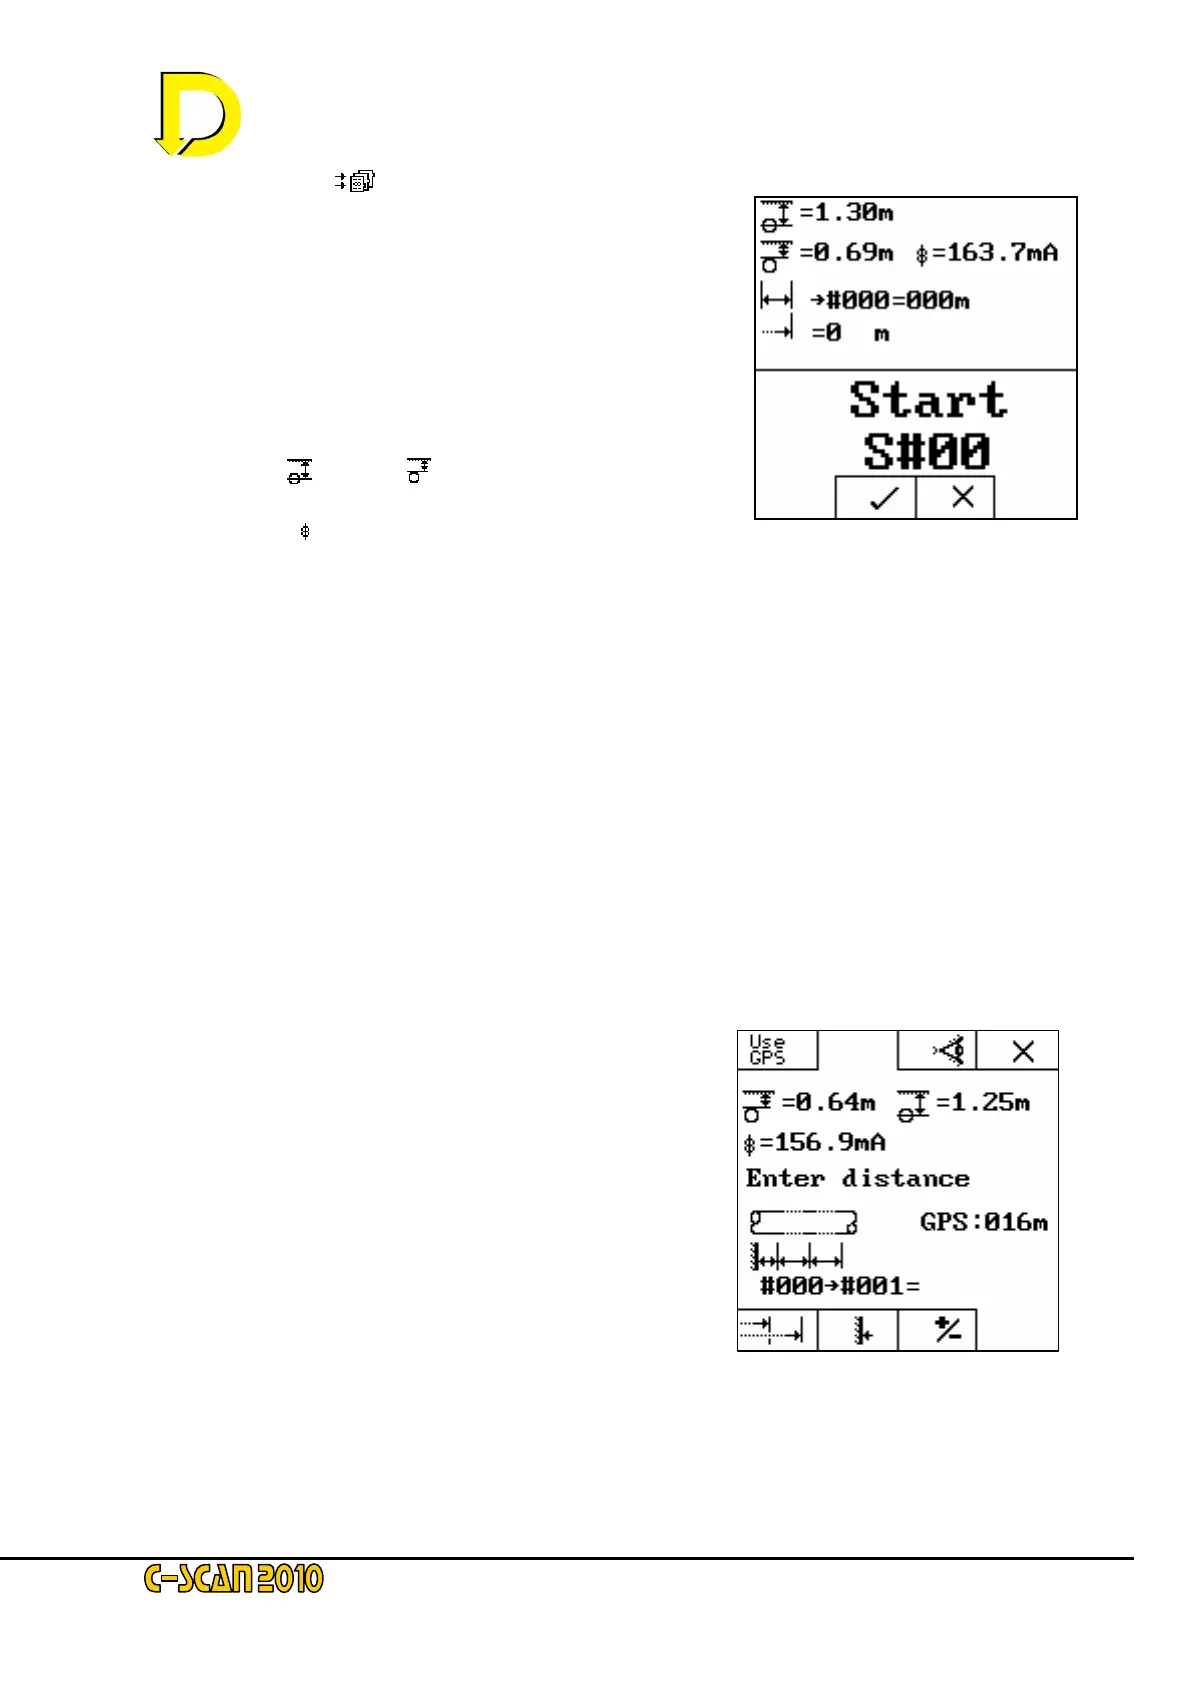
Fig. 18 – the Start Point screen
Press the STORE [ ]key now.
This is the final screen before data is permanently stored –
see Fig. 18 right.
Pressing the key below the X box will revert to the previous
screen.
Pressing the key below the 9 box will return to the Start-up
screen.
This screen shows:
• depth (
) (cover ( ) will show ‘?’ if pipeline
diameter is not entered)
• current (
)
• Distance between previous location point (│↔│)
n.b. as this is the first point (→#000 = 000m) is shown
• Chainage (→│) (0m)
• and survey number (S#00).
Press the 9key now.
That is the first survey point completed.
2.3.6. Entering Distance
Move down the pipeline to the next location (at least 100m for this test). Go through the above
procedures again until the STORE DATA screen is shown – Fig.17 on page 17.
If it is set into ‘DEMO MODE’ the DU will automatically call the next data point.
This point – i.e. the second point on
the survey – will obviously show different
data from the start point. Two choices are
now possible – see Fig. 19 right.
1. Use the distance calculated by the GPS
(shown as GPS:016m in this example).
2. Enter the distance manually.
To use the GPS press the key above the
USE GPS box. To enter the distance manually,
just use the numerical keypad.
If you have not entered the distance manually,
press the USE GPS key now.
Fig. 19 – Distance Screen 1
 Loading...

