10
3.2 MOUNTING
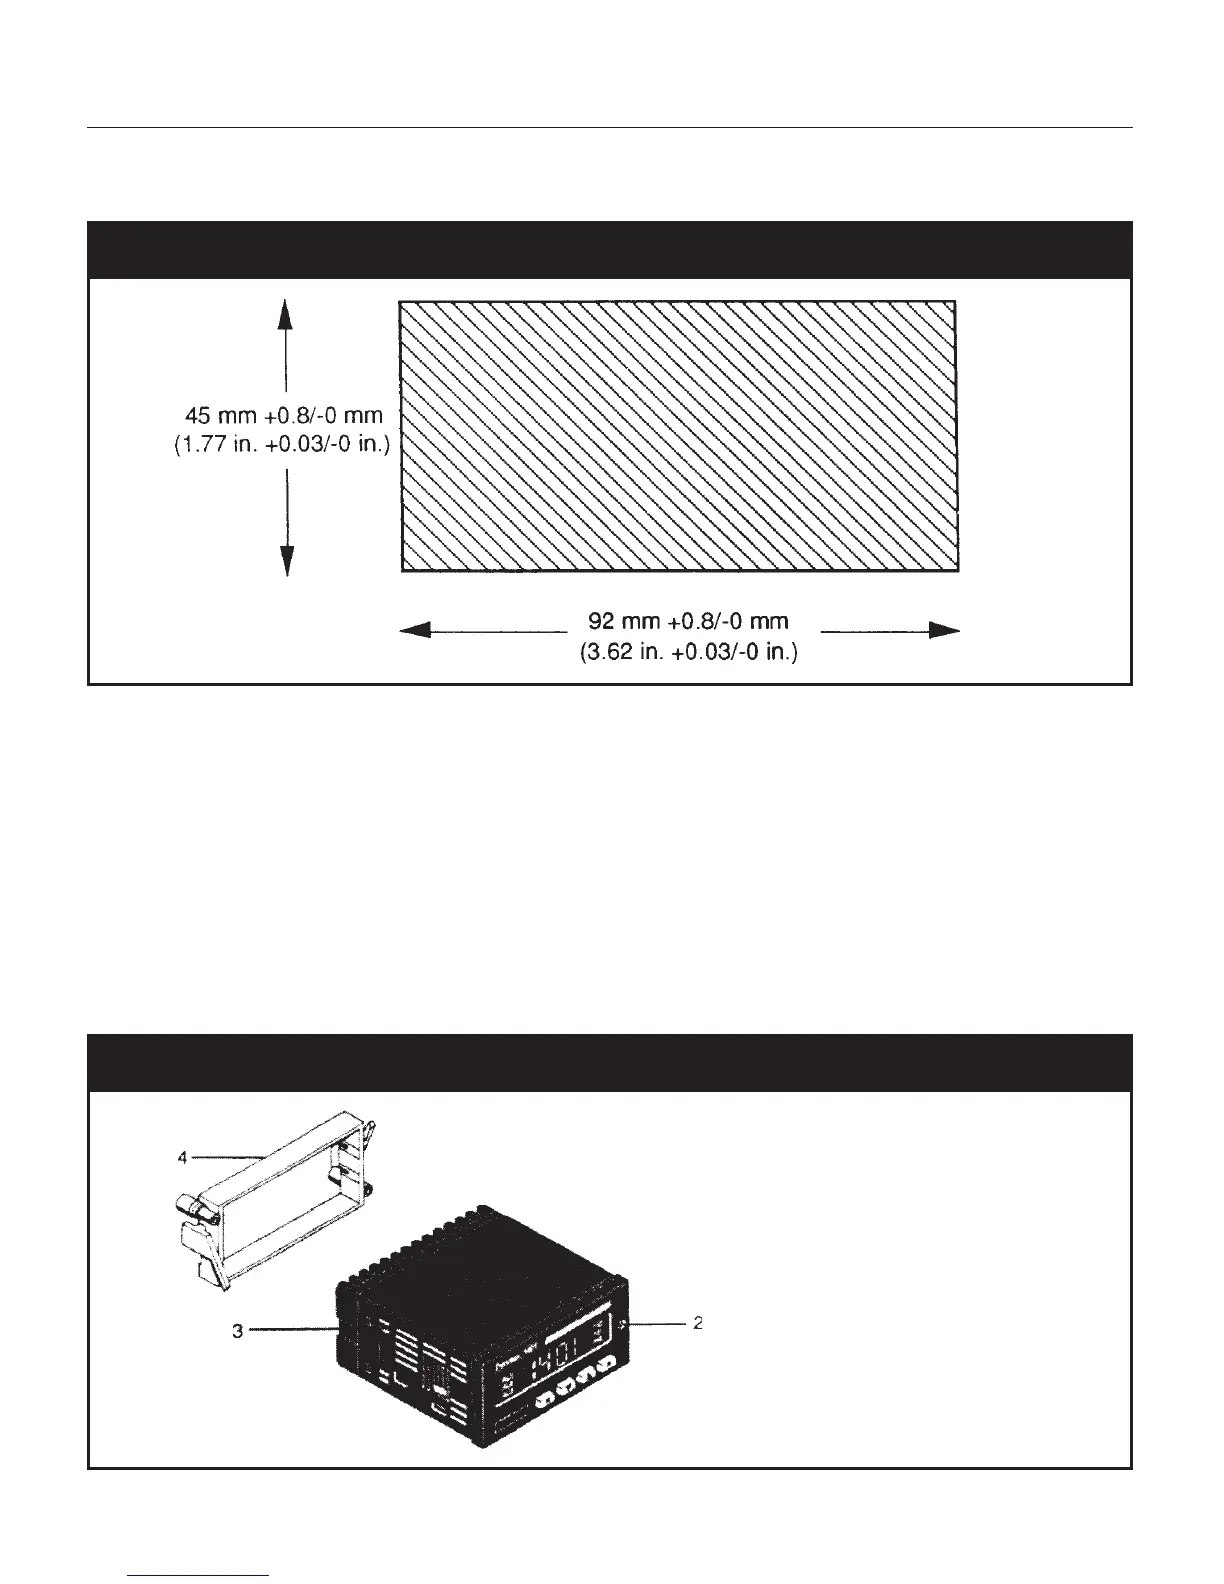
Fig. 1 Panel Cutout
•Make the instrument panel cut-out with the specified cut-out dimensions.
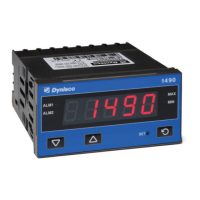
• Undo the screw (2).
• Remove the unit from the instrument case (3).
• Slide the gasket onto the instrument case (3).
• Slide the the instrument case (3) through the cut-out.
• Slide the mounting frame (4) from the rear over the instrument case (3) so that the snap-in
elements of the mounting frame (4) engage in the recesses at the side.
• Use a screwdriver to snug the mounting frame (4) and the instrument case (3).
• Slide the instrument from the front into the instrument case (3).
• Secure the instrument in the case with the screw (2).
Fig. 2 Side View, Mounting