Computerized Transmitter Setup
Start all transmitter programming with a blank ACRO
model (perform a model reset), then name the model.
Set Dual Rates to
2 Position
switch
3 Position
switch
HIGH 100%
HIGH 100%
MID 70%
LOW 50% LOW 50%
Set Servo Travel to 100%
Set Throttle Cut to -100%
DXe
Refer to spektrumrc.com for the appropriate
download setup.
DX7S
DX8
1. Go to the SYSTEM SETUP
2. Set MODEL TYPE: AIRPLANE
3. Go to CHANNEL ASSIGN:
CHANNEL INPUT CONFIG
AUX2 Switch A SELECT GEAR: INH
DX6e
DX6
(Gen2)
DX7
(Gen2)
DX8e
DX8
(Gen2)
DX9
DX10t
DX18
DX20
iX12
iX20
NX6
NX8
NX10
1. Go to the SYSTEM SETUP (Model
Utilities)†
2. Set MODEL TYPE: AIRPLANE
3. Set AIRCRAFT TYPE (Model Setup, Aircraft
Type)†: Wing: Normal
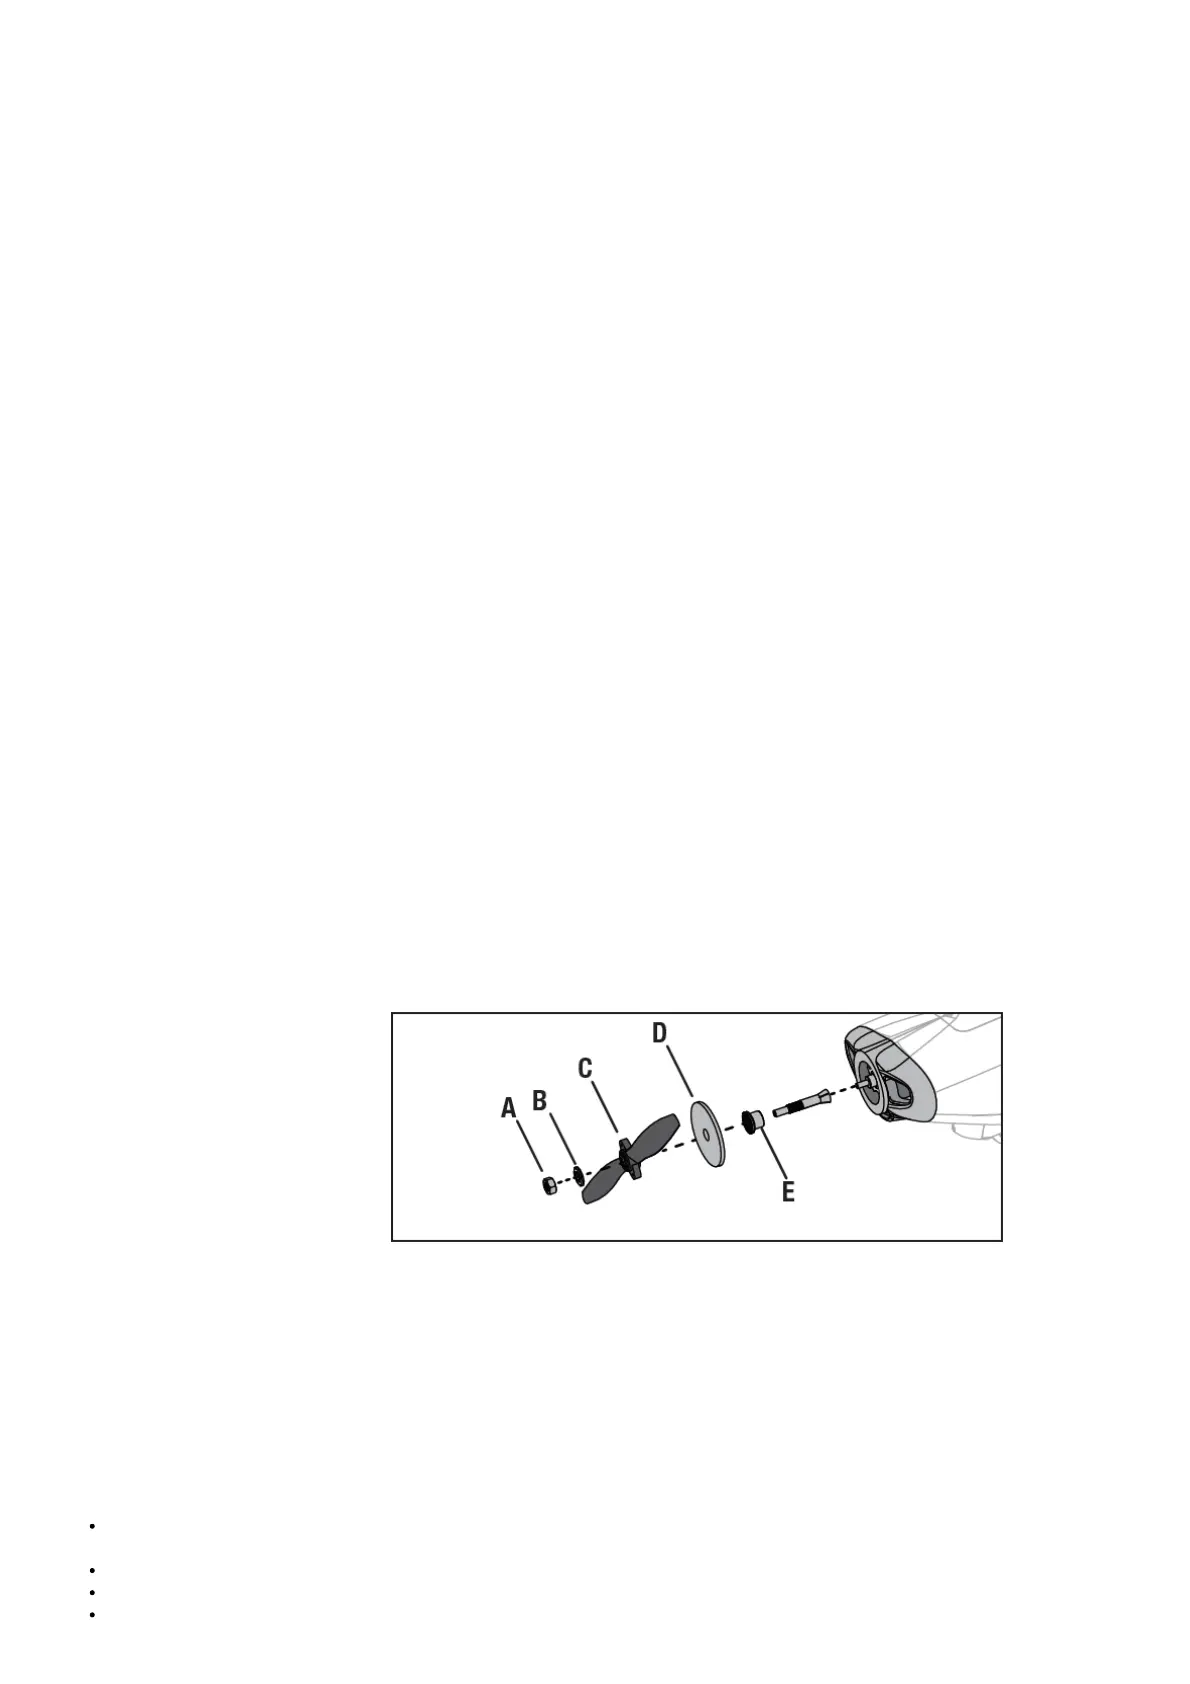
Factory Installed Propeller Removal
CAUTION: Before connecting a flight battery and binding to a transmitter, remove the factory installed propeller.
1. Remove the spinner nut (A) using an adjustable wrench.
2. Slide the washer (B), propeller (C), spinner backplate (D), backplate (E) off the propeller shaft.
Keep the removed parts in a safe place as they will need to be reinstalled at the end of the model assembly process.
Transmitter and Receiver Binding / Switching ON and OFF SAFE Select
General Binding Tips
The included receiver has been specifically programmed for operation of this aircraft. Refer to the receiver manual for correct setup if
the receiver is replaced.
Keep away from large metal objects while binding.
Do not point the transmitter’s antenna directly at the receiver while binding.
The orange LED on the receiver will flash rapidly when the receiver enters bind mode.