9. Remove the servo screw and the servo arm.
Fuselage Servo Replacement
Use the wing servo replacement instructions (1–9) to replace the rudder and/or elevator servos. Then plug the fuselage wire directly into the
receiver.
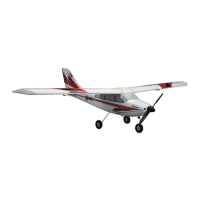
Wing Servo Installation
1. Plug the servo into the correctly marked aileron extension in the fuselage.
2. With the propeller removed, power ON the plane. Wait for the plane to initialize and for the servos to center.
3. Center the transmitter trims.
4. Align the servo arm by pressing the arm onto the servo. Install the servo arm screw, disconnect the servo from the aileron extension,
and begin the servo installation.
5. Using Deluxe Materials Foam 2 Foam (DLMAD34), secure the servo into the servo pocket.
6. Press the servo wire into the servo wire channel in the bottom of the wing.
7. Using Deluxe Materials Foam 2 Foam (DLMAD34), reinstall the foam servo wire retainer.
8. Reinstall the pushrod clevis into the aileron control horn.
TIP: Make sure the glue is dry!
9. Connect the aileron servo wires to the proper aileron extension wires in the fuselage.
10. Install the wing.
Control Surface Replacement Servo Description Adhesive
Aileron SPMSA332 9g Sub-Micro Servo
Deluxe Materials Foam 2 Foam
(DLMAD34)
Elevator SPMSA332 9g Sub-Micro Servo
Deluxe Materials Foam 2 Foam
(DLMAD34)
Rudder SPMSA332 9g Sub-Micro Servo
Deluxe Materials Foam 2 Foam
(DLMAD34)
Troubleshooting Guide AS3X
Problem Possible Cause Solution
Oscillation
Damaged propeller
or spinner
Replace propeller or spinner
Imbalanced
propeller
Balance the propeller. For more information, view John
Redman’s propeller balancing video at
www.horizonhobby.com
Motor vibration
Replace parts or correctly align all parts and tighten
fasteners as needed
Loose receiver Align and secure receiver in fuselage
Loose aircraft
controls
Tighten or otherwise secure parts (servo, arm, linkage,
horn and control surface)
Worn parts
Replace worn parts (especially propeller, spinner or
servo)
Irregular servo
movement
Replace servo
Inconsistent flight
performance
Trim is not at
neutral
If you adjust trim more than 8 clicks, adjust the clevis to
remove trim
Sub-Trim is not at
neutral
No Sub-Trim is allowed. Adjust the servo linkage
Aircraft was not
kept immobile for 5
seconds after
battery connection
With the throttle stick in lowest position. Disconnect
battery, then reconnect battery and keep the aircraft still
for 5 seconds
Incorrect
response to the
AS3X Control
Direction Test
Incorrect direction
settings in the
receiver, which can
cause a crash
DO NOT fly. Correct the direction settings (refer to the
receiver manual), then fly
Troubleshooting Guide