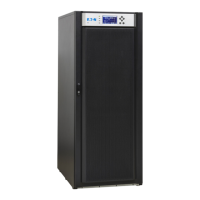
42 Eaton 93E UPS (20–30 kVA, 208/220V) Installation and Operation Manual 164000301—Rev 04
44..1111..22 GGeenneerraattoorr IInntteerrffaaccee CCoonnnneeccttiioonnss
If High-Efficiency (HE) mode is enabled and the UPS will be fed by a site generator at any time, an On
Generator building alarm must be wired and configured to a Building Alarm Input. Wiring the On Generator
sensing circuit to a building alarm allows the UPS to optimize its operation with the generator by transferring
the UPS from HE mode to Standard Normal (double conversion) mode.
NOTE 1 A UPS building alarm input is used to indicate On Generator.
NOTE 2 Any pair of unused building alarm terminals may be used for On Generator connections.
NOTE 3 Program the building alarm to read On Generator and for either Normally Open (default)
or Normally Closed as required by the generator sensing output.
NOTE 4 If installing interface wiring connections between standalone cabinets, conduit must be
installed between cabinets.
NOTE 5 Disconnect terminal block plugs from terminal blocks to wire plugs.
To Install wiring:
1. Verify the UPS system is turned off and all power sources are removed. See
Chapter 7 UPS Operating Instructions for shutdown instructions.
2. If not already opened, open the front door by lifting the latch from the bottom and turning to the right
(counterclockwise) and swing the door open.
3. Route the wiring to the terminal block:
a. If not already removed, remove the power terminal cover right and left sides (see Figure 15). Retain
the cover top and hardware for later use.
b. If not already removed, remove the power terminal cover top. Retain the cover top and hardware for
later use.
NOTE The lower fan is attached to the top rear panel.
c. Remove the screws securing the top rear panel (see Figure 16). Supporting the panel, tilt the panel
away from the cabinet and disconnect the fan connector from the wiring harness.
d. Remove the panel. Retain the panel and hardware for later use.
e. Remove the interface terminal cover (see Figure 19). Retain the cover and hardware for later use.
NOTE Conduit and wiring enter from the bottom of the conduit landing plate.
f. Punch or drill a hole in the power terminal cover base (see Figure 11, Figure 12, and Figure 20) for the
interface wiring conduit.
g. Route the wiring along the interface wiring channel (see Figure 20) to the wiring access (see
Figure 21). Secure the wiring to the four mounting clips provided using Zip ties.
h. Supporting the top rear panel at the back of the cabinet, reconnect the fan connector to the wiring
harness.
i. Reinstall the top rear panel by tilting into position and securing the panel using the retained hardware.
j. Reinstall the power terminal cover top using the retained hardware.
k. Install the power terminal cover right and left sides using the provided hardware.
4. Connect the building alarm interface wiring as shown in Table 11 and Figure 18.
UPS System Installation

 Loading...