EasyManuals Logo

Eaton i-on16 Installation Guide

Eaton i-on16
28 pages
To Next Page IconTo Next Page
To Previous Page IconTo Previous Page
Page #8 background imageLoading...
Page #8 background image
Before You Begin i-on16
Page 4
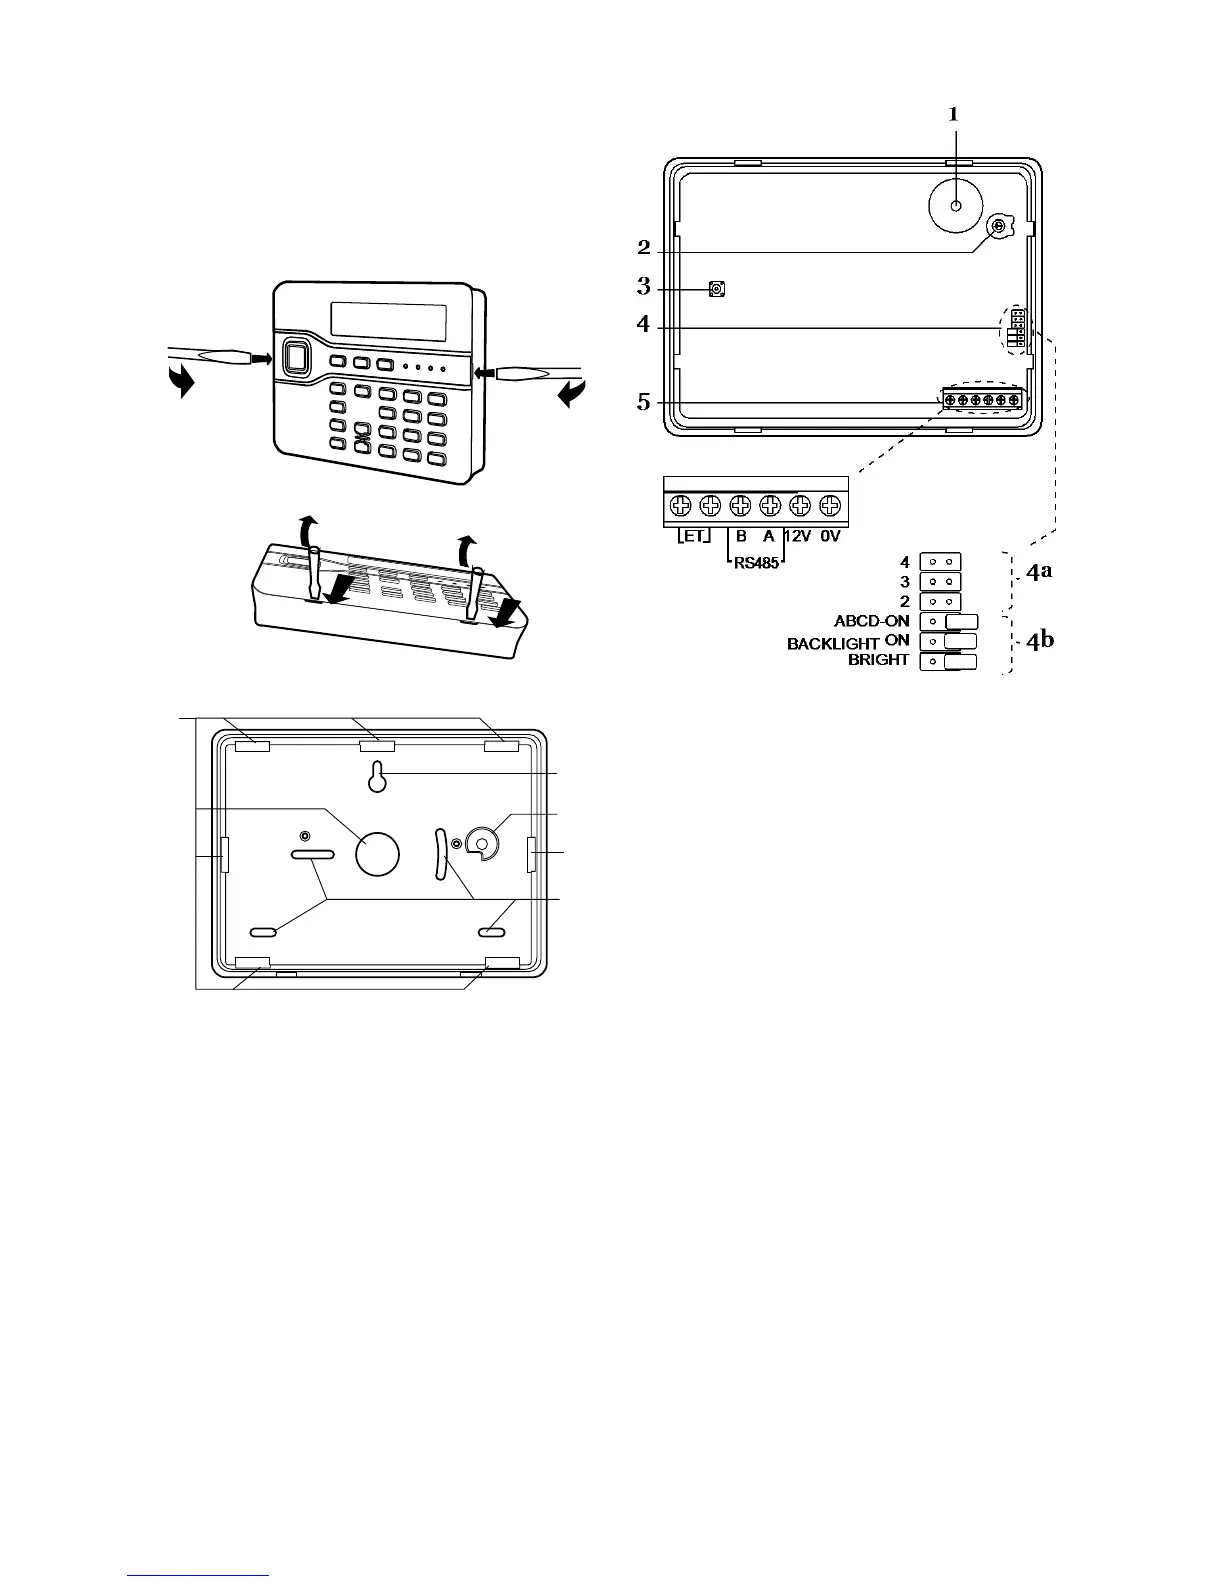
Opening the i-kp01 Keypad
Note: For EN50131-3:2009, 8.7 the keypad is a
type B ACE, fixed.
To open the keypad first gently prise off the trim on
the front and remove the two screws. Next, carefully
lever the front of the keypad (containing the PCB
and display) away from the keypad rear housing.
Figure
5.
Opening the Keypad
1. Central keyhole.
2. Rear tamper shroud.
3. Cable entry.
4. Fixing holes.
Figure
6.
Keypad Rear Housing
1. Sounder.
2. Sounder volume control.
3. Tamper switch.
4. a) Address Jumpers
b) Jumpers for LED function:
5. RS485 termination jumper
6. Connector for control unit.
Figure
7.
Keypad PCB
1
2
3
4
2
4
3
3
1

Table of Contents

Other manuals for Eaton i-on16

Questions and Answers:

Question and Answer IconNeed help?

Do you have a question about the Eaton i-on16 and is the answer not in the manual?

Eaton i-on16 Specifications

General IconGeneral
BrandEaton
Modeli-on16
CategorySecurity System
LanguageEnglish

Related product manuals