6.1 Finishing Techniques.
6.1.1 Useful Tools/Equipment.
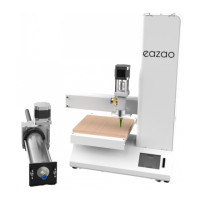
FINISHING
Motor Connectors
Loose motor connections could cause a 3D print to fail. It's a good habit to routinely
check for any damage to the connectors or the black cables.
Axis Lubrication
Regular lubrication of the X, Y and Z Axis rods is important for the longevity and
smooth running of your printer. The rods can be lubricated with machine oil or synthetic
grease. We recommend using bearing grease and to apply liberally to both the Y Axis
and Z Axis rods.
Nuts and Bolts
Loose nuts and bolts could affect the geometry of the Eazao Zero. Check that all nuts
and bolts remain firmly tightened. If required, retighten using the hex wrench.
5.1.5 Routine Component Check.
2.
PrePutter
-Electric putter pre-extrusion function
When you need to start printing, but the tube and extruder do not have clay yet, you
need to use the electric push rod pre-extrusion function.
① . To select the stroke, click the button "10-200-2000" to make the pointer stay at the
2000 level.
② . To select the working mode, click the button "PrePutter" to make the electric putter
in the pre-extrusion mode.
③ . Direction selection, click the button "In" to push the electric putter forward and
push the clay into the tube and extruder.
④ . When the extruder has extruded the clay smoothly, just click the button "Shut
down", and the electric putter will stop feeding immediately.
3.
PrintPutter
-Normal printing function of electric putter
When you are ready to start printing and you want to confirm whether the amount of
clay extruded by the extruder is appropriate, the normal printing function of the electric
putter is used.
① . To select the stroke, click the button "10-200-2000" to make the pointer stay in the
appropriate gear (take 200 as an example below).
② . To select the working mode, click the button "PrintPutter" to make the electric push
rod in the normal printing mode.
③ . Direction selection, click the button "In" once to make the electric putter advance
200 strokes, and the extruder also normally extrudes the clay.
④ . When the amount of clay extruded by the extruder is appropriate, you can click the
button "Shut down" to stop the electric putter and extruder from extruding the clay.
Note:
PrintPutter
-This step needs to ensure that each adjustment of the electric putter
must be carried out and cannot be omitted, otherwise it will cause printing failure.
32