EC-PM-80320 Service Manual
- 17 -
Chapter 5 Printer Installation and Removing
5.1 Removing the Enclosure
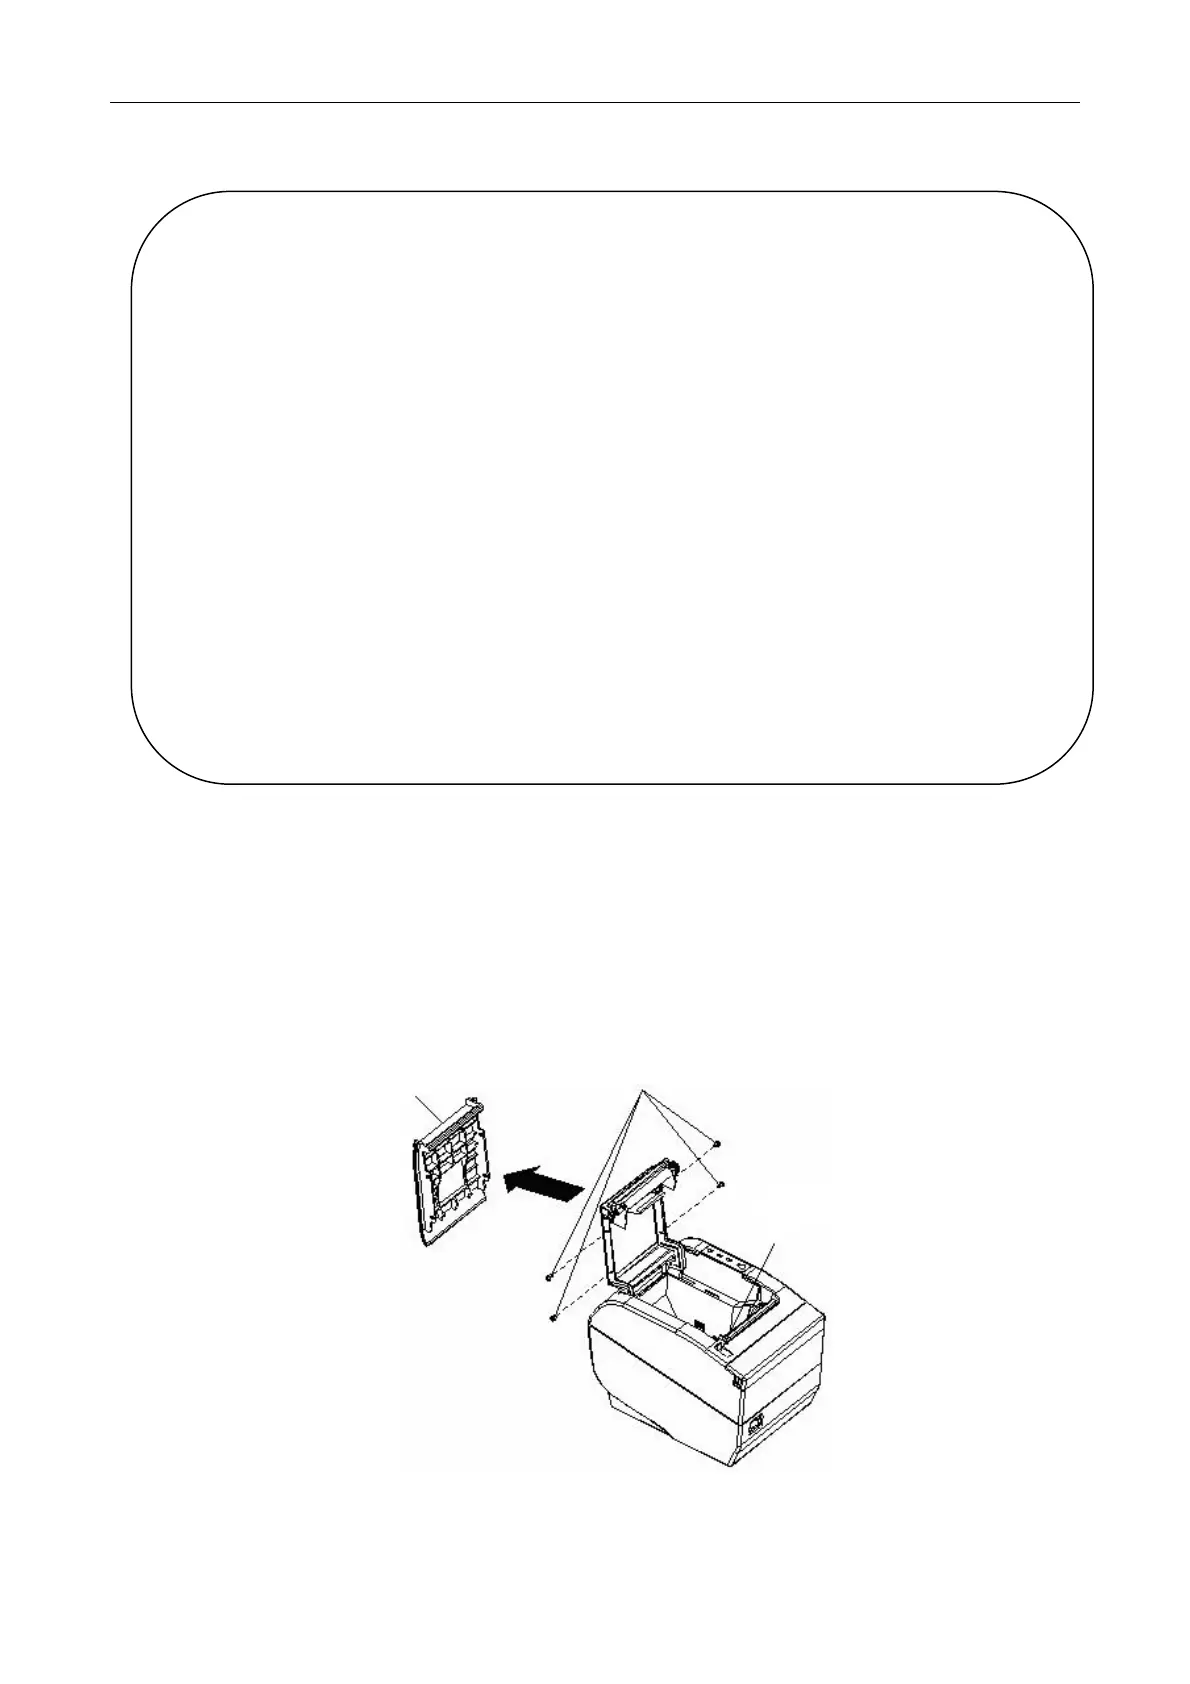
5.1.1 Removing the Upper Cover
Step1. Pull the cover-open button, open the upper cover.
Step2. Loosen the four screws PM3*5*7 in the upper cover sideward.
Step3. Take down the upper cover.
Figure 5-1
r
w PM
*
*7
Upper cover
Cover-open Button
Warning: 1. Before installing/removing or adjusting the printer, you should unplug the
power cord from the electrical outlet.
2. Be careful of the cutter because of its sharpness.
3. Thermal head is a sensitive part, therefore, please don’t touch the thermal
head with your hand or other hard thing at any time.
4. Do not installing/removing or adjusting the printer if there is no functional
error. Especially to keep in mind is that only when necessary could you
loosen the screws in the relative parts.
5. During maintenance or printing, do not put any matter on the printer cover or
place the printer slantingly.
6. In the period of installing and removing, you should be careful not to drop
any screws or components in the printer or loosen any components.
7. Do not use gloves when removing PCB, because these things would
produce static easily and static would damage IC (such as CPU, RAM and
ROM). Therefore, do not touch lead-wires or pins.
8. Do not put the PCB directly on the printer or on the ground.
9. You should check whether the printer cable is damaged when installing or
removing the printer. Do not press the printer cable too tightly, or else, it may
be damaged.
 Loading...