EasyManua.ls Logo

Eizo FlexScan EV3895 - User Manual

Eizo FlexScan EV3895
49 pages
Print Icon
To Next Page IconTo Next Page
Loading...
Important
Please read this “Users Manual, and “PRECAUTIONS” (separate
volume) carefully to familiarize yourself with safe and e󰀨ective
usage.
Refer to the “Setup Guide” for information on the installation /
connection of the monitor.
For the latest product information including the “User’s Manual”,
refer to our web site :
www.eizoglobal.com
Color LCD Monitor
Users Manual

Table of Contents

Questions and Answers

  • A
    Ashley ChristianAug 22, 2025
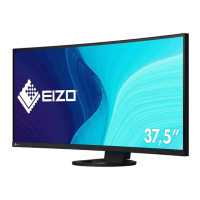
    What to do if I can't access the Setting menu on my Eizo FlexScan EV3895?
    • M
      Marcus RussellAug 23, 2025
      If the Setting menu does not appear on your Eizo monitor, check whether the switch operation lock function is active.
  • B
    Bradley PetersonSep 6, 2025
    How to fix shifted windows and icons on Eizo monitor?
    • K
      Kelsey OwensSep 6, 2025
      If the positions of windows and icons are shifted when your Eizo monitor is turned off/on or restored from power saving mode, turn the setting “On” for “Compatibility Mode” on the “Administrator Settings” menu.
  • M
    Michael BrennanSep 4, 2025
    Why does my Eizo FlexScan EV3895 Monitor have noise on the screen?
    • Z
      Zachary VangSep 4, 2025
      If noise appears on the screen of your Eizo monitor, set “Overdrive” to “Off” in the Setting menu. Note that when inputting HDCP system signals, normal images may not be displayed immediately. When inputting an HDMI signal, try changing “Signal Format” in the “Administrator Settings” menu.
  • B
    banksjamieSep 3, 2025
    What to do if there are afterimages on my Eizo FlexScan EV3895 Monitor?
    • C
      Carlos BatesSep 3, 2025
      Afterimages are particular to LCD monitors. To minimize afterimages on your Eizo monitor, avoid displaying the same image for a long time. Use the screen saver or power saving function. To remove such a phenomenon, change the image or keep the power turned off for several hours.
  • C
    Christopher MaysSep 1, 2025
    Why is the text blurred on my Eizo FlexScan EV3895?
    • H
      Holly FlemingSep 1, 2025
      If the text appears blurred on your Eizo monitor, check that your PC is configured to meet the resolution and vertical scan frequency requirements of the monitor. Also, try setting the magnification of display on the OS to “100%.” When using multiple monitors, try setting the magnification of display to “100%” on all monitors.
  • M
    Mark WiseAug 31, 2025
    What does it mean if the power indicator on my Eizo FlexScan EV3895 is flashing orange and white?
    • R
      Raymond MartinezAug 31, 2025
      If the power indicator on your Eizo monitor is flashing orange and white, this may occur when the PC is connected to the DisplayPort connector. Use a signal cable recommended by us for the connection. Also, check the connection and condition of the USB devices connected to the monitor. You can also try turning off the main power switch on the rear side of the monitor, and then turning it on again.
  • P
    Patrick MillerAug 27, 2025
    How do I stop the brightness from changing automatically on my Eizo monitor?
    • J
      Jonathan BuckAug 27, 2025
      To stop the brightness from automatically changing on your Eizo monitor, try setting the Auto EcoView setting to “Off.”
  • C
    Cassandra MannAug 26, 2025
    How to fix Eizo monitor screen being too bright or dark?
    • M
      Molly BooneAug 26, 2025
      To adjust the screen brightness on your Eizo monitor, use the “Brightness” or “Contrast” settings in the Setting menu. If the screen is too bright, you can also try turning the Auto EcoView setting to “On”.
  • E
    Elizabeth GoldenAug 25, 2025
    What to do if the Eizo FlexScan EV3895 shows no picture and the power indicator is off?
    • W
      williamstoddAug 25, 2025
      If your Eizo monitor displays no picture and the power indicator doesn't light up, try the following: * Ensure the power cord is properly connected. * Turn on the main power switch located on the rear side of the monitor. * Turn off the main power switch, wait a few minutes, and then turn it back on. * Increase the “Brightness”, “Contrast”, or “Gain” in the Setting menu. * Switch the input signal. * Turn “On” the “Compatibility Mode” in the “Administrator Settings” menu. * Move the mouse or press any key on the keyboard. * Verify that the PC is turned on. * Turn off the main power switch and then turn it on again. * If connected via DisplayPort, use a recommended signal cable. * Check the connection and condition of USB devices connected to the monitor.

Summary

Caution Statements

Location of Caution Statement

Diagram and explanation of warning symbols and their meanings.

Product Information

Usage Guidelines

Information on appropriate usage scenarios, safety measures, and limitations of the monitor.

LCD Panel Characteristics

Details about the LCD panel, including stabilization time, afterimages, and pixel characteristics.

Setup and Maintenance

Installation and Maintenance

Guidance on monitor setup, including installation, cleaning, and general maintenance procedures.

Comfortable Viewing Tips

Recommendations for optimal viewing comfort and eye strain reduction.

Chapter 1 Introduction

1-1. Features

Overview of key features including curved display, free layout, and docking capabilities.

1-2. Controls and Functions

Detailed explanation of front and rear monitor controls and their functions.

1-3. Supported Resolutions

List of supported resolutions for DisplayPort, HDMI, and USB-C connections.

1-4. Changing Computer Display Settings

Instructions for adjusting display settings in Windows and macOS for proper image display.

Chapter 2 Basic Adjustment and Setting

2-1. Switch Operation Method

Guide on how to navigate and operate the monitor's switches and menus.

2-2. Switching Input Signals

Procedure for selecting and switching between different input sources.

2-3. Switching Display Modes (Color Modes)

Explanation of pre-installed color modes for various display purposes.

2-4. Adjusting Brightness

How to adjust the screen brightness to suit your environment and preferences.

2-5. Adjusting Volume

Instructions for setting speaker and headphone volume levels.

Chapter 3 Advanced Adjustment and Setting

3-1. Basic Operation of the Setting Menu

Basic steps for accessing and navigating the monitor's advanced setting menus.

3-2. Setting Menu Functions

Detailed functions available in the setting menu, including color, signal, and preference adjustments.

Signal Settings

Configuration options for input signals, screen size, and color format.

Preference Settings

Customizing monitor settings like power saving and indicator behavior.

EcoView Settings

Features for energy conservation, including automatic brightness adjustment.

Language and Information

Setting display language and viewing monitor information.

Chapter 4 Connecting Multiple PCs

4-1. Connecting Multiple PCs

Instructions on connecting the monitor to multiple computers simultaneously.

4-2. Using PbyP Display

Guide to displaying multiple input signals side-by-side on the screen.

4-3. Linking Input Signal and USB Port

Enabling USB device sharing across multiple connected PCs.

Switching USB Ports

Methods for switching between USB upstream ports for connected devices.

Chapter 5 Administrator Settings

5-1. Basic Operation of Administrator Settings

How to access and navigate the Administrator Settings menu for advanced configuration.

5-2. Administrator Settings Functions

Detailed functions including Auto Input Detection, Compatibility Mode, and USB/Ethernet settings.

Chapter 6 Troubleshooting

6-1. No Picture Issues

Solutions for problems related to the monitor not displaying an image or power indicator status.

6-2. Imaging Problems

Troubleshooting steps for screen brightness, color, text blur, and afterimages.

6-3. Other Common Problems

Resolving issues with menus, audio, USB devices, and computer sleep mode.

Chapter 7 Attaching and Removing the Stand

7-1. Removing the Monitor Stand

Step-by-step guide on how to safely detach the monitor's original stand.

7-2. Attaching an Optional Arm

Instructions for mounting the monitor to an external arm or stand using VESA standards.

7-3. Attaching the Original Stand

Procedure for reattaching the monitor's original stand after removal.

Chapter 8 Reference

8-1. Docking Station Functionality

How to use the monitor as a docking station for network and peripheral connectivity.

8-2. Product Specifications

Detailed technical specifications of the LCD panel, video signals, USB, audio, and power.

Appendix

Trademarks and Licenses

List of registered trademarks and software licenses associated with the product.

Eizo FlexScan EV3895 Specifications

General IconGeneral
Energy efficiency scaleA to G

Related product manuals